


-22-
G0644 15" Open-End Wide Belt Sander
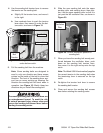
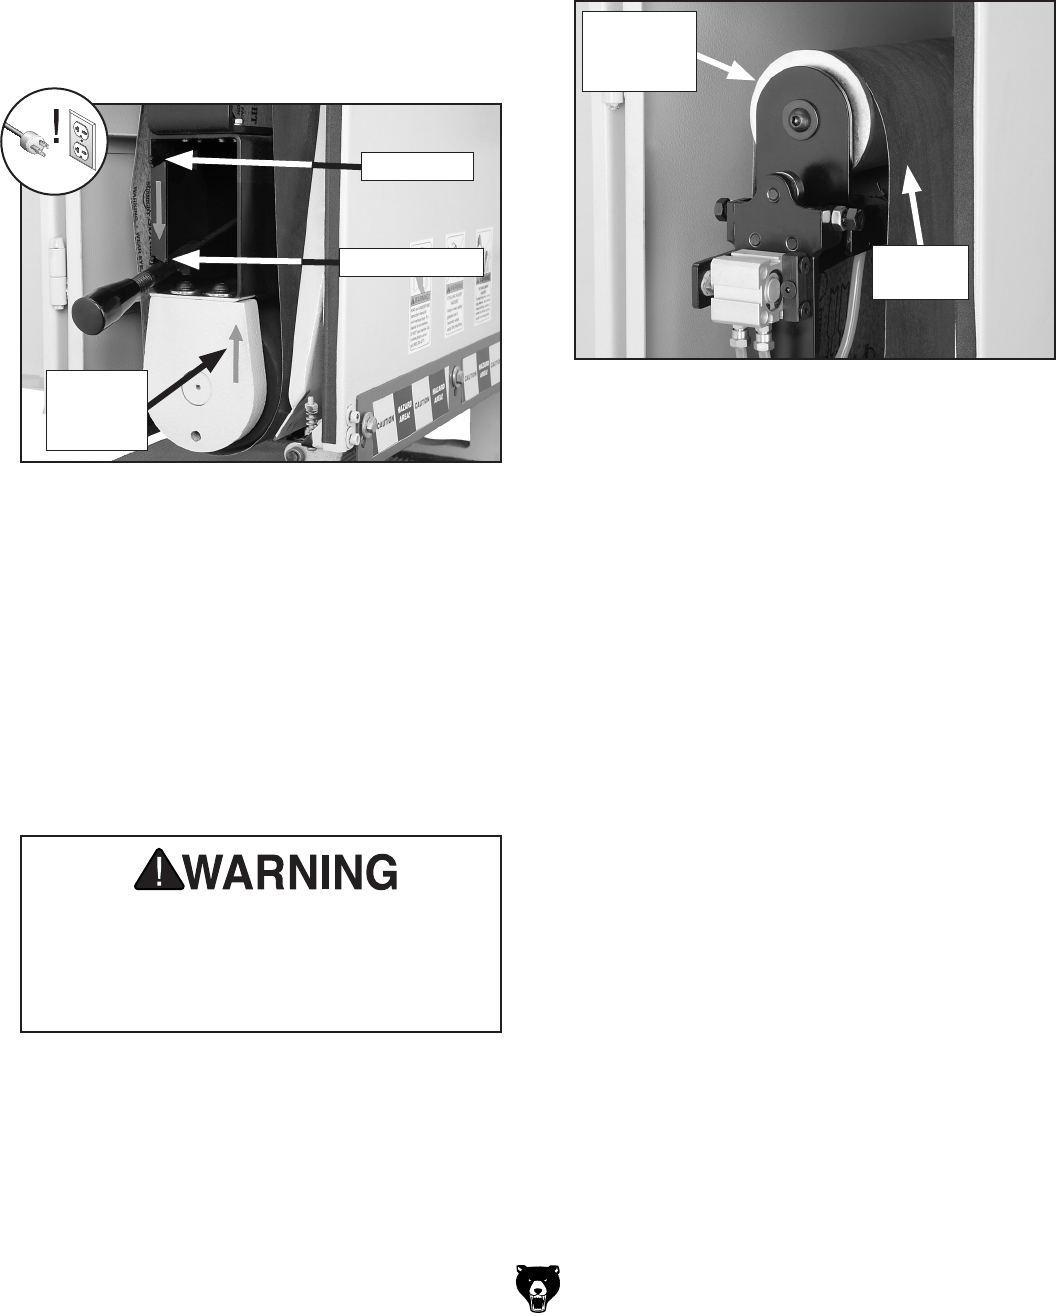
4. Use the sanding belt tension lever to remove
the tension on the sanding belt.
a. Slightly lift the tension lever, and move it
to the right.
b. Use moderate force to push the tension
lever down, then secure it under the bot
-
tom catch, as shown in
Figure 19.
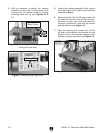
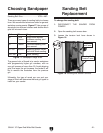
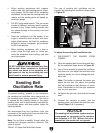
Figure 20. Correct installation position of
sanding belt.
Sanding
Belt
Left
Oscillation
Disc
5. Pull the sanding belt from the machine.
Note: Some sanding belts are designed to
sand in only one direction and have arrows
printed on the inside of the belt to show that
direction. The front of the sanding drum sup
-
port has an arrow pointing up showing the
direction the sanding belt will travel when in
operation (see
Figure 19). Match these two
directions as you install the sanding belt.
6. Slide the new sanding belt onto the upper
sanding roller and sanding drum, then posi
-
tion it on the upper sanding roller so that it is
just past the left oscillation disc, as shown in
Figure 20.
7. When you have the sanding belt evenly posi-
tioned between the oscillation discs, push
down on the sanding belt tension lever,
then move it to the right and up onto the top
catch.
Note: The Model G0644 automatically applies
the correct tension to the sanding belt when
the tensioning lever is secured on the top
catch.
8. Re-tighten the tension lock lever to secure
the sanding belt tension.
9. Close and secure the sanding belt access
door before starting the sanding motor.
The moving sanding belt and roller/drum are
an entanglement hazard. To avoid the risk
of serious personal injury, always close and
secure the sanding belt access door before
starting the sanding motor.
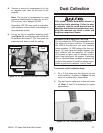
Figure 19. Sanding belt tension lever secured
under bottom catch.
Sanding
Belt
Direction
Bottom Catch
Top Catch