


-24-
G0644 15" Open-End Wide Belt Sander
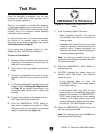
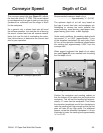
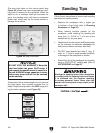
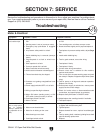
Figure 23. Amp load meter.
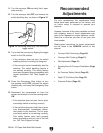
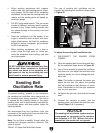
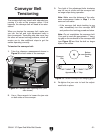
Figure 24. Amp load chart.
Always start with a shallow depth of cut to remove
any high spots, then carefully increase the cut
depth. Keep the amp load in the SAFE range dur
-
ing the entire operation (see Figure 24).
NOTICE
DO NOT VOID THE WARRANTY! Keep the
amp load within the green SAFE range. If
you operate the sander above 14 amps or
in
the red
WARNING range, capacitor or motor
failure may occur and will not be covered
under warranty.
Sanding Tips
Follow these instructions to ensure safe sanding
operation and quality results:
• Replace the sandpaper with a higher grit
to achieve a finer finish (refer to
Choosing
Sandpaper on Page 20).
• When making multiple passes on the
workpiece, avoid lowering the sanding belt
more than
1
⁄64" (0.016" or
2
⁄3 of a turn of the
handwheel) for any one pass
.
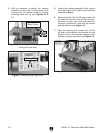
• Feed boards into the sander at different points
on the conveyor to maximize sandpaper life
and prevent uneven conveyor belt wear.
• DO NOT sand boards less than 6" long, 2"
wide, or
1
⁄4" thick to avoid possible kickback,
or damage to the workpiece or sander.
• Extend the life of the sandpaper by regularly
using a PRO-STICK
©
sanding pad (refer to
ACCESSORIES on Page 25).
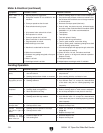
Starting the sanding motor with a workpiece
in contact with the sanding belt could cause
it to kickback into the operator resulting
in serious personal injury. Never start the
sander with a workpiece or any object on the
conveyor belt.
The amp load meter on the control panel (see
Figure 23) shows how much amperage the sand
-
ing motor is drawing for the operation. When the
depth of cut or conveyor feed rate becomes too
great, the sanding motor will draw an excessive
power load, which may trip the circuit breaker or
damage the machine.