


Maintenance
5-2 P/N 8040540
C
HELIX TECHNOLOGY CORPORATION
-
TI C
RY
OG
EN
ICS
Adsorber Replacement
Use the following procedure to change the adsorber every three years.
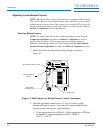
1. Set the System Circuit Breaker, on the rear of the 9600
Compressor, to the OFF position.
2. Remove the 4 screws which secure the rear panel to the Compres-
sor and remove the rear panel.
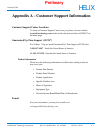
NOTE: Use two wrenches in Step 3 to prevent loosening the body of the
coupling.
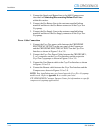
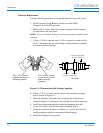
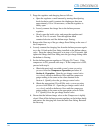
3. Using a 1-3/16 in. wrench, and a 1-1/8 in. wrench, as shown in Fig-
ure 5-1, disconnect the two self sealing coupling connectors quickly
to minimize helium leakage.
Figure 5-1: Disconnecting Self Sealing Couplings
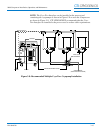
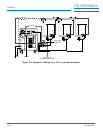
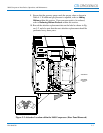
4. Using a 7/16 in. (11mm) wrench, remove the adsorber mounting
bolt as shown in Figure 5-2.
5. Move the adsorber from under the mounting tabs in the base as
shown in Figure 5-2 and remove the adsorber from the Compressor.
6. Install the replacement adsorber under the mounting tabs and
secure it into place with the bolt removed during Step 4.
7. Using two wrenches as shown in Figure 5-1, connect the two self
sealing couplings quickly to minimize helium leakage.
8. Install the Compressor rear panel.
This 1 3/16 in. wrench
is used to turn the self
sealing coupling
connector.
This 1 1/8 in. wrench
holds the coupling in a
stationary position.
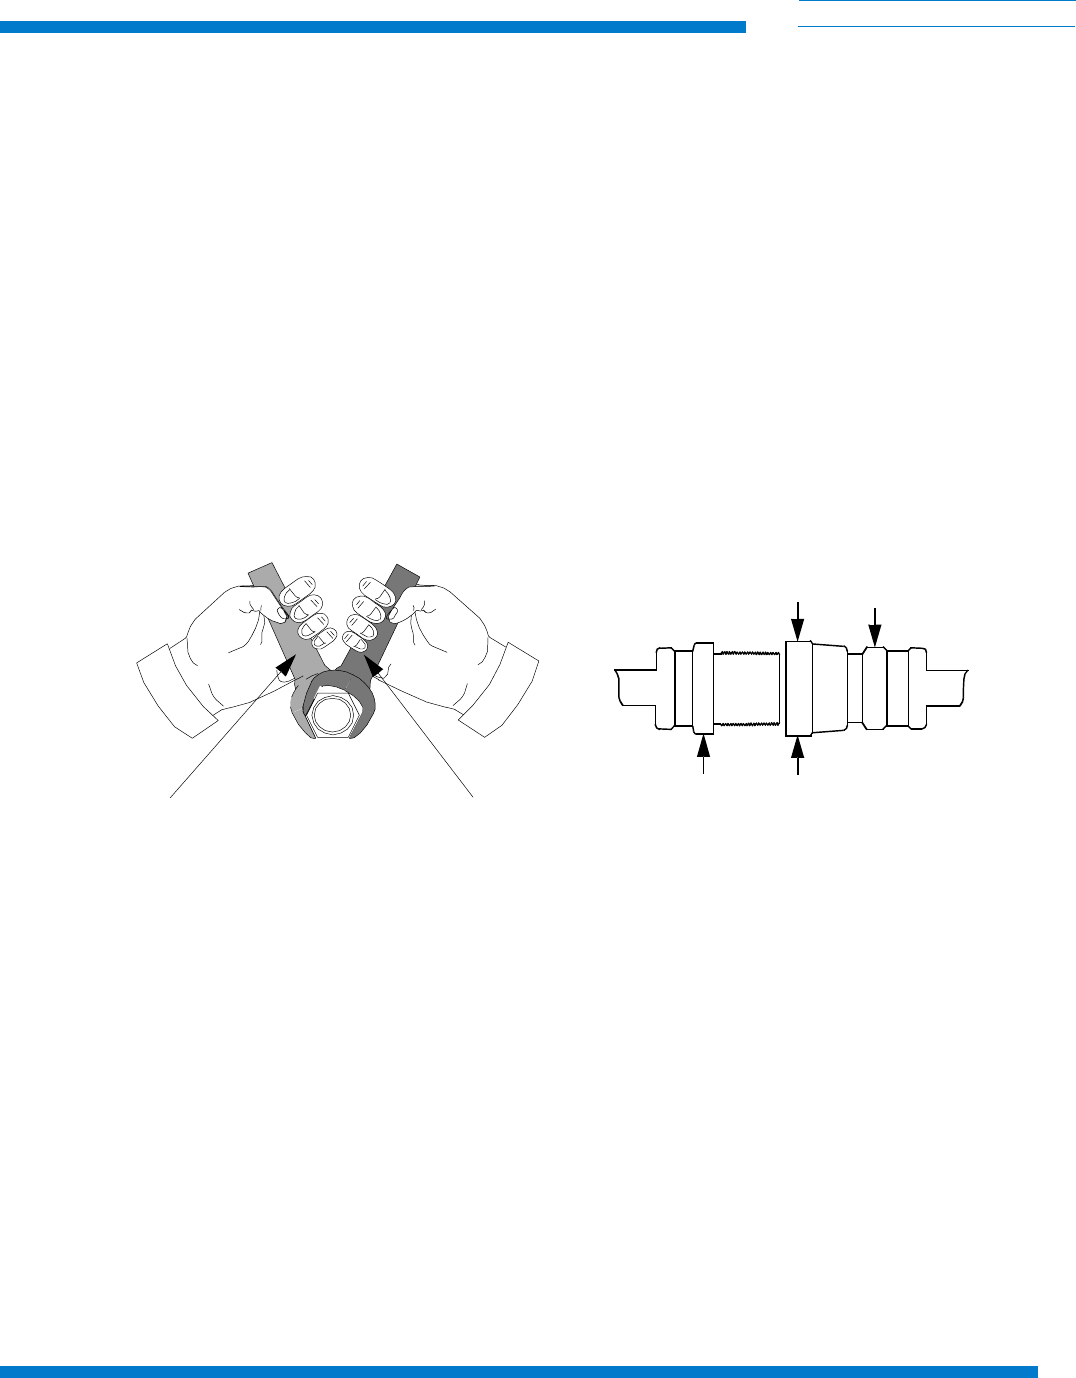
Side View
To Tighten Coupling Halves
Hold Here
Turn Here
Hold Here
Turn Here
To Loosen Coupling Halves