Maintenance
5-6 P/N 8040540
C
HELIX TECHNOLOGY CORPORATION
-
TI C
RY
OG
EN
ICS
2. Purge the regulator and charging lines as follows:
a. Open the regulator a small amount by turning the adjusting
knob clockwise until it contacts the diaphragm, then turn
approximately 1/8 to 1/4 turn more, so that the regulator is
barely open.
b. Loosely connect the charge line to the helium pressure
regulator.
c. Slowly open the bottle valve, and purge the regulator and
line for 10 to 15 seconds. Turn the regulator knob
counterclockwise until the helium stops flowing.
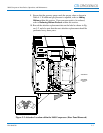
3. Remove the flare cap of the gas charge flared fitting on the rear of
the Compressor.
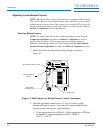
4. Loosely connect the charging line from the helium pressure regula-
tor to the 1/4-inch male flare fitting installed on the helium charge
valve. Purge the charge line again, as in step a, for 30 seconds, and
tighten the charge line flare fitting onto the gas charge fitting while
the helium is flowing.
5. Set the helium pressure regulator to 300 psig (20.7 bars). If the
compressor is ON, proceed with step a. If the compressor is OFF,
proceed with step b.
a. Obtain the previously recorded normal system operating
pressure from the Compressor Operation procedure in
Section 4 - Operation. Open the gas charge control valve
very slowly and allow helium to flow until the compressor
gauge reading is the same as the value obtained from
Section 4. Quickly close the gas charge control valve.
b. Obtain the appropriate (50 or 60 Hz) static system operating
pressure from Table 4-1. Open the gas charge control valve
very slowly and allow helium to flow until the compressor
gauge reading is the same as the appropriate value in Table
4-1. Quickly close the gas charge control valve.
6. Ensure that the helium charge valve on the Compressor is tightly
closed. Shut off the helium pressure regulator on the helium bottle
and remove the charging line from the male flare fitting. Reinstall
the flare cap.


