


11
If the jointer is to be hard-wired, make sure the
fuses have been removed or the breakers have
been tripped in the circuit to which the saw will
be connected. Place a warning placard on the
fuse holder or circuit breaker to prevent it being
turned on while the machine is being wired.
Always follow proper Lock-Out/Tag-Out
procedures when performing any wiring on this
machine.
Voltage Conversion
The Model 1285 Jointer is wired for 1-phase,
230 volt only; or 3-phase, 230/460 volt. The 3-
phase model is pre-wired at the factory for 230
volt. However, if you wish to convert your 3-
phase jointer from 230 volt to 460 volt, proceed
as follows:
1. Disconnect machine from power source.
2. Remove cover from junction box, and open
the side door on the stand.
3. Change the wires in the junction box by
following the diagram on the inside of the
junction box cover, or the diagram found at
the back of this manual.
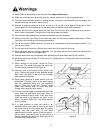
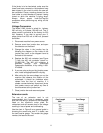
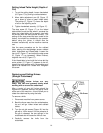
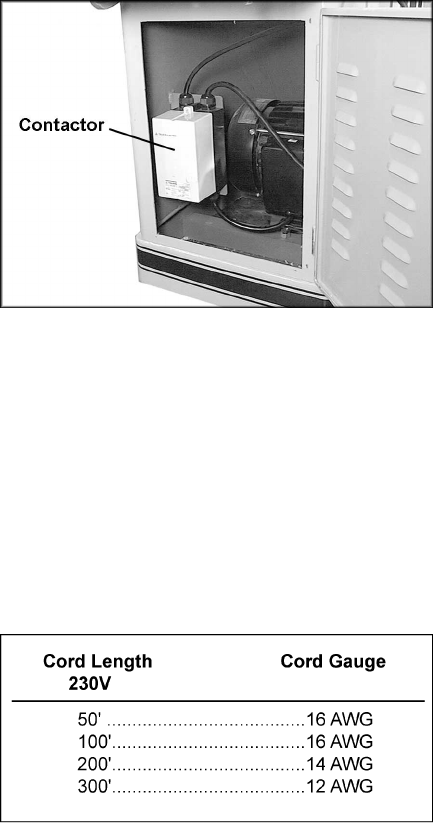
4. Replace the 230 volt contactor (see Figure
7) with the 460 volt contactor (stock no.
PJ1285-109). The 460 volt contactor is
available through your authorized
Powermatic distributor, or by calling 1-800-
274-6848.
5. If you are using a plug on the jointer’s power
cord, install an appropriate 460 volt plug.
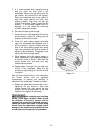
6. After wiring for the new voltage, turn on the
machine and observe the rotation of the
cutterhead; it should be clockwise when
viewed from the front of machine. If it
rotates counterclockwise, disconnect jointer
from power source and switch any two of
the three wires at the junction box.
7. Close junction box and reconnect power.
Extension cords
The use of an extension cord is not
recommended, but if one is necessary make
sure the cord rating is suitable for the amperage
listed on the machine’s motor plate. An
undersized cord will cause a drop in line voltage
resulting in loss of power and overheating.
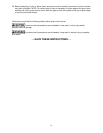
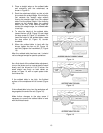
Use the chart in Figure 8 as a general guide in
choosing the correct size cord. If in doubt, use
the next heavier gauge. The smaller the gauge
number, the heavier the cord.
Figure 7
Figure 8