


9
Assembly
Tools need for assembly:
10mm hex wrench (provided)
10-12mm combination wrench (provided)
forklift or hoist with straps
cross-point screwdriver
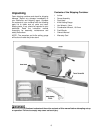
1. Remove top and sides of crate from around
the machine.
2. Remove the dust hood and the fence
assembly from the skid. Reach into the
stand and remove the screws securing the
stand to the skid.
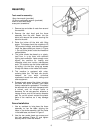
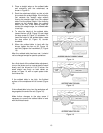
3. Raise the jointer off the skid with lifting
straps. The straps should be suitable to lift
762 pounds of weight, and should be placed
under the base casting as shown in Figure
1. Do not lift the jointer under the infeed and
outfeed tables.
4. The jointer should be placed on a sturdy,
level floor in a dry area, with sufficient
lighting and ventilation. Leave enough room
around the machine for loading and
offloading stock and routine maintenance
work. The machine can be further stabilized
by bolting it to the floor using lag screws
through the holes on the inside of the stand.
5. This machine is equipped with noise-
reducing table lips. The work site should,
however, be one which minimizes
reverberant sound from walls, ceilings and
other equipment.
6. Exposed metal areas of the jointer, including
the table and fence surfaces, have been
factory coated with a protectant. This should
be removed with a soft cloth dampened with
a solvent such as mineral spirits or
kerosene. Do not use gasoline, acetone or
lacquer thinner, and do not use an abrasive
pad. Do not let solvent contact the plastic
parts of the machine, as it may damage
them.
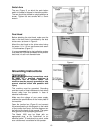
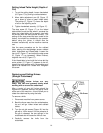
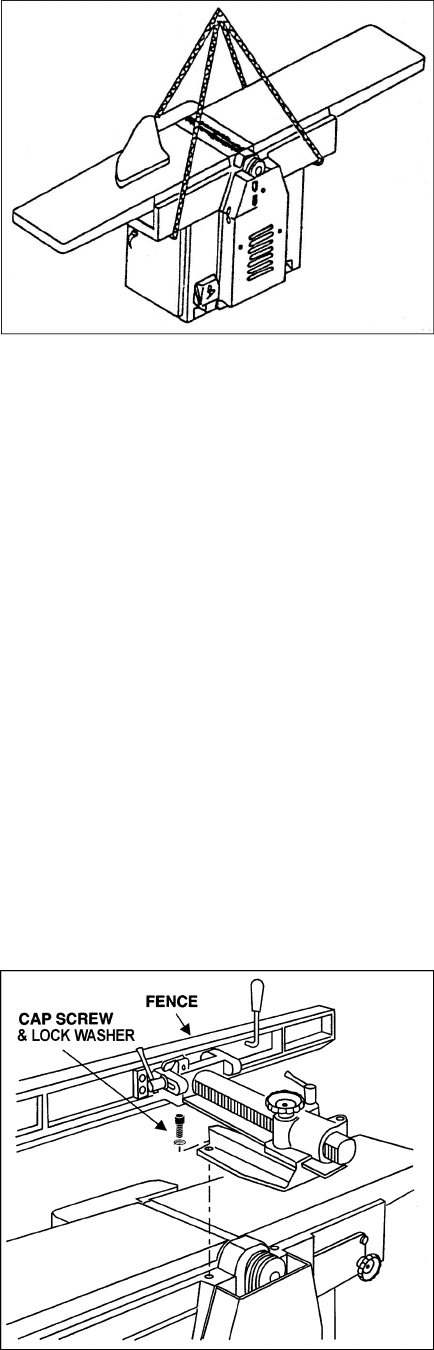
Fence Installation
1. Use an assistant to help place the fence
assembly on top the table, aligning the
holes in the fence assembly with the holes
in the table base, as shown in Figure 2.
2. Use the two socket head cap screws and
two lock washers (Figure 2), and tighten
securely with a 10mm hex wrench.
Figure 1
Figure 2