


17
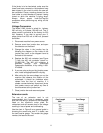
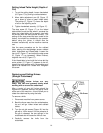
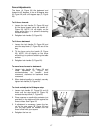
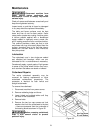
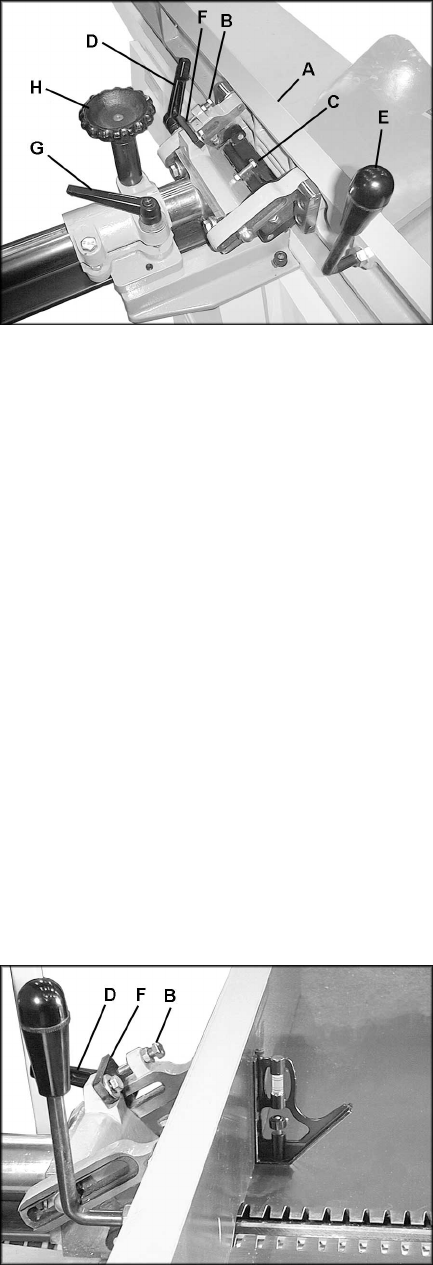
Fence Adjustments
The fence (A, Figure 22) tilts backward and
forward to 45 degrees. It has a 90-degree stop
(B, Figure 22) and a 45-degree stop (C, Figure
22).
To tilt fence forward:
1. Loosen the lock handle (D, Figure 22) and
tilt the fence forward using the handle (E,
Figure 22). NOTE: Lift up slightly on the
fence while tilting it, to prevent scratching
the table surface.
2. Retighten lock handle (D, Figure 22).
To tilt fence backward:
1. Loosen the lock handle (D, Figure 22) and
pivot the stop block (F, Figure 22) out of the
way.
2. Tilt the fence using the handle (E, Figure
22). NOTE: Lift up slightly on the fence
while tilting it to prevent scratching the table
surface.
3. Retighten lock handle (D, Figure 22).
To move fence forward or backward:
1. Loosen lock handle (G, Figure 22) and
rotate handwheel (H, Figure 22);
counterclockwise for forward fence
movement, clockwise for backward fence
movement.
2. When desired position is reached, securely
tighten lock handle (G, Figure 22).
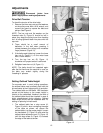
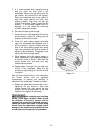
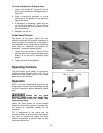
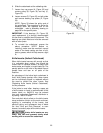
To check and adjust the 90-degree stop:
1. Loosen lock handle (D, Figure 23) and tilt
fence until the stop screw (B, Figure 23)
contacts the stop block (F, Figure 23).
2. Place a square or machinist’s protractor (not
provided) on the table and flush against the
fence surface. See Figure 23.
3. If adjustment is necessary, loosen the hex
nut on the stop screw (B, Figure 23) and
turn the stop screw as needed until the
fence is flush with your square.
4. Retighten the hex nut.
Figure 22
Figure 23