


15
5. It is recommended when replacing knives
that you clean the knife slots in the
cutterhead. Remove the gib along with the
gib screws, and remove the two springs.
Clean the cutterhead slot of any debris or
dust that might prevent the knife from
seating properly. Also clean the gib, gib
screws, and springs. Closely inspect the gib
screws – if the threads appear worn or
stripped, or if the heads are becoming
rounded, replace the screws.
6. Re-insert the springs and the gib.
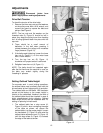
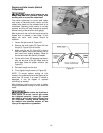
7. Place the new or resharpened knife into the
slot as shown in Figure 18, making sure the
direction of the knife is correct.
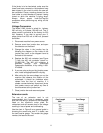
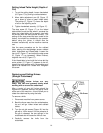
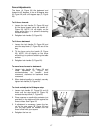
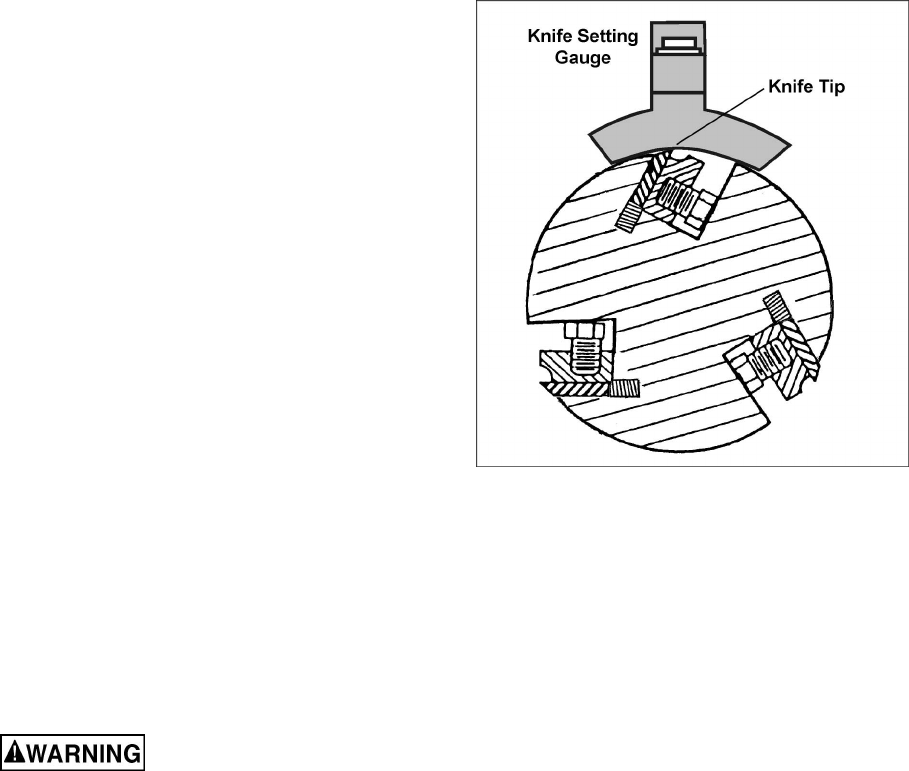
8. Place the knife setting gauge (provided)
upon the cutterhead and centered over a
knife, as shown in Figure 19. Make sure the
feet of the knife setting gauge rest solidly
upon the cutterhead and that its handle is
parallel to the cutterhead. The gauge is now
holding the knife at proper depth.
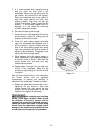
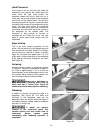
9. While keeping the knife setting gauge in
place, tighten the six gib screws just enough
to hold the knife in position. Start with the
center screws first, and work your way
toward the end screws.
10. Repeat steps 3 through 9 for the other two
knives in the cutterhead. Make the gib
screws just tight enough to hold the knives
in position.
With all three jointer knives in the cutterhead,
the knives should now be tightened
incrementally to prevent any buckling or
distortion of the cutterhead. Proceed as follows:
11. Rotate the cutterhead to each knife in turn,
tightening the gib screws a little more
(center screws first, then toward the end
screws). Do this at least twice; on the final
rotation, firmly tighten all gib screws.
After replacing and checking
knives, check again carefully. Make certain
the direction of knives is correct, and all
eighteen gib screws are tightened securely.
Loose gib screws can result in knives being
thrown from the cutterhead, causing severe
damage to the machine and possible serious
or fatal injury to the operator or bystanders.
Figure 19