


25
ADJUSTMENTS
WARNING:
For your own safety turn switch OFF and remove
plug from power source outlet before making
any adjustments. To reduce the risk of injury
from thrown parts due to spring release, follow
instructions carefully and wear eye goggles.
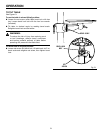
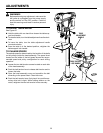
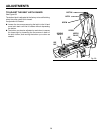
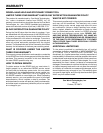
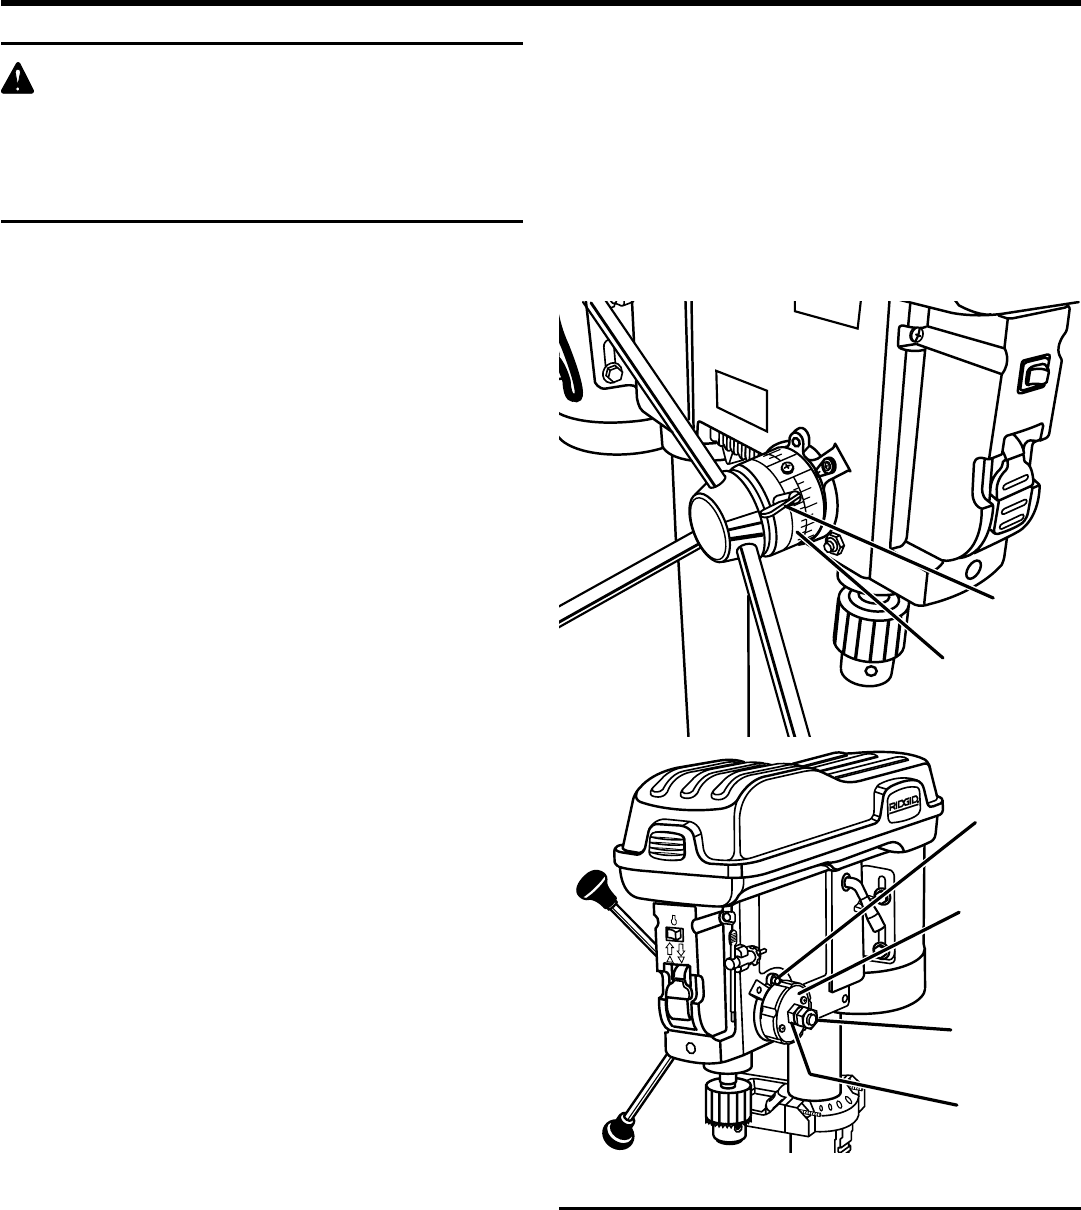
TO ADJUST QUILL RETURN SPRING
See Figure 28.
NOTE: The return spring tension is set at the factory and
should not require further adjustment.
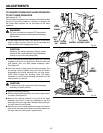
IMPORTANT: If you switched your drill press from right
hand operation to left hand operation, follow the procedure
below to adjust spring tension.
n With the chuck at its highest possible position, turn the
depth scale clockwise until it stops and tighten the depth
scale lock. This will prevent the quill from dropping while
tensioning the spring.
NOTE: For right hand operation (feed handle on right side)
turn the depth scale counterclockwise until it stops and
tighten the depth scale lock.
n Check to make sure spring housing is mounted correctly.
When spring housing is placed on the right side (feed
handles mounted on left side), the housing screws face
out as shown.
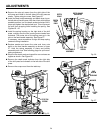
n Lower table for additional clearance.
n Firmly hold the spring assembly against the head
keeping it engaged with the cap screw while loosening
and removing the outer nut only.
n Loosen inner nut (approximately 1/4 in. [6.4 mm]) and
disengage spring housing from the cap screw. Using
both hands turn spring housing clockwise to the next
notch and engage with the cap screw.
NOTE: For right hand operation (feed handle on right side)
turn spring counterclockwise to the next notch and engage
with the cap screw.
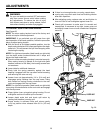
n Finger tighten inner nut against spring housing. Do not
overtighten as this will restrict quill movement.
n Loosen depth scale lock and check quill return by
rotating feed handles, lowering quill.
n Proper tension is achieved when quill returns gently
to full up position when released from 3/4 in. (19 mm)
depth.
n If there is not enough tension on spring, repeat steps
n moving only one notch each time and checking tension
after each repetition.
n After adjusting spring, replace outer nut and tighten to
inner nut. But do not overtighten against inner nut.
n Check quill movement to make sure it is smooth and
unrestricted. If movement is too tight, loosen outer nut
and slightly loosen inner nut until unrestricted. Retighten
outer nut.
Fig. 28
®
DEPTH
SCALE
DEPTH
SCALE
LOCK
SPRING
HOUSING
CAP
SCREW
OUTER NUT
INNER NUT