


24
25
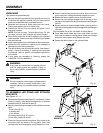
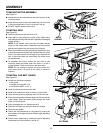
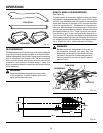
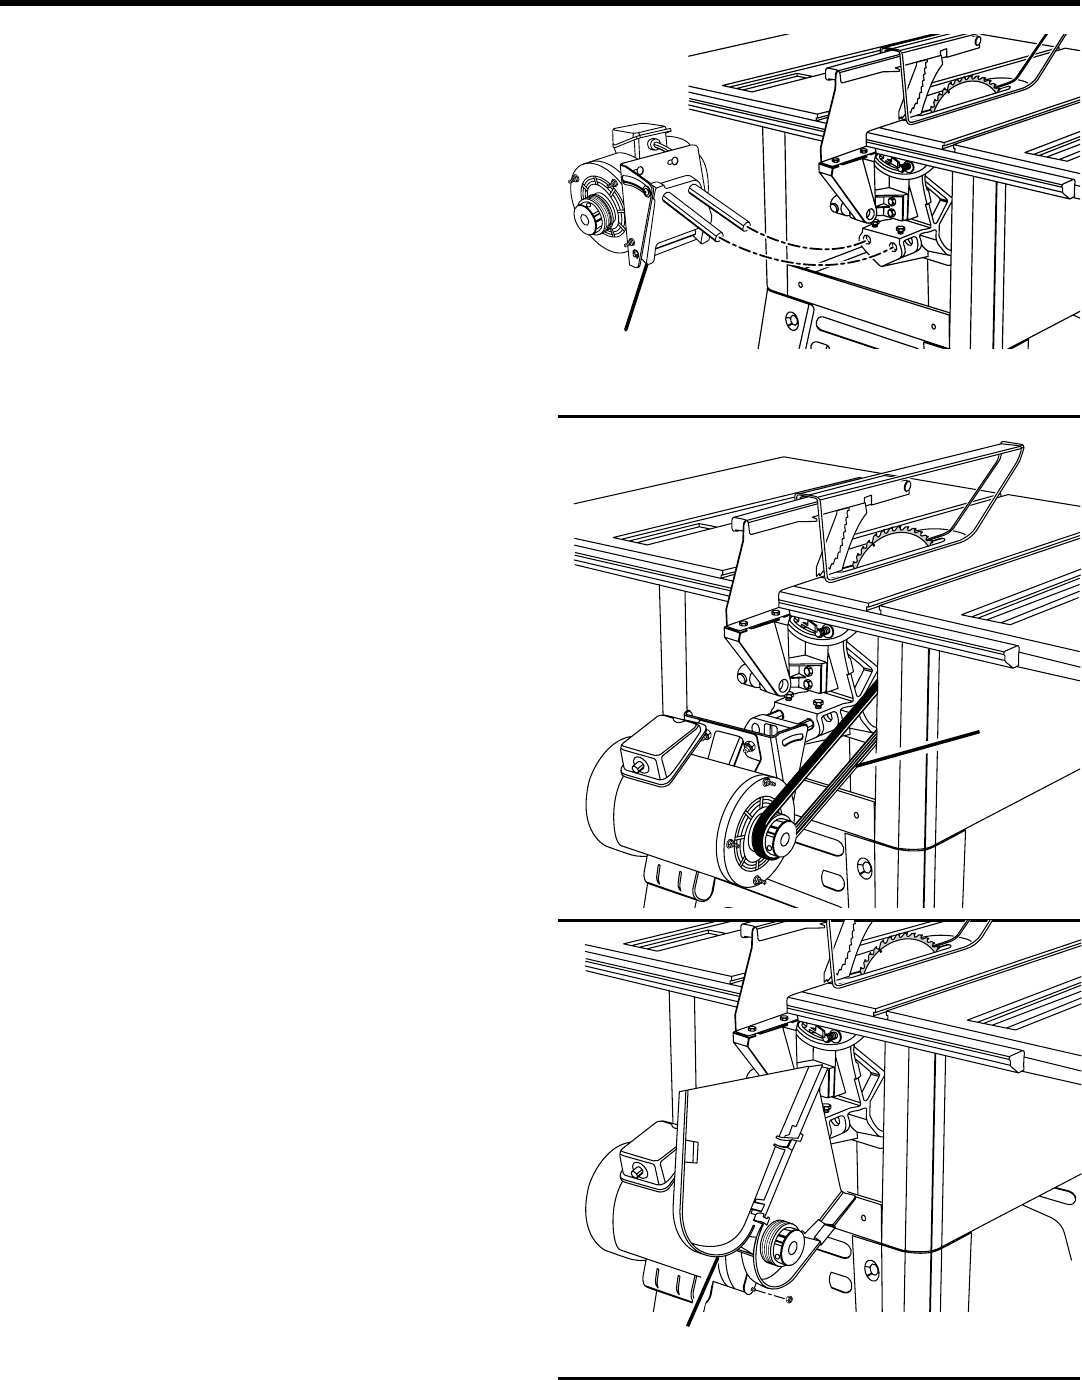
Fig. 31
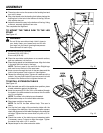
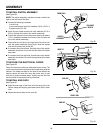
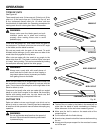
Fig. 32
ASSEMBLY
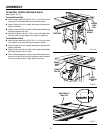
TO MOUNT MOTOR ASSEMBLY
See Figure 31.
n Loosen the two hex head screws that lock the pins in the
mounting brace.
n Insert the two pins on the motor assembly into the holes
in the mounting brace. Push in as far as it will go.
n DO NOT tighten screws at this time.
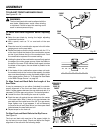
TO INSTALL BELT
See Figure 32.
n Lower the blade and set the bevel to 0˚.
n Place belt on saw pulley and motor pulley. Sight along
both pulleys checking that the belt is parallel to the edges
of both pulleys.
NOTE: If not parallel, use a hex key to loosen the set
screw on the motor pulley. Reposition the motor pulley
and securely tighten the set screw when finished.
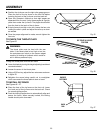
n Place your hand around the belt halfway between the two
pulleys and squeeze the belt until the two sides of the belt
touch. The motor should move freely as you squeeze the
belt. If the motor does not move freely, the motor must
be repositioned.
n To reposition the motor, loosen the hex nuts on the
mounting brace and either push the motor in or pull it
out as needed. Check at maximum elevation also.
NOTE: Do not attempt to tighten the pivot screw as it
must move freely in the slot as the blade is raised or
lowered.
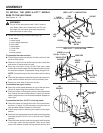
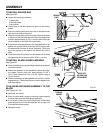
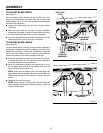
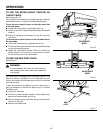
TO INSTALL THE BELT GUARD
See Figure 33.
n Locate the following hardware:
1 belt guard
4 flanged hex nuts (M5 x .8)
4 flat washers (M5.3 x 12 x 1)
n Lower the blade and remove the belt.
n Install a flat washer on each of the four motor studs.
n Open the belt guard by pushing down on the tab lock.
n Place the belt guard so that the large hole fits around the
motor pulley. Insert the motor studs through the small
holes of the belt guard.
n Using a flanged hex nut, tighten securely.
n Place the belt back on the motor and saw pulleys.
n Close the belt guard.
n Check the belt clearances on the guard by raising the
saw blade to full height using the blade height adjusting
handwheel.
n Check motor clearance by rotating the bevel adjusting
handwheel until the indicator is set at 45˚.
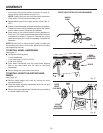
Fig. 33
MOTOR
ASSEMBLY
BELT GUARD
BELT