


26
27
®
0
5
10
15
20
25
30
35
40
45
®
0
5
10
15
20
25
30
35
40
45
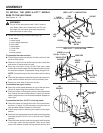
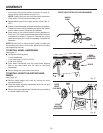
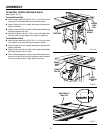
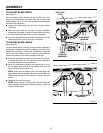
ASSEMBLY
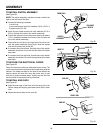
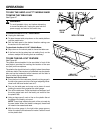
TO ADJUST BLADE DEPTH
See Figure 41.
The saw blade depth should be set so that the outer
points of the saw blade are higher than the workpiece by
approximately 1/8 in. to 1/4 in. but the lowest points (gullets)
are below the workpiece.
n Loosen the blade height lock knob by turning counter-
clockwise.
n Raise the saw blade by turning the height adjusting
handwheel clockwise or lower the saw blade by turning
the height adjusting handwheel counterclockwise.
n Once the desired saw blade height is achieved, lock the
blade height lock knob by turning it clockwise.
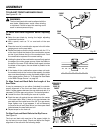
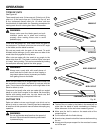
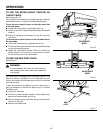
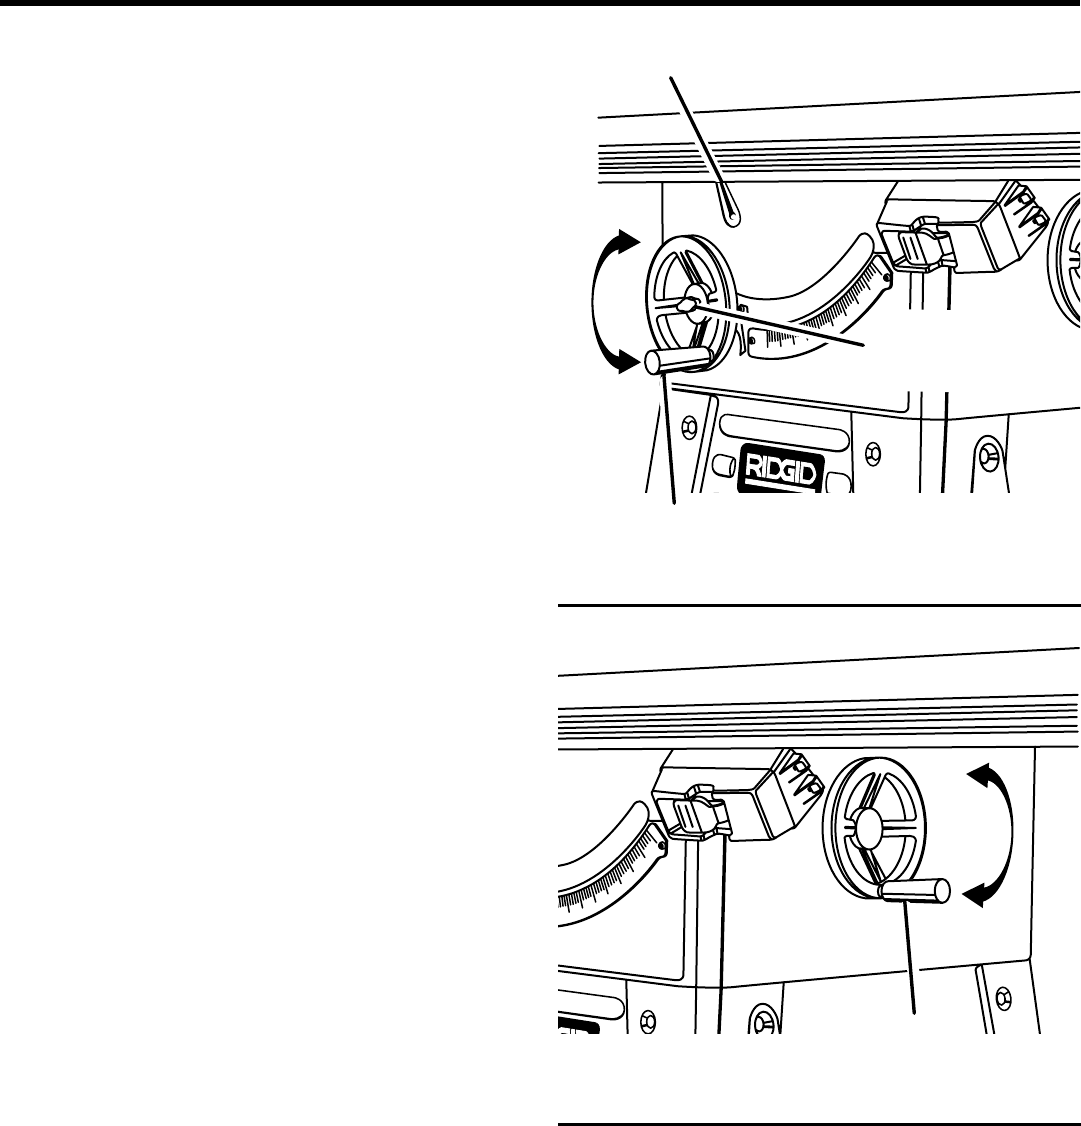
TO ADJUST BLADE ANGLE
See Figure 42.
The saw blade angle is set by turning the bevel adjusting
handwheel. Loosen the bevel lock lever then turn the bevel
adjusting handwheel. Turning the handwheel clockwise
will tilt the saw blade to the left; turning the handwheel
counterclockwise will tilt the saw blade to the right.
n When the saw blade is tilted to the left as far as it will go,
the blade should be at a 45˚ angle to the saw table and
the bevel indicator should point to 45˚.
n When the saw blade is tilted to the right as far as it will
go, the blade should be at 90˚ to the saw table and the
bevel indicator should point to 0˚.
NOTE: When the saw blade is 90˚ to the saw table, the
saw blade should be square with the saw table. (See the
Adjustments section of this manual to square the saw
blade.)
n Retighten the bevel lock lever.
NOTE: When locked, the bevel lock lever will keep the
bevel adjusting handwheel locked securely in place to
maintain blade angle.
Fig. 41
Fig. 42
BEVEL ADJUSTING
HANDWHEEL
BEVEL LOCK
LEVER
HEIGHT
ADJUSTING
HANDWHEEL
BLADE HEIGHT
LOCK KNOB