


SUPER PRO GUN &
SUPER PRO GUN II
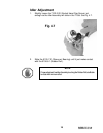
NOTE
Discard all parts to be replaced by repair kit. All remaining parts should be
thoroughly cleaned, inspected for damage, and replaced if necessary.
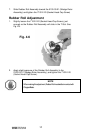
7. Remove and discard the 5105-9-1 (Trigger Nut Seal), and the
7304-4-1 (Lip Seal) from the 5105-10-1 (Trigger Nut)
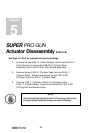
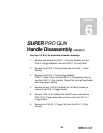
SUPER PRO GUN II
Handle Disassembly 5110-7-1
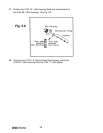
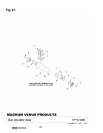
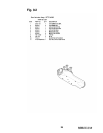
See Figs. 9.5 & 9.6 for exploded schematic drawings
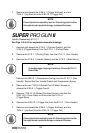
1. Remove and discard the 5110-6-1 (Cylinder Gasket), and the
5105-6-1(Toggle Washer) from the 5110-1-1 (Porting Plate).
2. Remove the 5110-1-1 (Porting Plate) from the 5110-7-1 (Gun Handle).
3. Remove the 5110-5-1 (Handle Gasket) and the 5110-2-1 (Slide Valve).
Remove the 9203-2-1 (Compression Spring) from the 5110-7-1 (Gun
Handle). Discard the Gun Handle Gasket and Compression Spring.
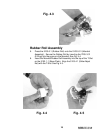
4. Remove the two 7102-8-8 (Slotted Pan HD Mach Screws) to
remove the 5105-2-1 (Trigger Guard).
5. Remove 7102-10-12 (Slotted Flat Head Screw), and slide the
5105-15-01 (Pivot Plate) out from under the 5110-4-1
(Trigger Stem).
6. Remove the 5105-10-1 (Trigger Nut) from the 5110-7-1 (Gun Handle).
7. Remove and discard the 5105-9-1 (Trigger Nut Seal), and the
7304-4-1 (Lip Seal) from the 5105-10-1 (Trigger Nut)
NOTE
For two stage trigger, chopper gun handle only. Remove the 5110-3-1
(Detent Plate).
NOTE
Discard all parts to be replaced by repair kit. All remaining parts should be
thoroughly cleaned, inspected for damage, and replaced if necessary.
21