


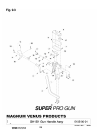

SUPER PRO GUN &
SUPER PRO GUN II
SUPER PRO GUN
Gun Block Disassembly 5104-00-01
22
Chapter
7
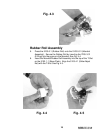
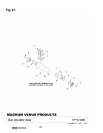
1. Remove the four 5106-6-1 (Mounting Screws), and the four
5106-3-1 (Mounting Seals) to remove the 5104-00-01 (Gun Block
Assembly) from the 5106-00-01 (Gun Actuator Assembly).
2. Remove the two 7102-1-6 (Socket Head Cap Screws) to remove
the 5104-20-1 (Mix Housing) from the Gun Block Assembly.
3. Remove the 5104-12-1 (Mix Housing Seal), and the 5104-17-1
(Distribution Ring) from the 5104-20-1 (Mix Housing).
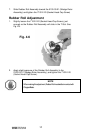
4. Remove the 5104-03-01 (Injector Assembly), from the Gun Block
Assembly.
5. Remove the 5104-32-1 (Plug) from the 5104-1-1(Gun Block).
6. Remove the 5104-32-1 (Plug), and the 7301-15-125 (O-Ring) from
the 5104-1-1 (Gun Block).
7. Remove the 5104-9-1 (Resin Fitting), and the (7301-14-904
(O-Ring) from the 5104-1-1 (Gun Block).
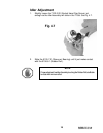
8. Remove the 7701-3-6 (Catalyst Fitting), and 7301-10-903
(O-Ring), from the 5104-1-1 (Gun Block).
9. Remove 5104-11-1 (Actuating Stem) from the 5104-2-1 (Valve
Rod).
10. Remove both 5104-8-1(Packing Nuts) from the 5104-1-1 (Gun
Block).
11. Gently tap the 5104-2-1 (Valve Rod) from Gun Block using the
9301-5-1 (Seal-Installation Tool).
12. Remove 5104-10-1 (Center Spacer).
See Figs. 9.9 - 9.12 for exploded schematic drawings