


@@2:/9F
'< .C<61 =<@@6/92 6;7B?F
16@0<;;20A =9B4 3?<: =<D2?
@<B?02 /23<?2 =2?3<?:6;4 .;F .@@2:/9F
.17B@A:2;A@<??2=.6?@
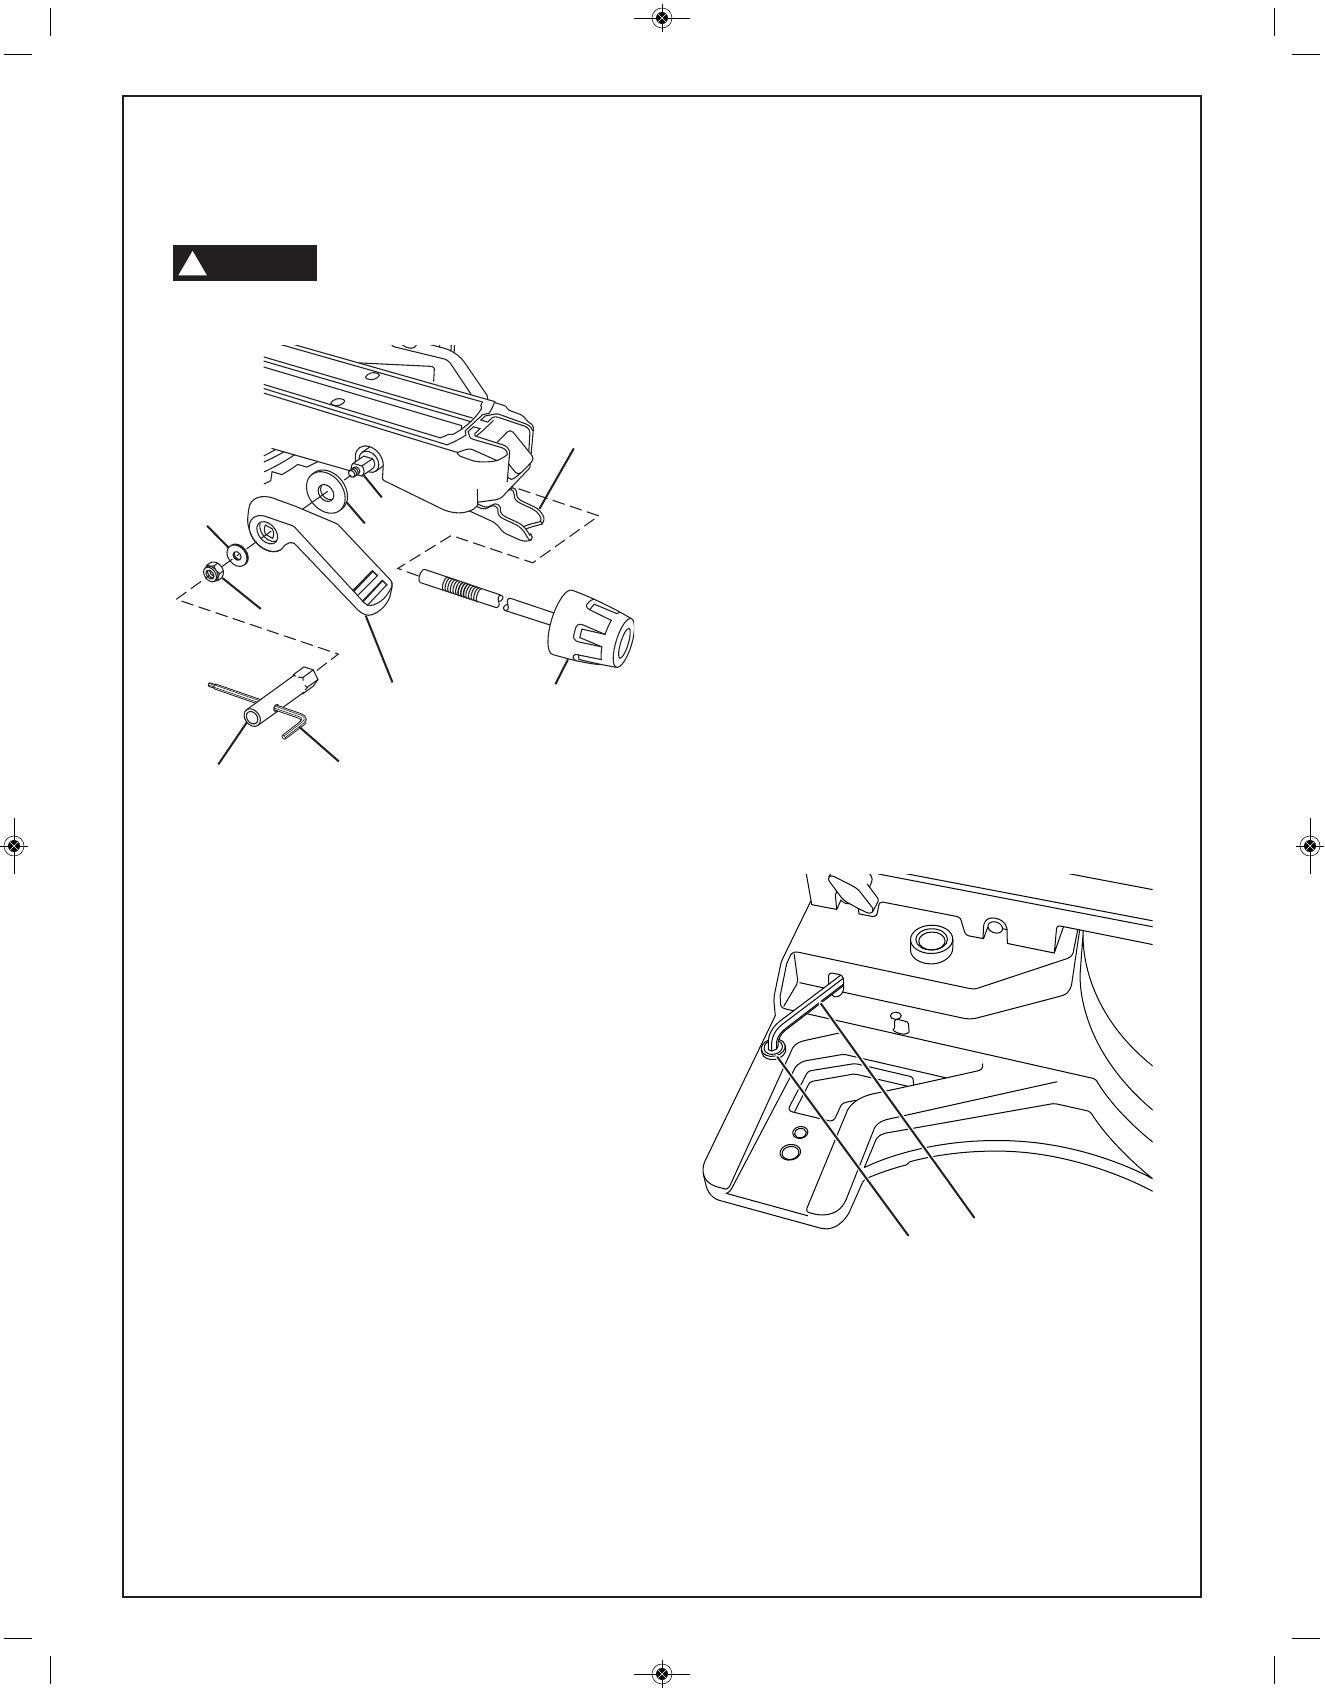
64B?2
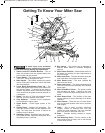
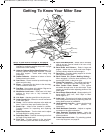
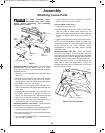
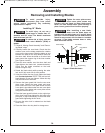
AA.056;4A522C29 <08 2C2? – This miter saw is
packaged with the saw head locked at 0° bevel
angle. The bevel lock lever must be attached before
operating the tool.
1. Slide the 10 mm flat washer over the shaft (area
with flats).
2. Slide the bevel lock lever over the shaft, aligning
the flats on the shaft to the flats on the lever’s
mounting hole. The lever should be horizontal with
the handle to the front (see Figure 1).
3. Slide the 6 mm flat washer over the shaft (area
with screw threads) and against the recessed wall
of the lever.
4. Finger-tighten the 10mm lock nut on the shaft. Use
the 10mm socket tool to tighten the lock nut.
NOTE: The 6/4mm hex key is placed through the
holes in the socket tool to assist in tightening.
5. Lift the bevel lock lever and push back down to
check that the lever is securely in place.
AA.056;4A52!6A2? <08;</ – Locate the miter
lock knob from among the loose parts.
1. Look under the turntable’s front arm above the lock
lever and locate the 10mm hole (see Figure 1).
2. Insert the long shaft of the miter lock knob through
this hole until it stops.
3. Turn the knob clockwise (about 10 full revolutions)
until it is tight or “locked.”
4. Loosen the knob 1/2 turn to unlock it. The table is
now free to be moved on the base.
(@6;4A52!6A2? <08;</ –
1. Loosen the miter lock knob.
2. While holding the knob in your palm, reach down
with your index or middle finger and pull up the
detent lever. While gripping knob, rotate table left
or right to needed miter angle and release the
lever.
3. Tighten the knob once you are at the correct angle.
NOTE: It is recommended to tighten the miter lock
knob before all cuts. It is required to tighten the knob
before cutting at any angle between detent
engagements or when the miter detent override
system is in use.
&A<?6;4A52::2E2F – There is a storage
location on the saw to store the 6/4mm hex key.
Insert the short leg of the hex key through the rubber
grommet as shown. Place the long leg into the tool rest
and press down into the retainer clip (see Figure 2).
NOTE: The 6/4mm hex key is needed to change the
blade and to make tool adjustments. If lost, two
separate hex keys may be substituted: a 4mm hex
key and a 6mm hex key.
64B?22E2F&A<?.42
Miter
Lock Knob
Bevel Lock
Lever
Miter
Detent Lever
Hex Key
10mm Socket Tool
Lock Nut
Shaft
10 mm
Washer
6 mm
Washer
*%""
!
Grommet
6/4mm
Hex Key
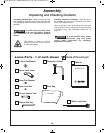
AA.056;4 <<@2$.?A@
BM 2610027879 07-13_BM 2610027879 07-13.qxp 7/8/13 9:52 AM Page 12