


CC1800XL Concrete Saw Manual 13
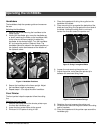
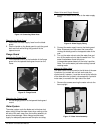
Figure 8: Wrench
Installing the Blade
WARNING
• DO NOT install a blade with the
engine/motor running.
• Failure to properly secure the outer
flange and blade may cause parts to loosen or
fall off the saw.
CAUTION
• Wear gloves and be alert to the surrounding
environment when handling blades.
Install the blade on either the right or left side of the saw;
utilize the side most appropriate for the cutting task.
1. Remove the blade guard or pivot the front of the
guard 180° (fully upward) to gain access to the blade
flanges. Note: Failure to fully pivot the guard may
cause serious injuries
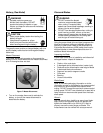
2. Remove the blade shaft nut using the wrench. Turn
the nut clockwise on the right side of the saw and
counterclockwise on the left side of the saw to
loosen.
.
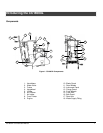
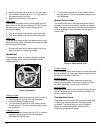
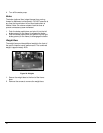
Figure 9: Blade Flanges and Nut
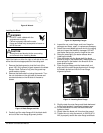
3. Carefully pull the outer flange off of the blade shaft
and out of the inner flange alignment pinhole.
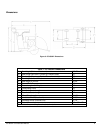
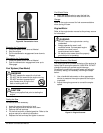
Figure 10: Separating Flanges
4. Inspect the nut, outer flange, and inner flange for
damages and clean, repair, or replace as necessary.
5. Select the correct blade type and size for the cutting
task and inspect the blade for damages. DO NOT
use blades that are too small or large for the saw.
6. Raise the saw slightly (for easier access when
installing the blade).
7. Place the blade onto the blade shaft (the blade
should fit snug on the blade shaft). Always point the
arrow printed on the blade in the direction of the
blade shaft’s rotation.
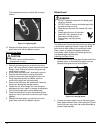
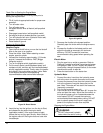
8. Place the outer flange onto the blade shaft, and
align and fit the outer flange alignment pin through
the blade’s pinhole and into the inner flange
alignment pinhole.
Figure 11: Inserting Outer Flange
9. Slightly rotate the outer flange and blade backward
to eliminate backlash (looseness) between parts.
10. Fit the blade shaft nut onto the blade shaft and
tighten by hand.
11. Slowly lower the blade until it touches the ground.
12. Tighten the nut, using the wrench, to 50 ft-lb (67.8
Nm) to properly secure the outer flange and blade.