


22
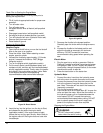
Hydraulic Motor
Lubricate the pillow block grease fitting every 40 hours of
operation.
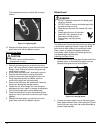
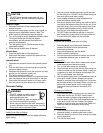
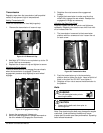
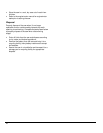
Inner Blade Flange
Figure 25: Inner Blade Flange
Installing the Inner Blade Flange
1. Inspect the inner blade flange for damages and
clean or replace as necessary.
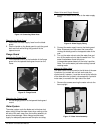
2. Place the flange onto the tapered portion of the
blade shaft.
3. Apply Loctite 262 (red) or an equivalent to the
setscrew threads.
4. Place the setscrew into the flange’s setscrew hole
and tighten the screw down to the blade shaft key to
secure the flange. Note: Always make sure the
flange is secure prior to operating the saw
Removing the Inner Blade Flange
.
1. Remove the setscrew from the back of the inner
blade flange using an Allen wrench.
2. Remove the flange from the blade shaft.
Wheels
WARNING
• Raise the saw to a proper height
for access when working
underneath the saw. Use chocks
to block the wheels, and fit blocks or jacks
under the frame edges at the front and back of
the frame for additional support.
• Always wear safety glasses when
removing retaining rings.
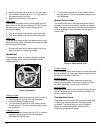
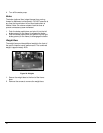
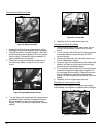
Front Wheels
Inspect the front wheels regularly for damages or wear
and replace as necessary.
Figure 26: Front Wheels
1. Raise the saw to gain access to the front wheels.
2. Remove the retaining ring using retaining-ring pliers.
3. Remove the washer and wheel from the wheel shaft.
4. Place a new wheel and then the washer onto the
wheel shaft.
5. Snap the retaining ring into the groove at the front of
the wheel shaft to secure the wheel.
6. Repeat steps 2–5 to replace the second wheel.
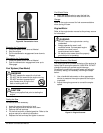
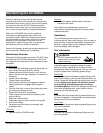
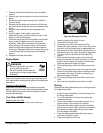
Rear Wheels
Inspect the rear wheels regularly for damages or wear
and replace as necessary.
Figure 27: Rear Wheels
1. Raise the saw to gain access to the bottom of the
frame. There are two holes (one on each side of the
saw) in the frame near the rear wheels.
2. Loosen both rear axle setscrews through these
holes and then lower the saw.
3. Loosen both set collar setscrews.
4. Slide the axle to the right (you are facing the back of
the axle) and remove the wheel assembly on the
left.
5. Place a set collar, washer, new wheel, and another
washer (in this order) onto the end of the axle. Slide
the axle back into the axle hole on the left, and then
push the assembly parts to the left.
6. Slide the axle to the left (you are facing the back of
the axle) and remove the wheel assembly on the
right.