


Basic Operation
3A0868G 31
Pump Calibration
NOTE: See Calibration 1 and 2 (Screens 22 and 23),
page 46, for further screen information, if needed.
Calibrate the pump:
• The first time the system is operated.
• Whenever new materials are used in the system,
especially if the materials have viscosities that differ
significantly.
• At least once per month as part of regular mainte-
nance.
• Whenever a pump is serviced or replaced.
NOTE:
• Pump factors on Calibration 1 (Screen 22) are
updated automatically after the calibration pro-
cedure is completed. You also may manually
edit them if desired.
• All values on this screen are in cc or cc/in.,
regardless of the units set in Configure 4
(Screen 21).
• During each calibration the dispense valve will
close during an up stroke and a down stroke (in
either order). This test is to verify that the pump
ball checks are seating properly and not leak-
ing. If leaking occurs, the system will alarm after
the calibration for that particular valve.
1. Before calibrating pump A or B, prime the system
with material. See Prime the System, page 30.
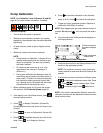
2. If the display is on a Run Mode screen, press
to access setup screens.
3. Press to display Calibration1 (Screen 22).
Pump calibration factors are shown for Pump A and
Pump B.
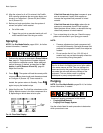
4. Press to move to Calibration 2 (Screen 23).
5. Press to highlight the pump you wish to cali-
brate. Press . An X displays in the box.
6. Press to start the calibration on the checked
pump (A or B). Press to cancel the calibration.
7. Trigger gun into a graduated cylinder. Dispense a
minimum of 200-300cc of material.
NOTE: Stop triggering the gun when desired amount is
reached. Do not press , as it will cancel the calibra-
tion.
8. The volume that the ProMix measured displays on
the Display Module.
9. Compare the amount on the Display Module to the
amount in the graduated cylinder.
NOTE: For maximum accuracy, use a gravimetric
(mass) method to determine the actual volumes dis-
pensed.
• If the screen and actual volumes are different, press
to highlight the dispense volume field. Press
. Press to move between digits. Press
to change a digit. Press when field is
correct.
NOTE: If the value is substantially different, repeat the
calibration process until the dispensed volume and mea-
sured volume match.
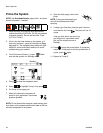
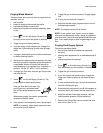
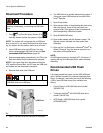
F
IG
. 17. Dispensed Volume Comparison
Volume measured
by system displays
here.
Enter dispensed
volume here.