


-62-
Model G0602/G0752 (Mfg. Since 11/12)
The clamping pressure of the half nut is fully
adjustable with a gib that can be loosened or
tightened by two set screws. Use this procedure
to adjust the half nut if it becomes loose from
wear, or it is too tight for your preferences. A half
nut that is too loose will make it difficult to produce
accurate work; one that is too tight will increase
the rate of wear on itself and the leadscrew.
Tools Needed Qty
Open-End Wrench 8mm.................................... 1
Hex Wrench 5mm .............................................. 1
Hex Wrench 2.5mm ........................................... 1
To adjust the half nut:
1. DISCONNECT LATHE FROM POWER!
2. Disengage the half nut, then remove the
thread dial.
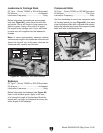
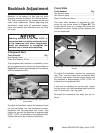
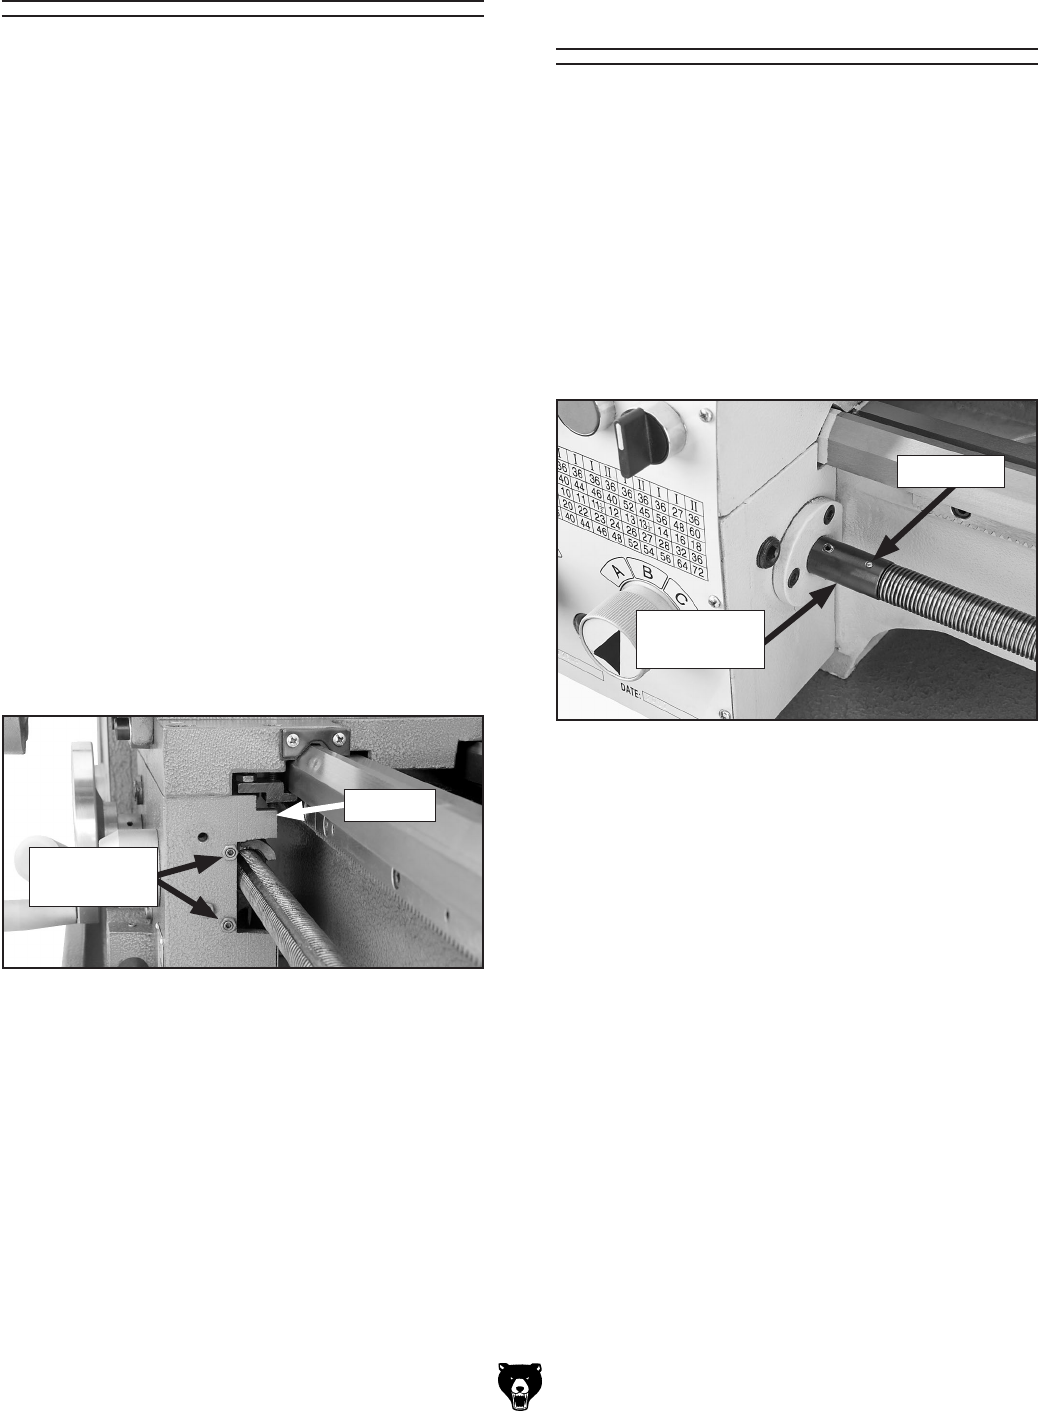
3. Loosen the two adjustment hex nuts shown
in Figure 91, then adjust the set screws in
small, even increments so one end of the gib
does not become tighter than the other.
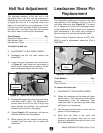
Half Nut Adjustment
Half-Nut
4. Engage/disengage the half nut several times
and notice how it feels. The adjustment is
correct when the half nut has a slight drag
while opening and closing. The movement
should not be too stiff or too sloppy.
5. Repeat Steps 3–4, if necessary, until you are
satisfied with the half nut pressure.
6. While keeping the set screws from moving,
re-tighten the hex nuts, then re-install the
thread dial.
Figure 91. Typical half nut gib adjustment.
Adjustment
Fasteners
Leadscrew Shear Pin
Replacement
The longitudinal leadscrew is secured to the feed
rate gearing in the headstock with the use of a
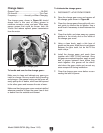
soft-metal shear pin (see Figure 92). The shear
pin is designed to break and disengage power
to the leadscrew to help protect more expensive
lathe components if you crash your carriage or
take too large of a cut and overload the lathe.
Contact Grizzly Customer Service at (570) 546-
9663 to order a replacement shear pin (Part #
P0602815).
Tools Needed Qty
Hammer ............................................................. 1
Punch 2.5mm .................................................... 1
To replace the shear pin:
1. DISCONNECT LATHE FROM POWER!
2. Rotate the leadscrew so the shear pin faces
up and down. If the connecting collar rotates
independently from the leadscrew, then
rotate the collar so the shear pin holes align
with those in the leadscrew.
3. Use the punch and hammer to drive out the
pieces of the old shear pin.
4. Make sure the holes in the collar and
leadscrew are aligned, then tap the new
shear pin completely through the holes in the
collar and leadscrew.
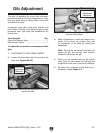
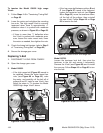
Figure 92. Longitudinal leadscrew shear pin.
Shear Pin
Connecting
Collar