


17
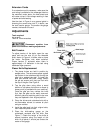
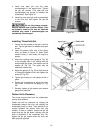
3. Stand to one side of the machine and start
the board under the infeed roller so that it
travels in a straight line. As the infeed roller
takes hold, let go and remain standing to
one side of the unit – never directly in line
with the board. The power feed will
complete the travel without further pushing
or pulling.
Planing for Finish
Planing for a smooth finish is best accomplished
by taking light cuts on the board. However,
several other things are important to achieve a
smooth finish.
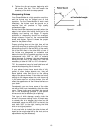
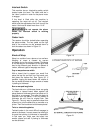
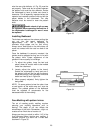
Always feed board in a direction that allows the
planer blades to cut with the grain as shown in
Figure 24. This aids the knife in severing the
wood fibers rather than lifting and tearing the
fibers. Torn fibers give a fuzzy appearance to
the surface. Feeding against the grain can also
cause your knife to lift large chips from the
board’s surface, causing a very unsightly
appearance.
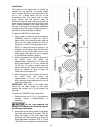
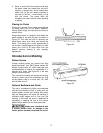
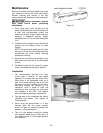
Introduction to Molding
Pattern Knives
Custom molding knives are ground from high
speed hard steel. Your PM15 planer-molder will
accept a single knife set, which uses gibs and
counterbalances to ensure the cutterhead is in
balance at all times. See Figure 25. It will also
accept a three-knife set.
The three-knife molding set allows the planing
knives to remain within the cutterhead, as long
as the pattern knife is no more than 1/8” thick
and no wider than 3”.
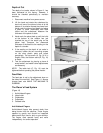
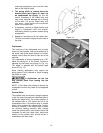
Optional Bedboard and Guide
The use of a bedboard is highly recommended
and can be extremely critical in cases such as
custom pattern knives and molding bits where
they are designed to cut below the molding to
eliminate rough edges and to final size the
molding. In this case, the use of a bedboard is
mandatory in keeping the tips of the custom
pattern knives away from the cast planer bed.
Always use a bedboard with
a custom pattern knife, or damage to the
knives, planer bed and cutterhead can result.
Figure 24
Figure 25