21
Before you begin molding, you must also
consider the hardness of the board, its moisture
content, straightness, grain direction, and grain
structure. All of these factors will play a part in
the quality of your molding.
Stand to one side of the machine and start the
board under the infeed roller so that it travels in
a straight line. When the feed roller takes hold,
let go of the piece and remain standing to one
side of the machine – not in direct line with the
board. The power feed completes the travel
without further pushing or pulling.
Edge Molding with pattern knives
This procedure is easily done by installing the
proper pattern knife and setting up the bedboard
and guide system with guides tall enough to
hold the stock on edge.
Edge Planing
A bedboard must be installed
on the planer when edge planing.
Edge planing can be done on stock up to 3/4”
thick and 11” wide with the following set-up:
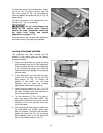
Install the rabbet cutter knife, at the right or left
edge of the cutterhead, so that the rabbet knife
extends inside of the guide approximately 1/16”
to 1/8” or just enough to clean up the stock. See
Figure 36.
If you have not already done so, install
counterweights in the remaining two cutterhead
slots. The rabbet knife is locked in place with the
aluminum gib provided.
NOTE: When the rabbet knife becomes dull on
one side, move the rabbet knife and
counterweight set-up to the opposite side of the
cutterhead. This will give you a fresh cutting
edge with which to work.
Common Molding Applications
Practice and experience will greatly affect the
quality of molding that you produce. Once you
become familiar with the set-ups for the different
molding applications, you will easily be turning
out quality molding on every run. Some of the
more common applications are described below.
Back Relief
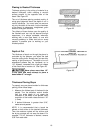
Back reliefs are used to create a better fit over
irregular surfaces. With less wood contact, the
molding matches irregular surfaces more easily.
See Figure 37. The back relief should be formed
on a piece of wood before it is molded to
finished thickness.
Figure 35
Figure 36
Figure 37


