


-24-
For Machines Mfg. Since 3/11
16-Speed Gearhead Lathe
PREPARATION
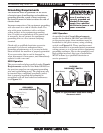
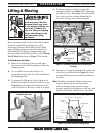
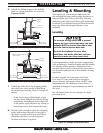
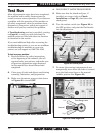
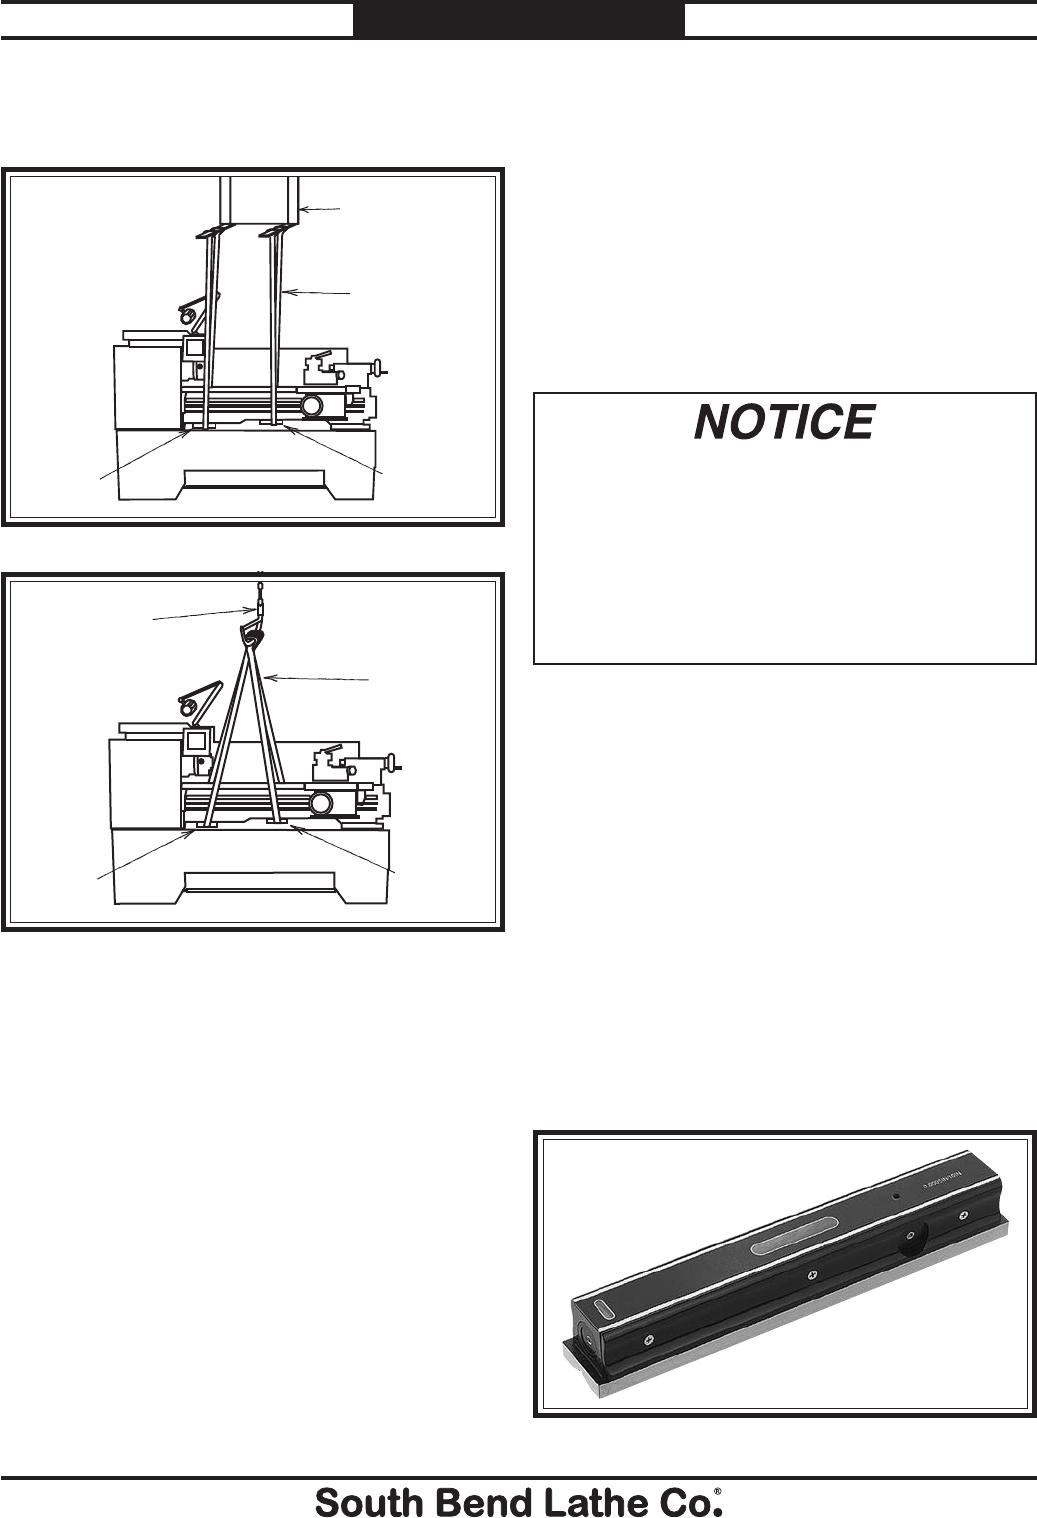
6. Attach the lifting straps to the forklift
forks or a hook and chain, as shown in
Figures 19–20.
Forklift
Forks
Lifting
Straps
12" Long
2x6 Board
12" Long
2x6 Board
Figure 19. Lathe set up for lifting with forklift.
7. Unbolt the lathe from the shipping pallet,
then with two other people to help keep
the lathe from swaying, raise it a couple of
inches.
— If the load is not well balanced, or you
see any other difficulties with the lifting
equipment, immediately lower the lathe
to the pallet again. Resolve any lifting or
balancing issues, then repeat this step.
8. Lift the lathe enough to clear the shipping
pallet and remove the pallet, then lower
the lathe enough to clear any small floor
obstacles and move it to the prepared
location and lower it in place.
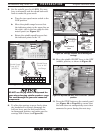
Lifting Hook
with Chain
Lifting
Straps
12" Long
2x6 Board
12" Long
2x6 Board
Figure 20. Lathe set up for lifting with hook and chain.
Leveling & Mounting
You must level your machine and either use
the included foot pads and leveling hardware or
bolt and shim your lathe to the floor. Because
mounting your lathe to the floor with permanent
hardware is an optional step and floor materials
may vary, floor mounting hardware is not
included.
Leveling
Leveling machinery helps precision components,
such as bedways, remain straight and flat during
the lifespan of the machine. Components on a
machine that is not level may slowly twist due to
the dynamic loads placed on the machine during
operation.
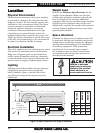
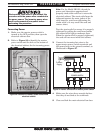
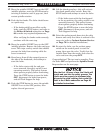
For best results, use a precision level that
is at least 12" long and sensitive enough to
show a distinct movement when a 0.003" shim
(approximately the thickness of one sheet of
standard newspaper) is placed under one end of
the level.
See the figure below for an example of a high
precision level.
For accurate turning results and to prevent
warping the cast iron bed and ways, the lathe
bedways MUST be leveled from side-to-side
and from front-to-back on both ends.
Re-check the bedways 24 hours after
installation, two weeks after that, and then
annually to make sure they remain level.
Figure 21. Example of a precision level.