


For Machines Mfg. Since 3/11 16-Speed Gearhead Lathe
-79-
SERVICE
Feed Rod Clutch
Adjustment
Tools Needed: Qty
Hex Wrench 2.5mm ..............................................1
Hex Wrench 3mm .................................................1
To adjust the clutch release point:
1. DISCONNECT LATHE FROM POWER!
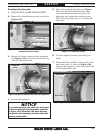
2. Remove the clutch front and side covers (see
Figure 130).
Setting the feed clutch for too high of a load
defeats its purpose and could lead to lathe
damage in the event of a crash.
4. Mark the set screw hole and the rotational
position of the collar on the feed rod for a
reference.
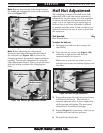
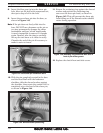
5. Remove the set screw shown in Figure 131.
6. Insert the hex wrench into one of the holes
on the collar, then rotate the collar.
— If you need to adjust the clutch for a
higher load, rotate the collar upward.
— If you need to adjust the clutch for a lower
load, rotate the collar downward.
7. Line up one of the available set screw holes
on the collar with the nearest indent in the
feed rod, then re-install the set screw and
fully tighten it.
8. When you are satisfied with the adjustment,
replace the front and side access panels.
3. Open the end gear cover, then rotate the
bottom end gear by hand until you can
access the set screw in the clutch collar, as
shown in Figure 131.
The feed rod clutch helps protect the drivetrain
from overload in the event of a crash, and it
works with the adjustable apron stop system to
disengage the feed rod from the apron. The feed
clutch release point is adjusted at the factory.
However, it can be re-adjusted to increase or
decrease the load it will take before the clutch
slips.
Keep in mind that correctly adjusting the feed
rod clutch for your operation is a matter of trial-
and-error and experience.
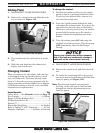
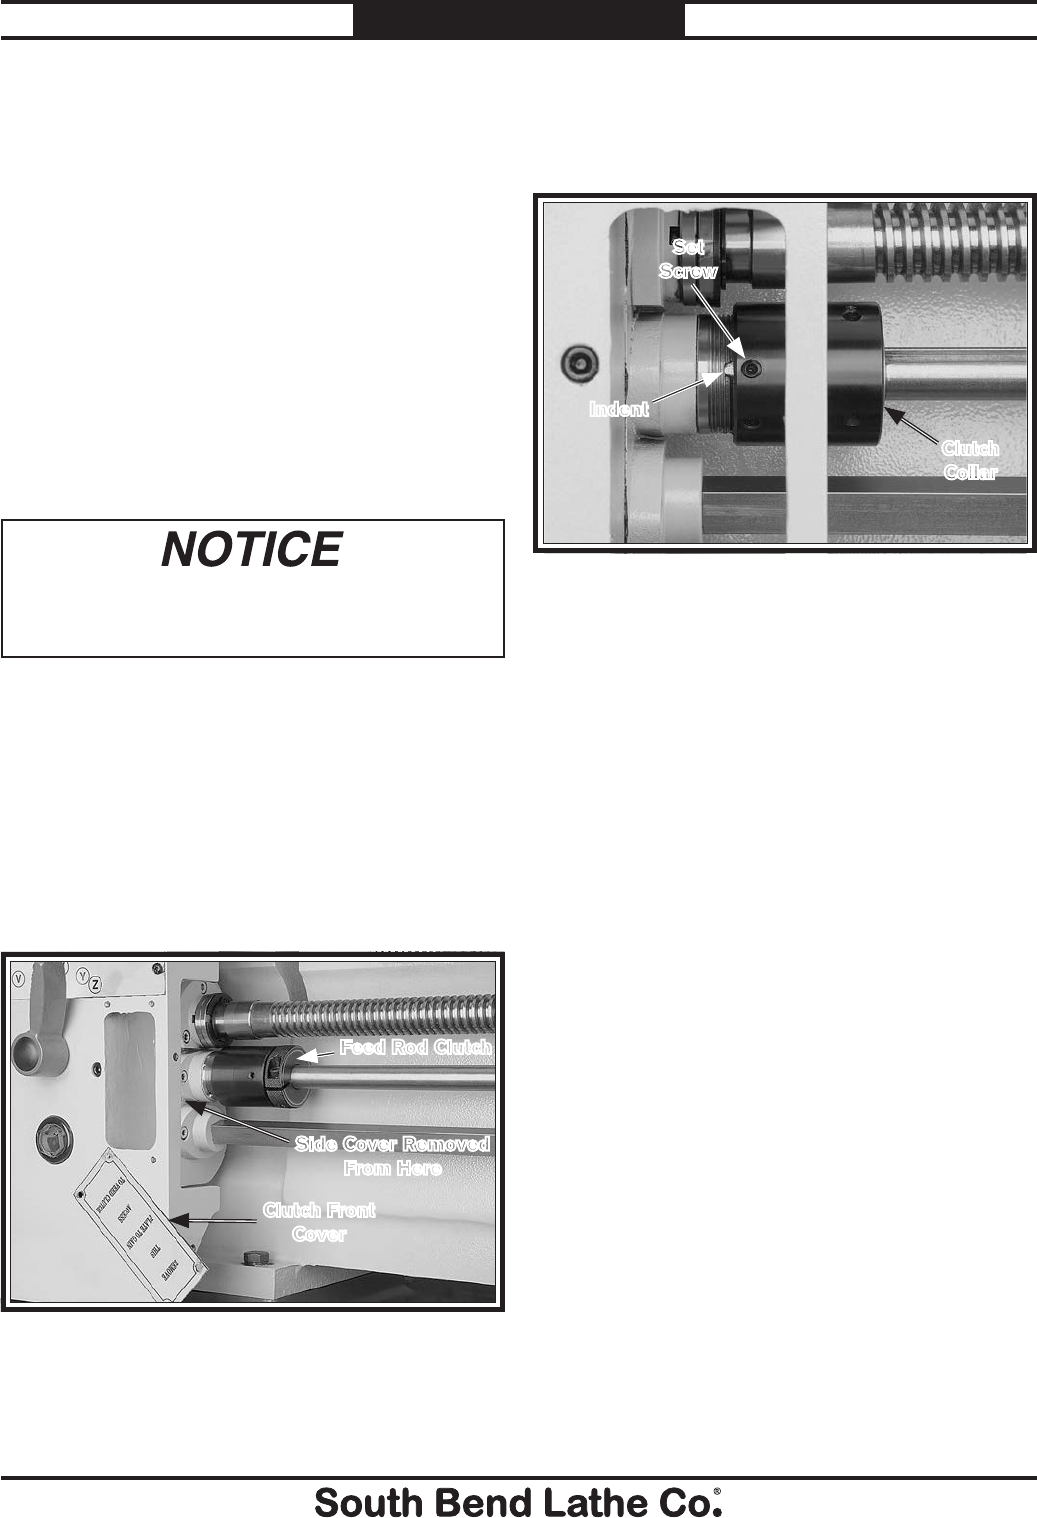
Figure 130. Location of feed rod clutch (side cover
removed for photo clarity).
Clutch Front
Cover
Side Cover Removed
From Here
Feed Rod Clutch
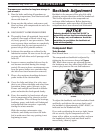
Set
Screw
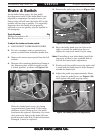
Figure 131. Feed rod clutch collar components.
Clutch
Collar
Indent