Performance Tests
TDS 500D, TDS 600B & TDS 700D Performance Verification and Specifications
1–47
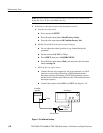
H Press VERTICAL MENU; then press the main-menu button
Coupling. Press the side-menu button W to toggle it to the 50 W
setting. (This step is not required on the TDS 794D.)
H Press SET LEVEL TO 50%.
H Use the vertical POSITION knob to center the test signal on screen.
H Press TRIGGER MENU; then press the main-menu button Mode
& Holdoff. Press the side-menu button Normal.
2. Confirm Main and Delayed time bases are within limits for accuracies:
a. Display the test signal:
H Press HORIZONTAL MENU.
H Set horizontal modes. To do this, press the main-menu button Time
Base. Press the side-menu buttons Delayed Only and Delayed Runs
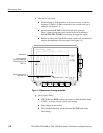
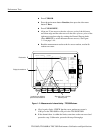
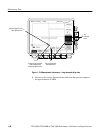
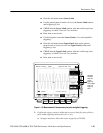
After Main. See Figure 1–13.
b. Measure the test signal:
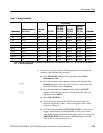
H Set the horizontal SCALE of the D (delayed) time base to 500 ns for
the TDS 600B or to 100 ns for the TDS 500D/700D.
H If using a time-mark generator, align the trigger T to the center
vertical graticule line by adjusting the horizontal POSITION. See
Figure 1–13 on page 1–48.
H If using a sine wave generator, align the rising edge of the sine wave
on the center graticule crosshairs by adjusting the horizontal
POSITION.
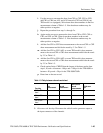
H Set delayed time to 10.000016 ms. Do this on the keypad by
pressing 10.000016, then SHIFT, then m followed by ENTER).
c. Check long-term sample rate and delay time accuracies against limits:
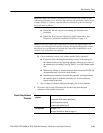
H CHECK that the rising edge of the marker (or sine wave) crosses
the center horizontal graticule line at a point within either ±2.0
divisions, for the TDS 600B, or ±2.5 divisions, for the
TDS 500D/700D, of center graticule. See Figure 1–13.
H Enter number of divisions on the test record.


