


&
!& Clean blade of any excess oil before
installation.
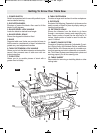
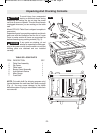
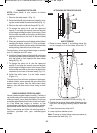
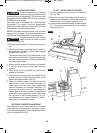
1. Remove the table insert (Fig. 11).
2. Raise the blade to the maximum height by turn-
ing the control wheel counterclockwise (Fig. 11).
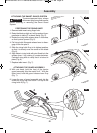
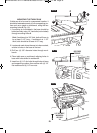
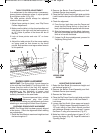
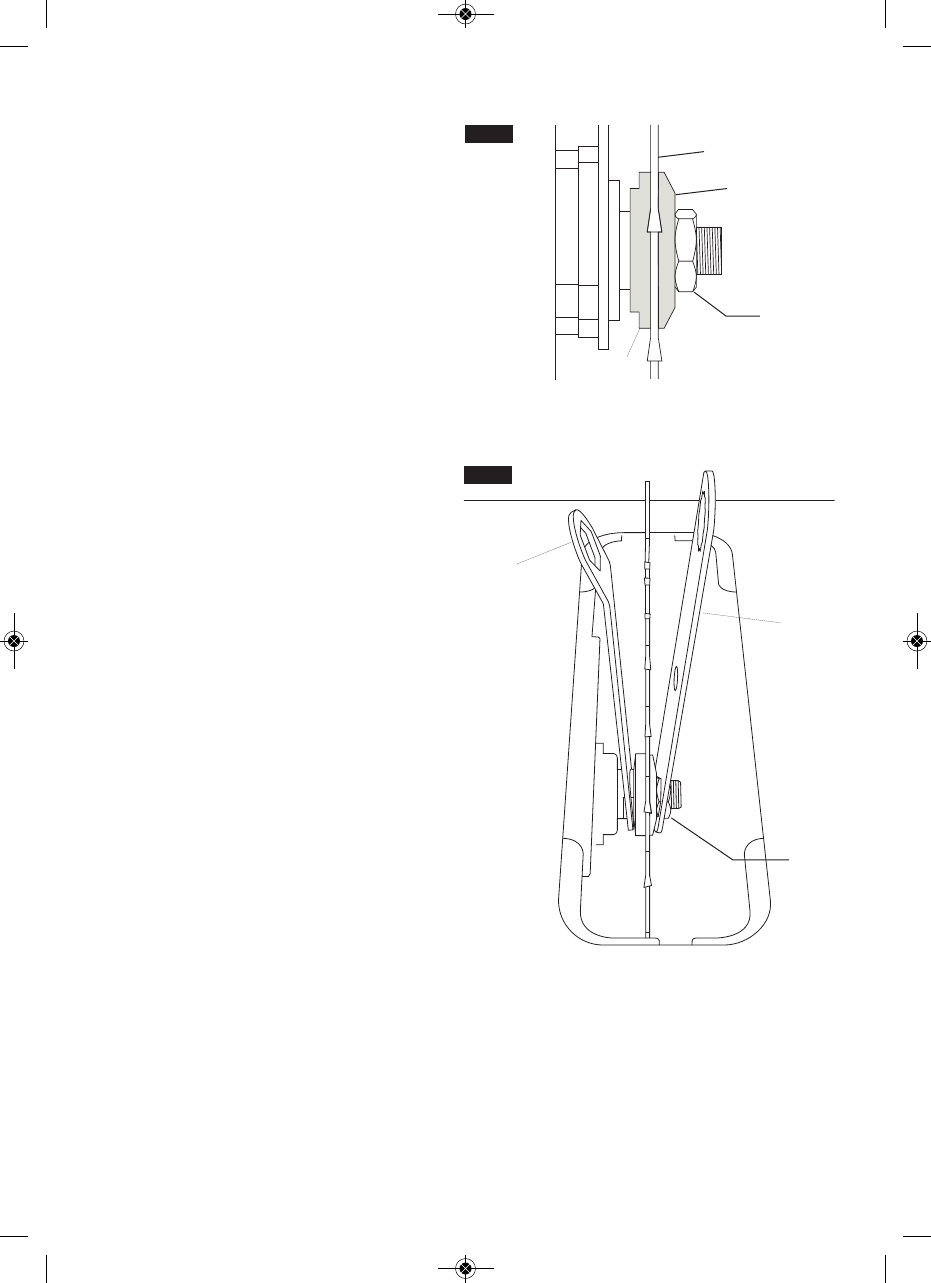
3. Remove the arbor nut and flange (Fig. 12).
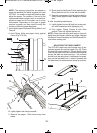
4. To loosen the arbor nut , use the open-end
wrench and align the wrench jaws on the flats
of the flange to keep the arbor from turning. Place
the box-end wrench on the arbor nut and turn
counter-clockwise (to the front of the saw table)
(Fig. 13).
5. Clean any sawdust from both blade collars before
installing the blade. Install a 10" (25.4 cm) blade.
Install the saw blade onto the arbor with the blade
teeth pointing toward the front of the saw.
To avoid injury, do not use a blade larger or smaller
than 10" diameter and 5/8" arbor.
6. Install the flange against the blade and thread
the arbor nut as far as possible by hand. Ensure
that the blade is flush against the inner blade
flange (Fig. 12).
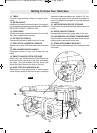
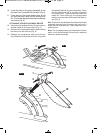
7. To tighten the arbor nut , use the open-end
wrench and align the wrench jaws on the flats
of the flange to keep the arbor from turning. Place
the box-end wrench on the arbor nut and turn
clockwise (to the rear of the saw table) (Fig. 13).
8. Install the table insert in the table recess.
(Figure 11).
To avoid injury from a thrown workpiece, blade part,
or blade contact, never operate the saw without the
proper insert in place. Use the table insert when
sawing. Use the dado insert when using a dado
blade.
'% $&""%
Handle carbide-tipped blades carefully. Carbide is
very brittle and can be easily damaged. Use caution
when you install, use or store the blades. Do not use
a carbide-tipped blade that is bent or has bent teeth,
or if the blade has cracks, is broken, or has
missing/loose carbide tips. Do not operate a carbide-
tipped blade faster than its recommended speed.
Read, understand and follow all warnings and in-
structions provided with your carbide-tipped
blades.
&& $" !$'%
%&!$
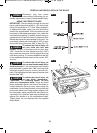
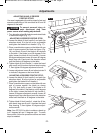
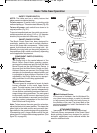
1. Raise rip fence handle , so holding clamp is
out far enough to fit on the table and into “V”
groove located on the back of rear rail (Fig. 14).
2. Position the rip fence over table holding up the
front end, first engage holding clamp with rear
rail.
3. Lower front end onto front rail .
4. Lower rip fence handle to lock.
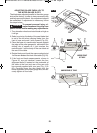
;@1To store rip fence follow same procedure as
above under the table (Fig. 15).
-15-
FIG. 13
FIG. 12
BM 2610014415 01-11 E:BM 2610012089 12-10 E 1/10/11 7:17 AM Page 15