


-32-
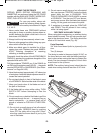
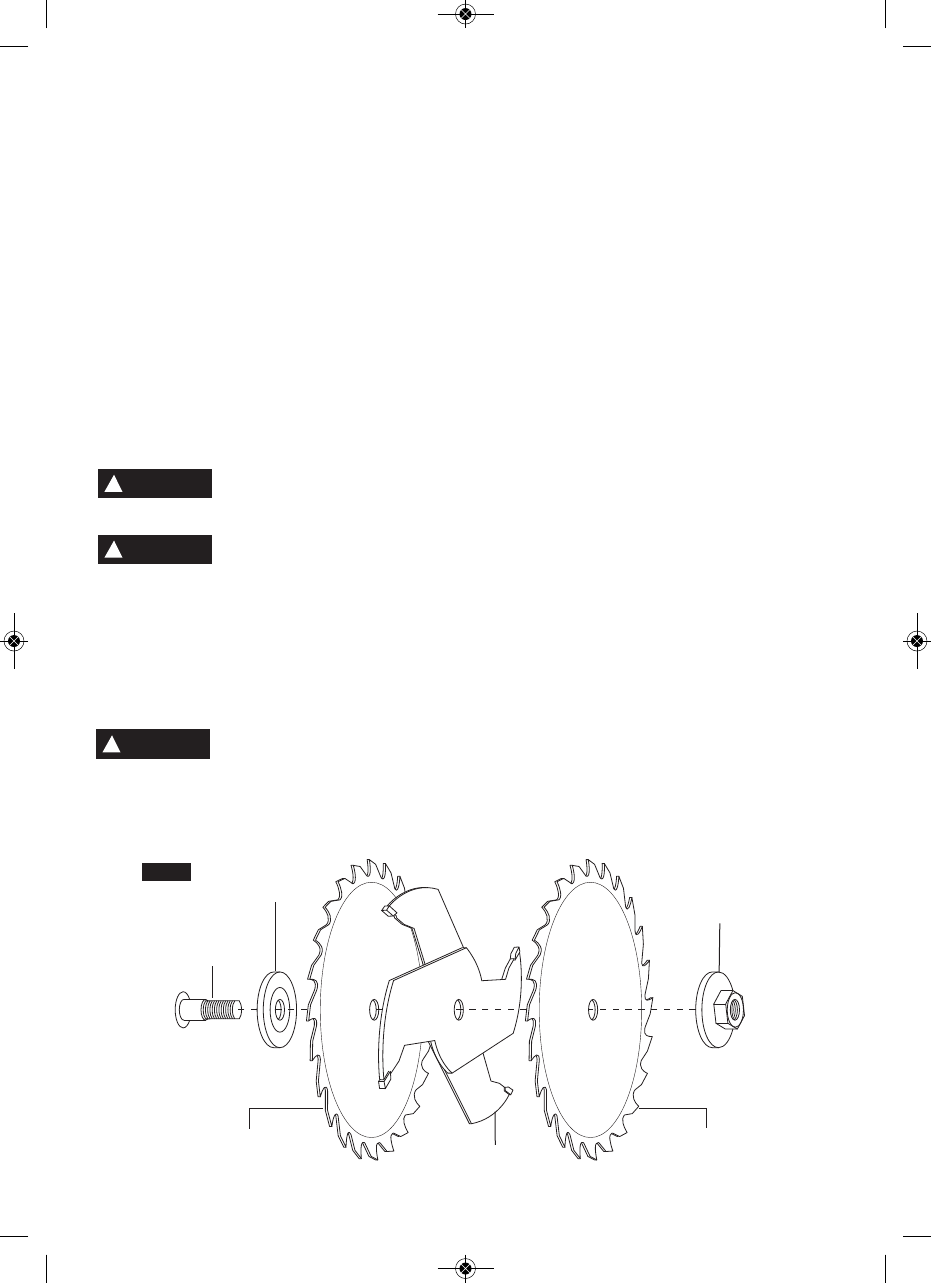
INNER BLADE
WASHER
INNER BLADE
CHIPPERS
ARBOR
OUTER BLADE
COMBINATION
NUT/WASHER
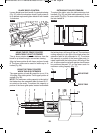
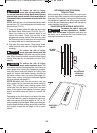
FIG. 55
!'&&
Instructions for operating the saw with Dado Head
sets are contained in the booklet furnished with
these accessories.
ALWAYS USE AN APPROPRIATE BOSCH TABLE
INSERT AND WASHERS LISTED UNDER REC-
OMMENDED ACCESSORIES (see page 35).
ALWAYS PLACE THE BLADE WASHERS IN THE
ORIGINAL POSITIONS WHEN YOU ARE FIN-
ISHED DADO CUTTING.
%& !%&
A dado set is an accessory system used to make
non-thru grooves or lap cuts on work pieces. These
tools are commonly used in furniture and cabinet
building. After work pieces have been properly dado
cut, they can be tightly joined together. The
GTS1031 table saw can accommodate dado cutting
up to 1/2” wide in a single pass.
&;>10A/1@41>5?7;25:6A>E-8
C-E? 05?/;::1/@ <8A3 2>;9
<;C1>?;A>/1.12;>1/4-:35:3.8-01?
&;>10A/1@41>5?7;25:6A>E-8
C-E?A?1@41;?/4-0;8-01
&-.81:?1>@ ;&%/;91?C5@4-0-0;-/
/1??;>EC-?41> Never make dado cuts without
this insert. Do not use dado sets larger than 8” di-
ameter. Never set dado cutters to any bevel angle
other than the vertical 0° angle. Follow all warnings
and instructions shown here and those that accom-
pany your dado set. Failure to comply with these
warnings may result in serious bodily injuries.
&;>10A/1@41>5?7;25:6A>E0;
:;@A?10-0;?1@?8->31>@4-:
5:/41?5:05-91@1> The saw is not designed to ac-
cept larger sized dados.
'% %&!%&%
!& These instructions are based on using the
Bosch 8” and 6” Professional Dado Sets: Model Nos.
PRO824DADO, PRO840DADO and PRO624DADO.
They also apply to most standard stacked dado sets.
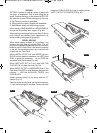
1. Disconnect plug from power source.
2. Remove the Barrier Guard Assembly and Anti-
Kickback Device (see pages 12 & 13). Lower and
lock the Riving Knife in its lowest position.
3. Remove standard table insert plate. Raise saw
blade to maximum height.
4. Remove the arbor nut, then outer washer, and
saw blade, (see page 15). Note: For only dado
cutting, leave the inner washer in place. The outer
washer will be replaced with the combination
nut/washer included with the TS1013 insert.
5. Installing a dado stack (Fig. 55)
A) Place the desired parts of the dado set onto
the arbor shaft.
B) Place the desired parts of the dado set onto the
arbor shaft.
C) Place the supplied combination nut/washer
from the Dado Accessory Kit (TS1013) onto the
outside of the dado stack and tighten.
6. Placing dado blades and chippers: (see Fig. 55)
• For 1/4” wide cuts, place the two outside dado
blades (cutters) on the shaft. The two dado out-
side blades may be different, check for informa-
tion on the blade and the manufacturer's
instructions for proper installation.
• For wider cuts (up to 1/2” maximum), chipper
blades and spacers can be placed only between
the outside blades (cutters).
!
WARNING
!
WARNING
!
WARNING
BM 2610014415 01-11 E:BM 2610012089 12-10 E 1/10/11 7:17 AM Page 32