-20-
&"! &$'%& &
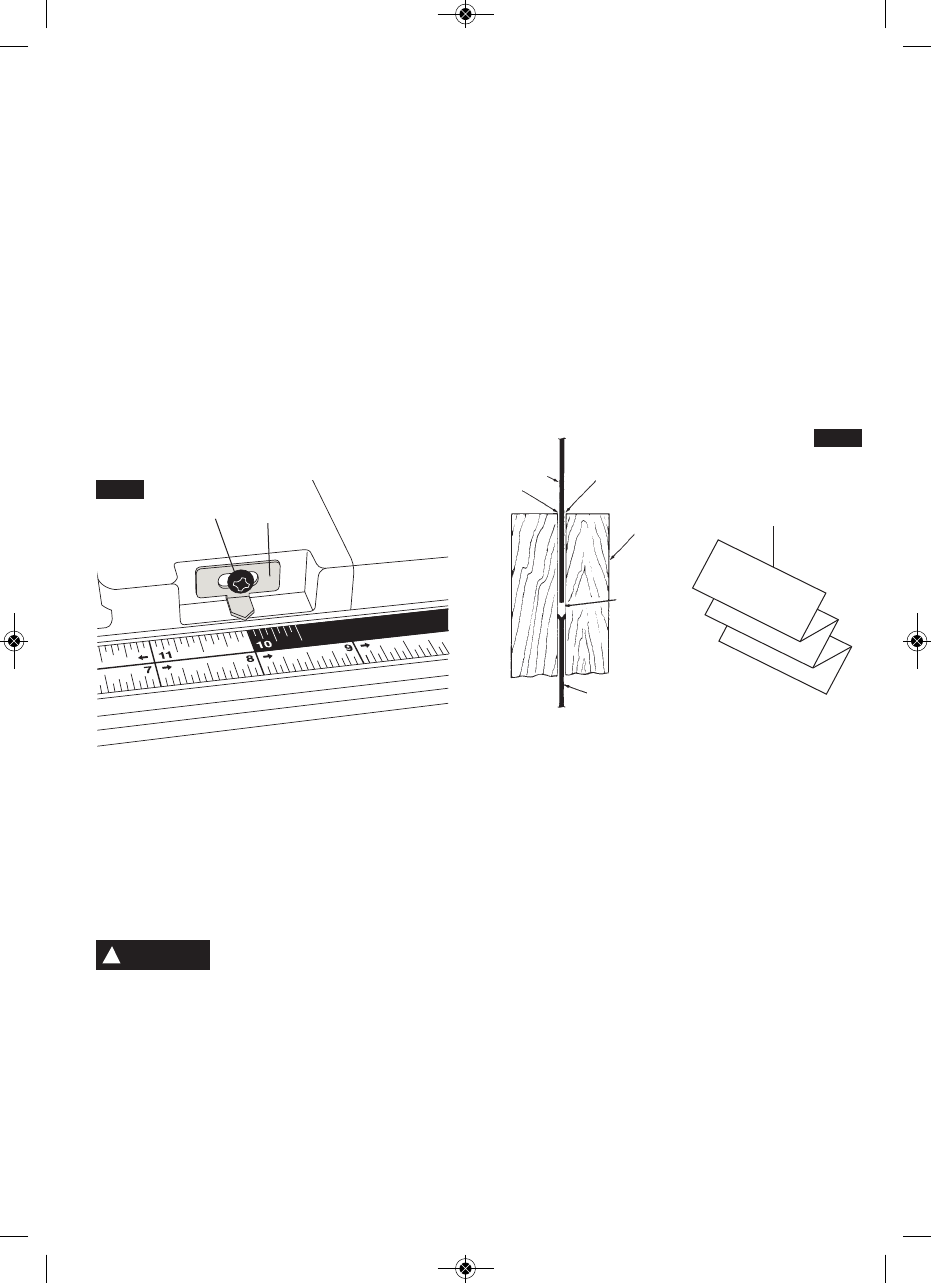
If an adjustment to the table pointer is necessary,
loosen pointer ad justment screw , adjust pointer
and tighten screw (Fig. 25).
The table pointer should always be adjusted
relative to fence pointer.
1. Adjust fence pointer to (zero) - see “Rip Fence
Pointer Adjustment”.
2. Make sure the table is in the closed position and
slide fence to the right until the fence pointer is
at 10”. (Note: A portion of the fence will be off
the rail.)
3. Look at fence pointer and note 10” on lower
scale.
4. Adjust the table pointer to the same reading
on upper scale as that shown on the fence
pointer. Both pointers must agree when fence is
at this position.
$( &
"!$& & The Riving Knife must always be
in line with the Saw Blade . The Riving Knife is
thinner than the width of the Kerf by approxi-
mately five thicknesses of paper on each side,
depending on the thickness of paper used
(Fig 26). ;@1 The Kerf is the width of the cut
made by the teeth on the saw blade.
To prevent personal injury, always
disconnect plug from power
source before making any adjustments and when
attaching or removing the Smart Guard System.
$( &
!& The Riving Knife has been properly aligned
at the factory - Check the alignment before making
any adjustments.
1. Raise the Saw Blade to maximum height and set
the bevel angle to 0°.
2. Remove the Barrier Guard Assembly and Anti-
Kickback Device (see manual).
3. Place the Rip Fence on the right side and slide
it until it touches the tips of the Saw Blade - Lock
fence.
4. Check the alignment:
A. From the top, look down over the Fence and
check that the Riving Knife is in line (front to
back) with the blade and parallel with the fence.
B. Slide the fence away from the blade. Look over
the front of the blade and check that the Riving
Knife is in line with the blade.
C. If steps A or B show misalignment, proceed to
“Adjusting Riving Knife”.
'%& $(
1. Raise the Saw Blade to maximum height and
set the bevel angle to 0°.
2. Remove the Barrier Guard Assembly and Anti-
Kickback Device (see manual).
3. Remove the Table Insert.
4. Place the Rip Fence on the right side and slide
it until it touches the tips of the Saw Blade -
Lock fence.
5. Loosen Hex Nut with 10mm open end wrench
(Fig. 27). Slightly loosen Clamping Screws (1/4-
1/2 turns) using a 5mm Allen wrench provided
with table saw (stored in the rear of saw). Loosen
Set Screw using a flat screwdriver (Fig. 27).
6. Make four folds in a small piece of paper (6” x 6”)
forming five layers (Fig. 26). Paper is used as a
“Spacing Gauge.”
FIG. 25
1
2
!
WARNING
5
FIG. 26
5
4
2
1
5
WORK
LOOKING DOWN
ON SAW
BM 2610014415 01-11 E:BM 2610012089 12-10 E 1/10/11 7:17 AM Page 20


