


!&The spacing instructions are based on
using the standard kerf blade supplied with your
GTS1031. If a smaller or larger kerf blade is used,
adjust the spacer. For instance, if the kerf of the
replacement blade is larger, use 6 or more thick-
nesses of paper and if it is smaller, use 4 or less
thicknesses. Depending on the type of paper
used as a spacer, you may need to modify the
number of folds for proper alignment.
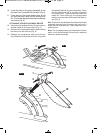
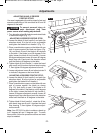
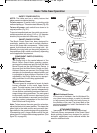
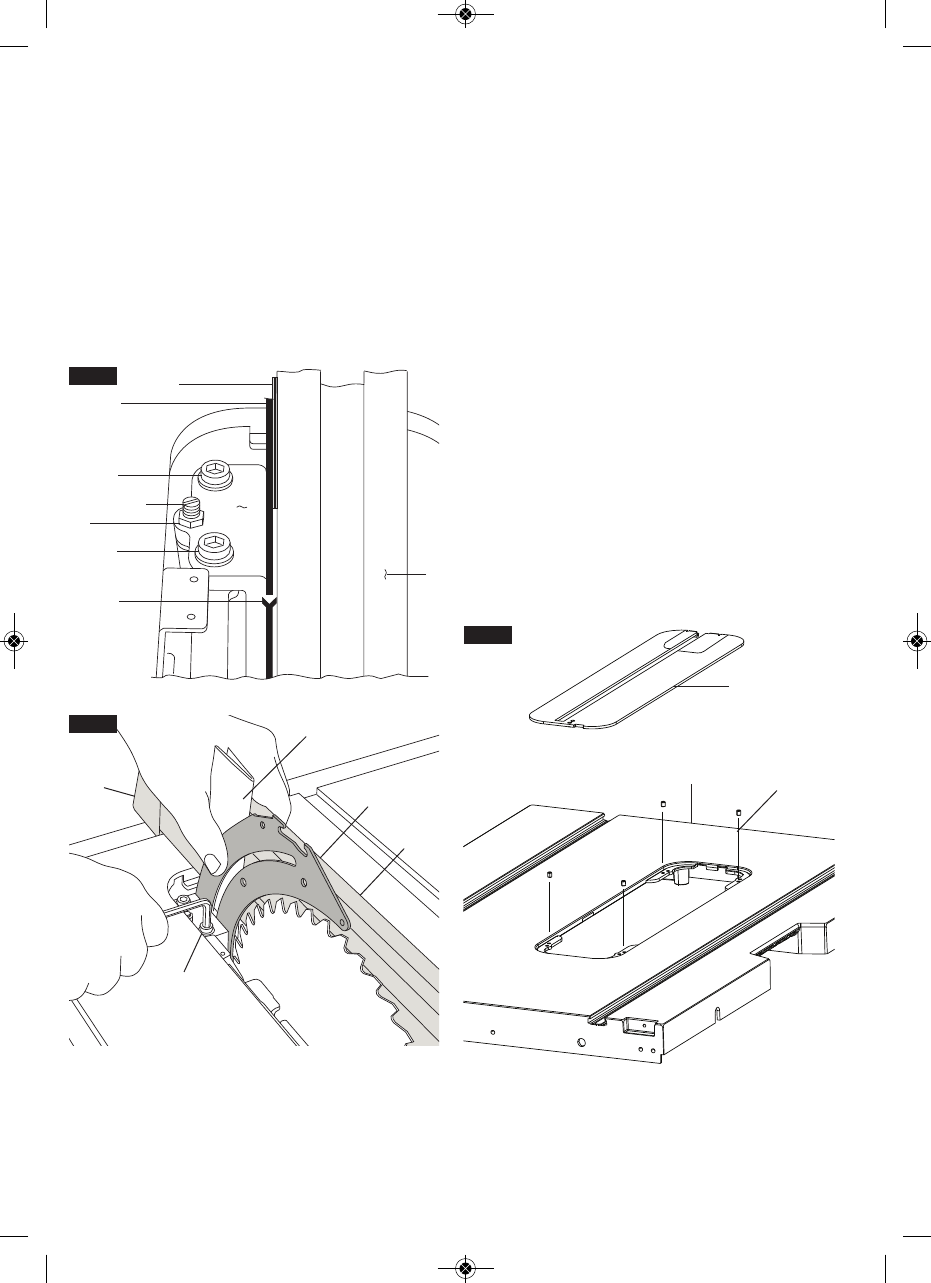
7. Insert folded paper between Riving Knife and
Fence .
A. Hold Riving Knife and paper firmly against
Fence (Fig. 27 & 28).
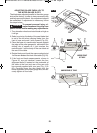
B. Lightly tighten the clamp screws .
C. Remove the paper - Slide fence away from
blade.
D. Slowly turn the Set Screw while watching the
Riving Knife tilt until it is in line with the blade.
E. Recheck squareness of riving knife to table by
sliding fence against blade. Readjust if neces-
sary.
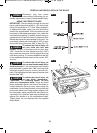
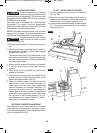
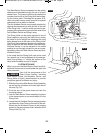
8. After completing adjustments:
A. Lightly tighten hex nut (hold set screw posi-
tion with screwdriver while tightening nut).
B. Fully tighten Clamp Screws with Allen
wrench. Then fully tighten the hex nut.
!& Check that the riving knife stays in line with
blade when the blade is tilted at any angle. Replace
the Barrier Guard Assembly and Anti-Kickback De-
vice before making cuts.
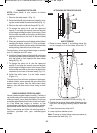
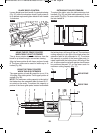
'%& && %$&
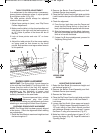
The GTS1031 table insert slot includes four (4) ad-
justment screws to set the height (Fig. 29). Place
the insert onto the table . Place a straight edge
(such as the metal ruler from a combination square)
across the table top and insert top – the surfaces
should be at the same level. If adjustment is neces-
sary, use the included 2 mm “L wrench” (packed with
the table insert) to rotate each set screw up or down.
-21-
8
3
3
1
5
7
6
8
8
1
2
5
3
FIG. 27
FIG. 28
9
FIG. 29
11
10
BM 2610014415 01-11 E:BM 2610012089 12-10 E 1/10/11 7:17 AM Page 21