


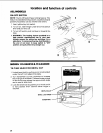
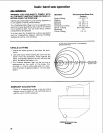
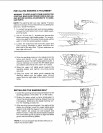
Light Bulb
To replace the light bulb remove the front cover. Use
a phillips screwdriver to remove the lens and replace
the bulb. The light bulb is a 25 watt bayonet mount
bulb.
Motor
Frequently blow or vacuum out any sawdust from
the motor, Follow lubrication instruction on the
motor label.
WARNING: TO AVOID EYE INJURY FROM BLOW-
ING DEBRIS, WEAR SAFETY GOGGLES WHEN
BLOWING OUT SAWDUST.
WARNING: TO AVOID ELECTROCUTION OR FIRE,
IMMEDIATELY REPLACE A WORN, CUT, OR
DAMAGED POWER CORD.
Lubrication
All of the ball bearings are packed with grease at the
factory. They require no further lubrication.
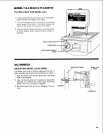
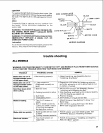
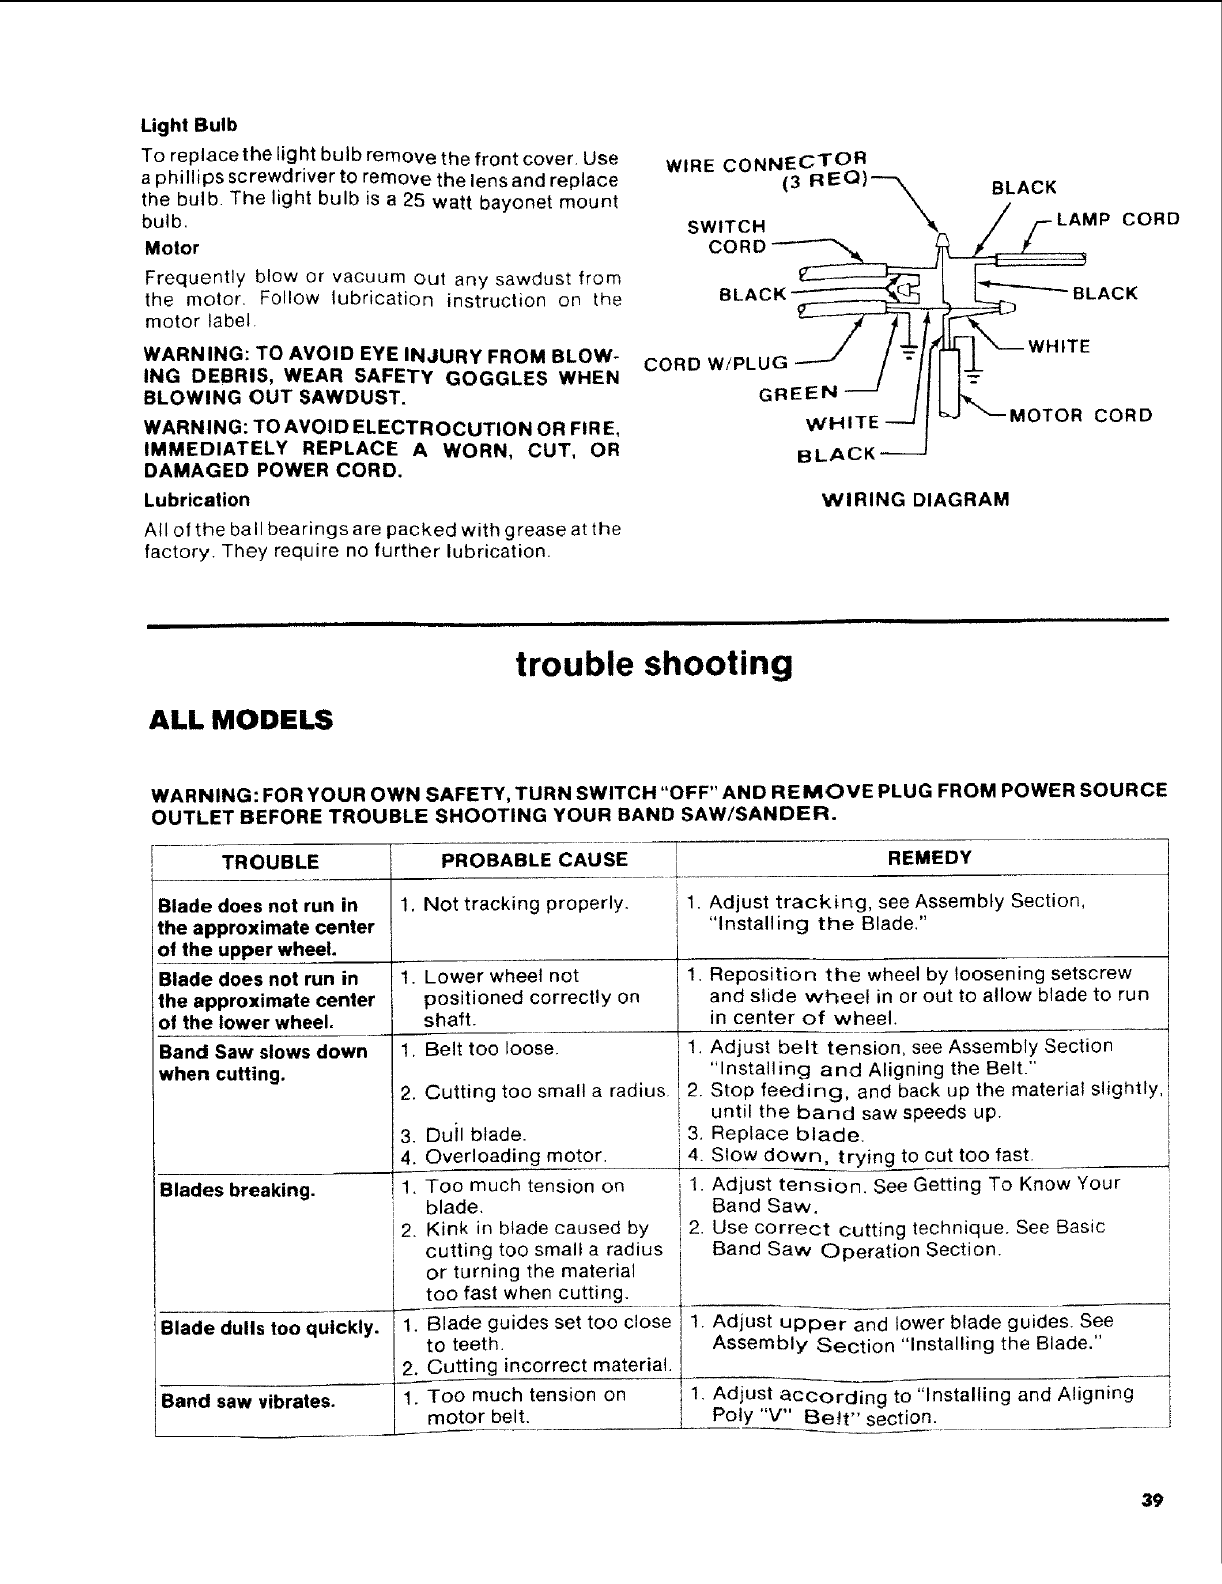
WIRE CONNECTOR
(3 REO)---_ BLACK
SWITCH "_k / F -LAMP CORD
/ / _ r_JJ.1] "_----WHITE
CORD W!PLUG_ / " I I€
GRE_NHI--_E__ L_MOTOR CORD
BLACK_
WIRING DIAGRAM
ALL MODELS
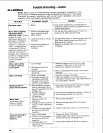
trouble shooting
WARNING: FOR YOUR OWN SAFETY, TURN SWITCH "OFF" AND REMOVE PLUG FROM POWER SOURCE
OUTLET BEFORE TROUBLE SHOOTING YOUR BAND SAW/SANDER.
TROUBLE PROBABLE CAUSE REMEDY
1. Not tracking properly. 1. Adjust tracking, see Assembly Section,
I "Installing the Blade."
1.
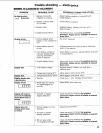
Blade does not run in
the approximate center
of the upper wheel.
Blade does not run in
the approximate center
of the lower wheel.
Band Saw slows down
when cutting.
Blades breaking.
I
Blade dulls too quickly.
Band saw vibrates.
1,
2.
3.
4.
1.
2.
2.
Lower wheel not 1,
positioned correctly on
shaft.
Belt too loose. 1,
Cutting too small a radius 2.
Duil blade. 3.
Overloading motor, i 4.
Too much tension on 1.
blade.
Kink in blade caused by 2.
cutting too small a radius
or turning the material
too fast when cutting.
Blade guides set too close 1.
to teeth.
Cutting incorrect material.
Too much tension on -11
motor belt.
Reposition the wheel by loosening setscrew
and slide wheel in or out to allow blade to run
in center of wheel.
Adjust belt tension, see Assembly Section
"Installing and Aligning the Belt."
Stop feeding, and back up the material slightly,
until the band saw speeds up.
Replace blade.
Slow down, trying to cut too fast.
Adjust tension. See Getting To Know Your
Band Saw,
Use correct cutting technique. See Basic
Band Saw Operation Section.
Adjust upper and lower blade guides. See
Assembly Section "Installing the Blade."
Adjust according to "Installing and Aligning {r
Poly "V" E_e_t" section.
39