


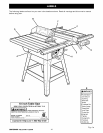

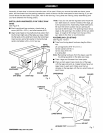
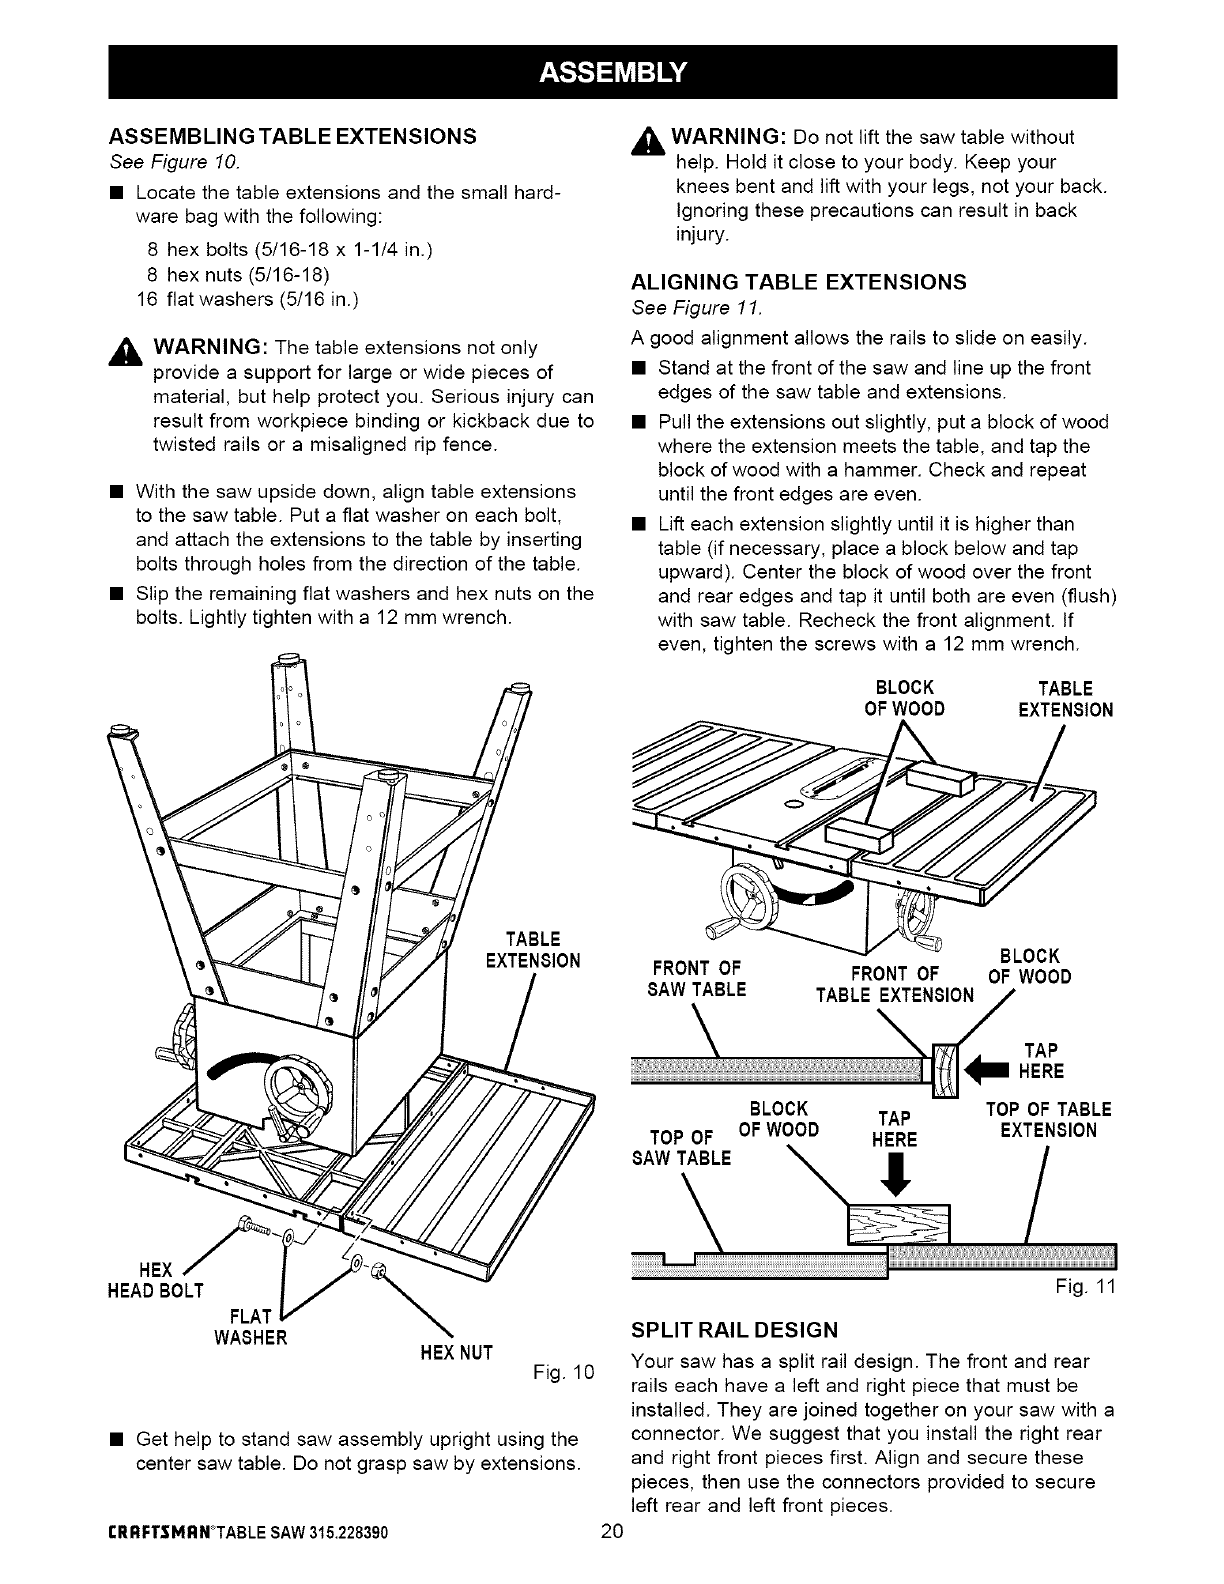
ASSEMBLINGTABLE EXTENSIONS
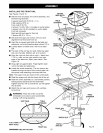
See Figure 10.
• Locate the tame extensions and the sma(I hard-
ware bag with the following:
8 hex bolts (5/16-18 x 1-1/4 in.'
8 hex nuts (5/16-18)
16 flat washers (5/16 in.)
,_ WARNING: The table extensions not only
provide a support for large or wide pieces of
material, but help protect you. Serious injury can
result from workpiece binding or kickback due to
twisted rails or a misaligned rip fence.
• With the saw upside down, align table extensions
to the saw table. Put a flat washer on each bolt,
and attach the extensions to the table by inserting
bolts through holes from the direction of the table.
• Slip the remaining flat washers and hex nuts on the
bolts. Lightly tighten with a 12 mm wrench.
TABLE
EXTENSION
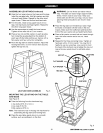
,_, WARNING: Do not lift the saw table without
u
help. Hold it close to your body. Keep your
knees bent and lift with your legs, not your back.
Ignoring these precautions can result in back
injury.
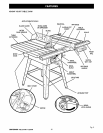
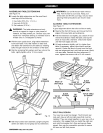
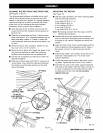
ALIGNING TABLE EXTENSIONS
See Figure 11.
A good alignment allows the rails to slide on easily.
• Stand at the front of the saw and line up the front
edges of the saw table and extensions.
• Pull the extensions out slightly, put a block of wood
where the extension meets the table, and tap the
block of wood with a hammer. Check and repeat
until the front edges are even.
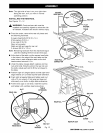
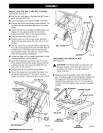
• Lift each extension slightly until it is higher than
table (if necessary, place a block below and tap
upward). Center the block of wood over the front
and rear edges and tap it until both are even (flush)
with saw table. Recheck the front alignment. If
even, tighten the screws with a 12 mm wrench.
BLOCK
OFWOOD
BLOCK
FRONT OF FRONT OF OF WOOD
SAWTABLE TABLE EXTENSION
TABLE
EXTENSION
TOP OF
SAW TABLE
TAP
HERE
BLOCK TAP TOP OF TABLE
OFWOOD EXTENSION
HERE
!
HEX
HEADBOLT
FLAT
WASHER
HEXNUT
Fig. 10
• Get help to stand saw assembly upright using the
center saw table. Do not grasp saw by extensions.
rRRFTSMRN*TABLE SAW315.228390 2O
Fig. 11
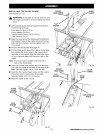
SPLIT RAIL DESIGN
Your saw has a split rail design. The front and rear
rails each have a left and right piece that must be
installed. They are joined together on your saw with a
connector. We suggest that you install the right rear
and right front pieces first. Align and secure these
pieces, then use the connectors provided to secure
left rear and left front pieces.