


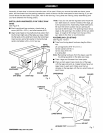
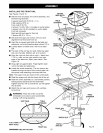
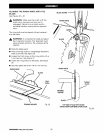
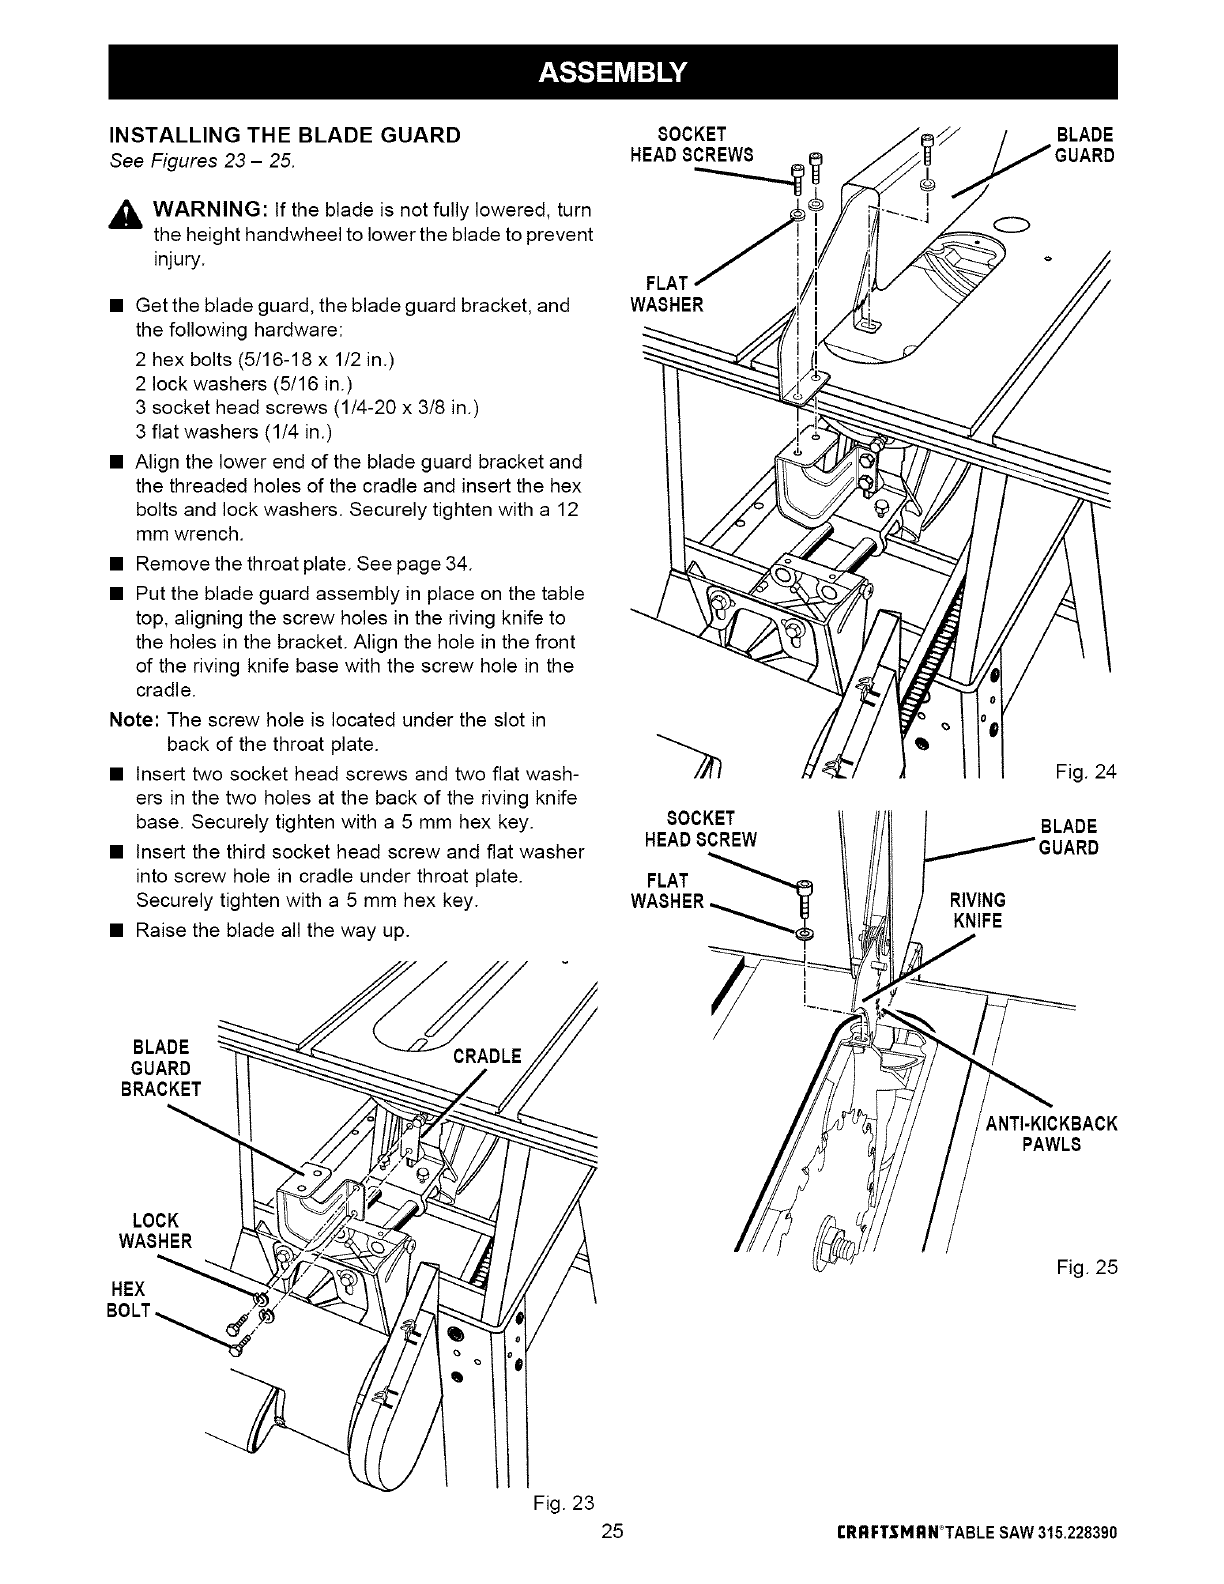
INSTALLING THE BLADE GUARD
See Figures 23- 25.
_k WARNING: If the blade is not fully lowered, turn
the height handwheel to lower the blade to prevent
injury
• Get the blade guard, the blade guard bracket, and
the following hardware:
2 hex bolts (5/16-18 x 1/2 in.)
2 lock washers (5/16 in.)
3 socket head screws (1/4-20 x 3/8 in.)
3 flat washers (1/4 in.)
• Align the lower end of the blade guard bracket and
the threaded holes of the cradle and insert the hex
bolts and lock washers. Securely tighten with a 12
mm wrench.
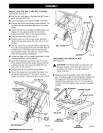
• Remove the throat plate. See page 34.
• Put the blade guard assembly in place on the table
top, aligning the screw holes in the riving knife to
the holes in the bracket. Align the hole in the front
of the riving knife base with the screw hole in the
cradle.
Note: The screw hole is located under the slot in
back of the throat plate.
• Insert two socket head screws and two flat wash-
ers in the two holes at the back of the riving knife
base. Securely tighten with a 5 mm hex key.
• Insert the third socket head screw and flat washer
into screw hole in cradle under throat plate.
Securely tighten with a 5 mm hex key.
• Raise the blade all the way up.
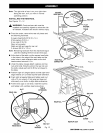
8OCKET
HEAD8CREW8
FLAT
WASHER
8OCKET
HEAD8CREW
FLAT
WASHER
O
RIVING
KNIFE
BLADE
Fig. 24
BLADE
BLADE
GUARD
BRACKET
ANTI-KICKBACK
PAWLS
LOCK
WASHER
HEX
BOLT_.
Fig. 25
Fig. 23
25 rRRFTSMRN°TABLESAW315.228390