


Copyright© 2006 Digital Spectrum Solutions, Inc. Page 40
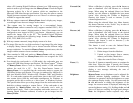
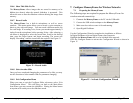
11.5.13 Network Information
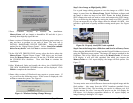
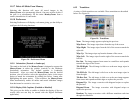
This menu is used to view the network information for a USB
Network device such as Ethernet or 802.11 wireless networks. The
settings that are presented are shown in Figure 26.
Figure 26 – Network Settings
12 Tips and Techniques
This chapter discusses ways to enhance the use of MemoryFrame
TM
. Areas
covered include: image optimization, care of the LCD screen, securing
MemoryFrame in busy environments, and changing the decorative frame.
12.1 Optimizing Images for Display on MemoryFrame
For a leisurely slideshow that displays images once a minute, performance
is not an issue. For messaging environments, image display periods must
be able to be small. It helps to understand a little about the MemoryFrame
architecture rules in order to design slideshows that display slides with the
best performance and quickly. There are several factors that affect the
slide performance:
Copyright© 2006 Digital Spectrum Solutions, Inc. Page 13
6.8 Removing an Image from a Slideshow
There are three ways to remove an image from a slideshow. The first
method is to Right-Click on the image that you wish to remove, and select
Delete or Cut. The other method is to first select the image to be removed
by using Left-Click. Then, click EDIT, and select either Delete or Cut to
remove the Image from the slideshow. Alternatively, you can press the
delete key on the keyboard. Cut will make the image available in the
Windows Clipboard for subsequent Paste.
6.9 Inserting an Image into a Slideshow
In addition to the Drag-&-Drop and Paste functions discussed earlier, you
can also insert an image from a directory or storage device with the
“Insert” option available in the Edit menu. This option will ask you to
specify the location or Browse to find.
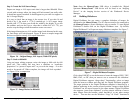
6.10 Rotating an Image in a Slideshow
The Rotate 90º option allows an image to be set to the desired orientation.
When Rotate 90º is selected, Digital PixMaster will rotate the currently
selected image 90º clockwise. Select the image you wish to rotate and
then click the “Rotate” function as many times as necessary until you
reach the desired orientation.
6.11 Hiding an Image in a Slideshow
You may not want to delete an image from a slideshow, but still not want
to display it in that slideshow. Un-checking Show Slide allows you to
hide that particular slide. This setting can also be reversed to unhide the
slide in the show.
6.12 Copying Images from one Slideshow to another
Since Digital PixMaster can have only one slideshow open at one time,
you must open/start another session of Digital PixMaster (by double
clicking on its icon again or invoking from the Windows Program list), in
order to copy images from one slideshow to another show. With two
instances of Digital PixMaster running, you can copy/paste or drag-n-drop
images from one show to another.
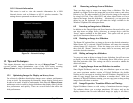
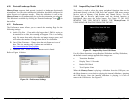
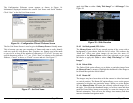
6.13 Image Properties: Transition Effects and Timings
Digital PixMaster features a wide variety of transitions between images.
The software allows you to assign transitions, fill colors, and set the
display duration time for each individual image (or apply to all slides).