


Copyright© 2006 Digital Spectrum Solutions, Inc. Page 30
Select While in the Menu system, the Select button functions
as the “select” key to select a thumbnail or to select and
execute a text menu option.
Reverse (◄) While in the Menu system, pressing the Reverse (◄)
button will move the item selector either up to the prior
menu text line or to the left to the prior thumbnail,
depending upon the current menu context. Pressing the
Reverse button while a slideshow is playing will bring
up thumbnail views so you can scroll through the stored
images.
The basis of operation is that the MemoryFrame will highlight the
currently selected item in one of two ways. If the item is a thumbnail, the
selected thumbnail will assume the center location of 5 potential
thumbnails across the top portion of the screen. If the item is text, the
selected text option will be highlighted in a different color than the rest of
the menu. This highlight is called the selector. Once the appropriate item
has been highlighted, you can press Select to perform the selected
function.
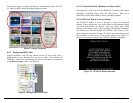
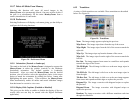
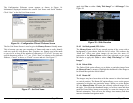
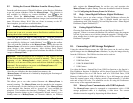
11.2 Main Menu
When you press the Menu button during a slideshow, the
MemoryFrame™ will stop displaying the slideshow and enter the menu
system into the “Main” Menu. Figure 17 is a sample of the Main Menu
screen.
Figure 17 - Main Menu
Copyright© 2006 Digital Spectrum Solutions, Inc. Page 23
8. Configure MemoryFrame for Photo Sharing
Because the MemoryFrame is web enabled, images can be sent directly to
the
MemoryFrame from selected photo sharing sites. This is a new an
exciting way of having family and friends send their latest photos directly to
your
MemoryFrame. Open the Configuration Wizard through Digital
PixMaster by clicking Digital Frame, Properties, and highlighting the desired
frame for sharing. Click the Configure button and go directly to Register Your
Frame. Follow the instructions as noted below.
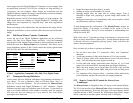
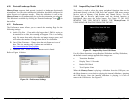
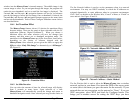
The Register Your Frame screen is used to register the frame for use with
photo sharing. Type in your email address, password, and secret answer. Click
“Next” to advance to Configure Photo Sharing, “Cancel” to abort, or “Finish”
to store and exit. See Figure 22.
Figure 22 – Register the Frame
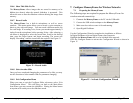
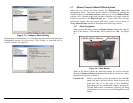
The Configure Photo Sharing screen is used to select the desired photo sharing
provider(s) and register your account information. This is used to associate a
MemoryFrame with a photo service and authorized senders. Select the photo
sharing provider from the pull down menu (updated as provider partners are
added), and your email address. If you have not set up an account with the
photo sharing provider, click on “Register”, which will take you to their site
for photo sharing registration. Once done, you, or who you authorize, can send
images directly to the MemoryFrame via the internet. Click “Next” to advance
to Summary, “Cancel” to abort, or “Finish” to store and exit. See Figure 23.