


Copyright© 2006 Digital Spectrum Solutions, Inc. Page 50
• Unit was turned on without the dongle attached. The Beta release
firmware only detects the wireless dongle on power-up. Turn off the
MemoryFrame, plug in the dongle and restart the unit.
• Router was turned off after MemoryFrame unit was started. Restart
the MemoryFrame.
• Too much interference between the MemoryFrame and the router, try
moving the MemoryFrame closer to the router (2 yards is considered
very close).
Q: The MemoryFrame seems “frozen” at the opening screen. How do I
reset the unit?
A: If a system gets into a situation where it hangs on the boot-up
initialization screen and never advances beyond that point, the
firmware has a hang-recovery button-sequence. This special button
sequence will delete all photos/audio/captions in the unit by
reformatting the Flash-file-system and replace with a default
slideshow of 3 pictures (girl scouts, dog-cat, picture of retail box).
Below are the steps to initiate this hang-recovery button-sequence:
1. Power-off unit and disconnect the USB cable
2. Power-on the unit and within 10 seconds proceed to step 3
3. Using two hands, simultaneously hold down the following four (4)
buttons: Special,
(Volume), (Forward), (Reverse) (must hold
down during entire power-up sequence).
4. If the buttons are continuously held down during the power-up (may
take up to 3 minutes), then at the end of power-up sequence, a special
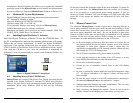
screen will be presented which asks: REFORMAT STORAGE?
YES NO
5. Once the special screen described in step 4 is on the screen, release the
4 buttons and then use the
(forward) or (reverse) button to move
the "blue-highlight-cursor" to be over the YES. Then press SELECT.
This will cause the unit to reformatting the Flash-file-system. When it
is finished, it will prompt you to move to Step 6.
6. When the MemoryFrame's screen says Please power the frame
off/on, cycle the power.
7. The unit will now boot normally (may take up to 3 minutes) showing a
default slideshow of 3 pictures.
Copyright© 2006 Digital Spectrum Solutions, Inc. Page 3
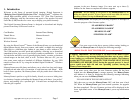
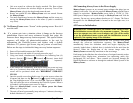
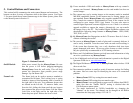
4.4 Connecting MemoryFrame to the Power Supply
MemoryFrame operates on an external power adapter that plugs into an
ordinary wall outlet. Use only the supplied MemoryFrame external Power
Supply or equivalent. MemoryFrame power input is 12VDC @ 2.0A.
Other power adapters will cause damage to MemoryFrame and void the
warranty. Do not use a power adapter that has an A.C. Output. The Power
Receptacle for the MemoryFrame is located in the rear right area, in a
recess.
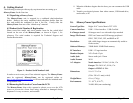
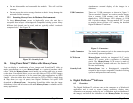
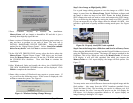
4.5 Power-on Initialization
Important Note: During the power-on sequence of the MemoryFrame,
the initialization screen will take a few moments to appear. The entire
power-on sequence may take several minutes and you will be unable
to use the push-button menu system until the initialization screen is
replaced by the opening image of the slideshow.
Move the MemoryFrame Power Switch to the “ON” position. After going
through the power-on initialization sequence, the MemoryFrame
automatically enters the slideshow mode and begins displaying the
currently loaded show (a default show is included with the unit from the
factory). When the display-time of the current image ends, the
MemoryFrame automatically transitions to the next image.
Each image in the slideshow has a broad array of assigned controls such as
transition effect, display-time, orientation, text captioning, audio clip,
background fill, and others.. These controls are accessed through the
Digital PixMaster
TM
software or through the onboard Menu System of the
MemoryFrame.