


Copyright© 2006 Digital Spectrum Solutions, Inc. Page 34
11.4.6 Show This Slide Yes/No
The MemoryFrame allows images that are stored in memory to be
hidden (not shown) when the normal slideshow is presented. This
allows the user to alter the slideshow without deleting the image from
memory.
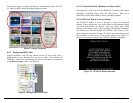
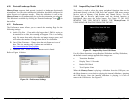
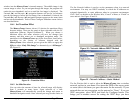
11.4.7 Record Audio
The MemoryFrame has a built-in microphone as well as stereo
speakers. This menu option allows you to record a voice narration or
music to play with each image. You can record a different audio clip
for each image. If recording voice, locate your mouth approximately 4
inches from the microphone before pressing Select. After selecting, a
sub Menu is displayed to select the record time. Scroll to the desired
time, press the Select button, and begin recording. The screen will
display “Recording” until the record time has expired. See Figure 21.
Figure 21 – Record Audio
11.4.8 Select Another Slide
Once you have completed changing the parameters of a slide, you may
use this function to select another slide for parameter changing.
11.4.9 Exit Configuration Menu
When you want to exit the Configure Slides sub-menu, select “Exit
Configuration Menu.” This will bring you back to the Main Menu
from where you may resume the slideshow. Hitting the Menu button
at anytime will return you to the slideshow mode.
Copyright© 2006 Digital Spectrum Solutions, Inc. Page 19
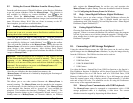
7. Configure MemoryFrame for Wireless Networks
7.1 Preparing the MemoryFrame
The following steps are required to prepare the MemoryFrame for
wireless network connectivity:
1. Connect the MemoryFrame to the PC via the USB cable
2. Connect the USB wireless adapter to the MemoryFrame.
3. Make sure the wireless router is On and running.
4. Open Digital PixMaster
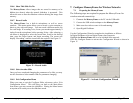
Use the Configuration Wizard to complete the installation as follows:
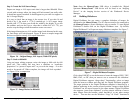
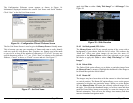
In Digital PixMaster click on Digital Frame, then Properties
Highlight the MemoryFrame that is to be included in the network.
Click the Configure button to activate the Configuration Wizard as shown in
Figure 15
Figure 15 – Activate Configuration Wizard