


Operation
3–16 975-0012-01-02 Rev A
Start-up
Once the inverter is properly connected to the batteries, AC source, and loads
(using a sub-panel) the inverter is ready for operation. Recheck the controls and
ensure they are in the proper position. Recheck all wiring and ensure it is correct.
Starting the inverter:
1. Apply DC power to the inverter by switching on the DC disconnect circuit
breaker. The inverter will go through a self-test and then shut OFF.
2. Press the ON/OFF button once. The inverter will sound an audible chirp.
3. Apply AC power to the inverter.
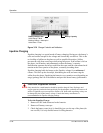
4. The inverter starts charging the batteries in the Bulk mode, indicated by the
CHARGER LED illuminating a solid orange.
5. Using a true RMS AC voltmeter, check the output voltage of the inverter. This
voltage can be checked at either the AC terminal block or in the sub-panel
(between the HOT and NEUTRAL lines). The voltage should be 120 Vac
(230 Vac for “E” models, 220 Vac for “W” models, or 105 Vac for “J” and
“K” models). (Non-true RMS meters register from 90 to 110 Vac.)
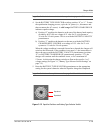
6. Switch the AC disconnect circuit breaker to OFF. The inverter will go into the
inverter mode (if a sufficient load is applied to the AC output while in the
search mode). The green INVERTER MODE LED will light solid indicating
the inverter is active. The voltage on the AC output of the inverter will remain
the same as above (± 5% maximum).
7. Reapply the AC power by switching the AC disconnect to ON. Allow the
batteries to fully recharge.
Important:
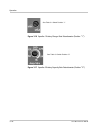
If the inverter is in the SEARCH MODE (INVERTER MODE LED
flashing) and a sufficient load is not available to bring the inverter up to full voltage, turn
the SEARCH MODE WATTS potentiometer fully CCW to defeat the search function.
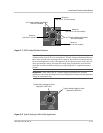
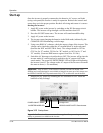
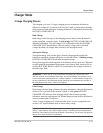
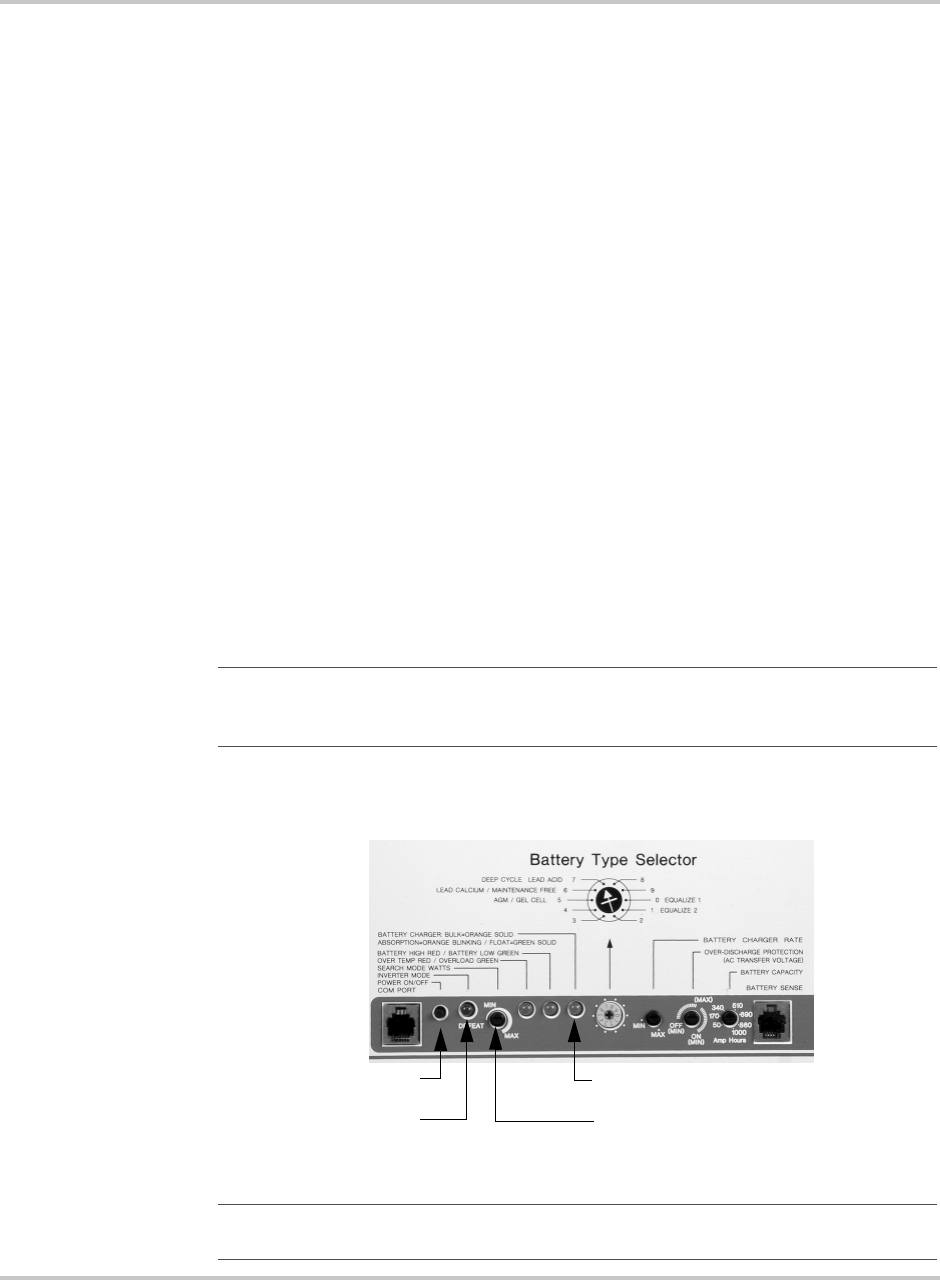
Figure 3-13
Startup Items
Important:
The unit will not use renewable energy for AC output as long as AC input
(utility or generator) is available to the inverter.
Charger LED
INVERTER MODE LED
POWER ON/OFF Switch
SEARCH MODE WATTS Potentiometer