


-22-
Model G0773 (Mfd. Since 12/14)
Mounting & Leveling
—If mounting machine to a stand (not includ-
ed), follow the instructions included with it.
Ensure stand is anchored to floor.
Follow these guidelines when mounting your
machine to ensure safe and accurate cutting
results:
• Make sure stand or workbench can ade-
quately support weight of machine and mate-
rials, and that it will not move or vibrate dur-
ing operation.
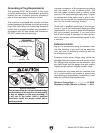
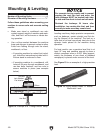
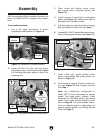
• Use a silicon sealant between the machine
base and chip pan to prevent coolant or other
fluids from leaking through onto the stand,
workbench, or floor.
Chip Pan
Workbench
Hex Bolt
Flat Washer
Flat Washer
Silicon
Lock Washer
Hex Nut
Lathe
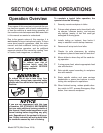
Figure 12. Example of a "Through Mount" setup.
— If mounting machine to a workbench, drill
holes all the way through workbench, and
use hex bolts, washers, and hex nuts to
secure machine in place (see example
below).
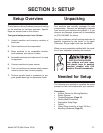
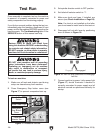
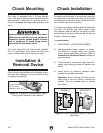
Figure 13. Grizzly Model H2683 12" Master
Machinist's Level.
Leveling machinery helps precision components,
such as bedways, remain straight and flat dur-
ing the lifespan of the machine. The bed on a
lathe that is not level may slowly twist due to the
dynamic loads placed on the machine during
operation.
For best results, use a precision level that is at
least 12" long and sensitive enough to show a
distinct movement when a 0.003" shim (approxi-
mately the thickness of one sheet of standard
newspaper) is placed under one end of the level.
See Figure 13 for an example of a high-precision
level.
For accurate turning results and to prevent
warping the cast iron bed and ways, the
lathe bedways MUST be leveled from side-
to-side and from front-to-back on both ends.
Recheck the bedways 24 hours after
installation, two weeks after that, and then
annually to make sure they remain level.
Number of Mounting Holes ............................ 4
Diameter of Mounting Hardware .................
1
⁄2"