


-30- G0501 Sliding Table Saw
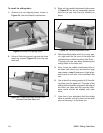
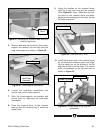
Figure 45. Installed clamp assembly.
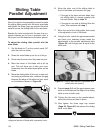
7. Check if the bottom edge of the aluminum
fence piece rests on the top surface of the
table. Note—The aluminum fence piece will
scratch the table surface if the ride height is
not adjusted correctly.
— If the bottom edge of the aluminum fence
piece does not rest on the table, then
fence is correctly adjusted. Proceed to the
next sub-section.
— If the bottom edge of the aluminum fence
piece does rest on the table, then contin-
ue on to the next step.
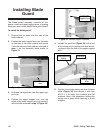
8. Loosen the cam bolt located on the end of
the fence clamp assembly (see Figure 45).
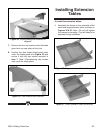
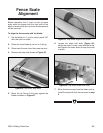
Crosscut Table
To assemble the crosscut table:
1. Swing the crosscut table brace away from
the table saw base. Note—A magnet holds
the support against the base. A strong pull is
necessary to free the support.
2. Position the brace perpendicular to the long
edge of the sliding table.
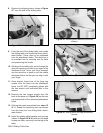
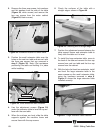
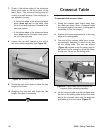
3. One end of the crosscut table has a clamp-
ing assembly designed to attach to the bar
on the sliding table. The two cap screws
(Figure 46) located under the clamp need to
be backed out far enough to allow the clamp
to slip over the bar on the sliding table.
9. Rotate the cam up or down to adjust the ride
height of the fence.
10. Retighten the cam bolt and check the ride
height. Re-adjust if necessary.
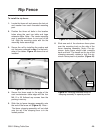
4. Lift the crosscut table and slip the clamp over
the bar on the sliding table and set the other
end of the crosscut table onto the shaft that
protrudes up from the brace (Figure 47).
Figure 46. Cap screws used to secure the
crosscut table clamping assembly.