


CHAPTER 3
Preparing the Robot
1 Robot Installation Environment ...............................................3-1
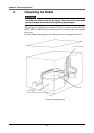
2 Unpacking the Robot ..............................................................3-2
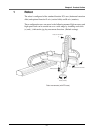
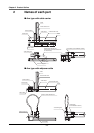
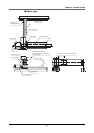
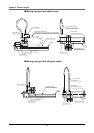
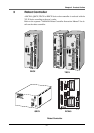
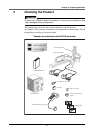
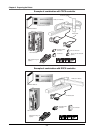
3 Checking the Product .............................................................3-3
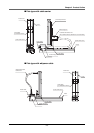
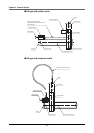
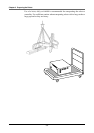
4 Transporting the Robot ...........................................................3-5
5 Installation ..............................................................................3-7
5-1 Installation base ............................................................................... 3-7
5-2 Installing the Robot .......................................................................... 3-8
6 Protective connections ...........................................................3-9
7 Connecting the Robot Cables ...............................................3-10
7-1 Connecting with the DRCX controller ............................................ 3-12
7-2 Connecting with the TRCX controller ............................................. 3-14
7-2-1 3-axis model ..................................................................................3-14
7-2-2 4-axis model ..................................................................................3-16
7-3 Connecting to the QRCX or RCX40 controller ............................... 3-18
8 Installing the Tool ..................................................................3-20
9 User Wiring and User Piping ................................................3-21
10 Setting the Robot ..................................................................3-22
10-1 Setting the payload ........................................................................ 3-22
10-2 Setting the maximum speed .......................................................... 3-23
10-3 Setting the acceleration ................................................................. 3-24
11 Absolute Reset .....................................................................3-25