Prestige 1100 Internet Access Router
Internet Access 3-3
3.2.3 DHCP Configuration
DHCP (Dynamic Host Configuration Protocol) allows the individual clients (workstations) to obtain the
TCP/IP configuration at start-up from a centralized DHCP server. The Prestige 1100 has the DHCP server
capability built-in. The DHCP server is disabled when [DHCP=] is [None.] When [DHCP=] is [Client, ]the
Prestige requests an IP address from a DHCP server on the Ethernet on which the [DHCP] field is set to
[Client].
IP Pool Setup
The Prestige 1100 is pre-configured with a pool of 6 IP addresses.
DNS Server Address(es)
DNS (Domain Name System) is for mapping a domain name to its corresponding IP address and vice versa,
e.g., the IP address of www.zyxel.com is 204.217.0.2. The DNS server(s) is extremely important because
without it, you must know the IP address of a machine before you can access it. The DNS server
address(es) that you enter in the DHCP setup is passed to the client machines along with the assigned IP
address and subnet mask. Make sure that you obtain the IP address of the DNS server(s) from your ISP.
Your workstations will need this information even if you don’t use the Prestige 1100’s DHCP server.
If the [Primary ]and[ Secondary DNS Server ]fields in [DHCP Setup] are not specified, i.e., left as 0.0.0.0,
the Prestige tells the DHCP clients that it itself is the DNS server. When a workstation sends a DNS query
to the Prestige, the Prestige forwards the query to the real DNS server learned through IPCP and relays the
response back to the workstation.
Please note that DNS proxy works only when the ISP uses the IPCP DNS server extensions. It does not
mean you can leave the DNS servers out of the DHCP setup under all circumstances. If your ISP gives you
explicit DNS servers, make sure that you enter their IP addresses in the [DHCP Setup] menu. This way, the
Prestige can pass the DNS servers to the workstations and the workstations can query the DNS server
directly without the Prestige’s intervention.
3.3 TCP/IP and DHCP Ethernet Setup
You will now use Menu 3.2 to configure the Ethernet of your Prestige 1100 for TCP/IP.
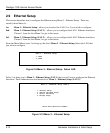
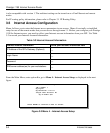
To edit Menu 3.2, select Menu 3. Ethernet Setup in the Main Menu and then the appropriate LAN. Then
select the submenu option 2, and press [ENTER]. The screen now displays Menu 3.2 - TCP/IP and DHCP
Ethernet Setup, shown next.


