


-15-
17B@A6;42C29&0.92$<6;A2?
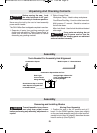
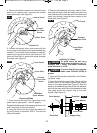
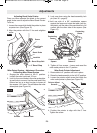
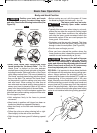
Once you have adjusted the blade to the correct
angle, make sure to adjust the Bevel Scale Pointer.
To do so,
1. Loosen the screw which holds the pointer in place
a quarter turn. (See Figure 13)
2. Align the pointer with the 0° line and retighten
screw.
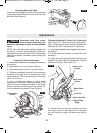
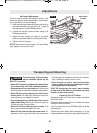
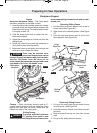
!6A2?2A2;A&F@A2:K17B@A:2;A$?<021B?2
.96/?.A6;4!6A2?2A2;A&F@A2:
1. Engage the miter detent at the 0° position.
Loosen the miter lock knob 1/2 turn.
2. Look for four round holes in the miter scale plate.
In each hole is a screw. Use the small end of the
6/4mm hex key or a 4mm hex key to loosen all
four screws 1 to 2 turns. This will loosen the miter
detent plate (see Figure 14).
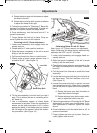
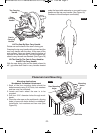
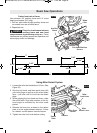
3. Lock saw down using the head assembly lock
pin (item 36 – page 8).
4. Hold one side of a 90° combination square
against the fence and rotate the table (and de-
tent plate) until the side of the saw blade is in full
contact with the other side of the square. (See
Figure 15)
5. Tighten all four screws – loosen and reset the
miter scale pointer to the “0” position.
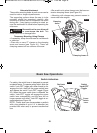
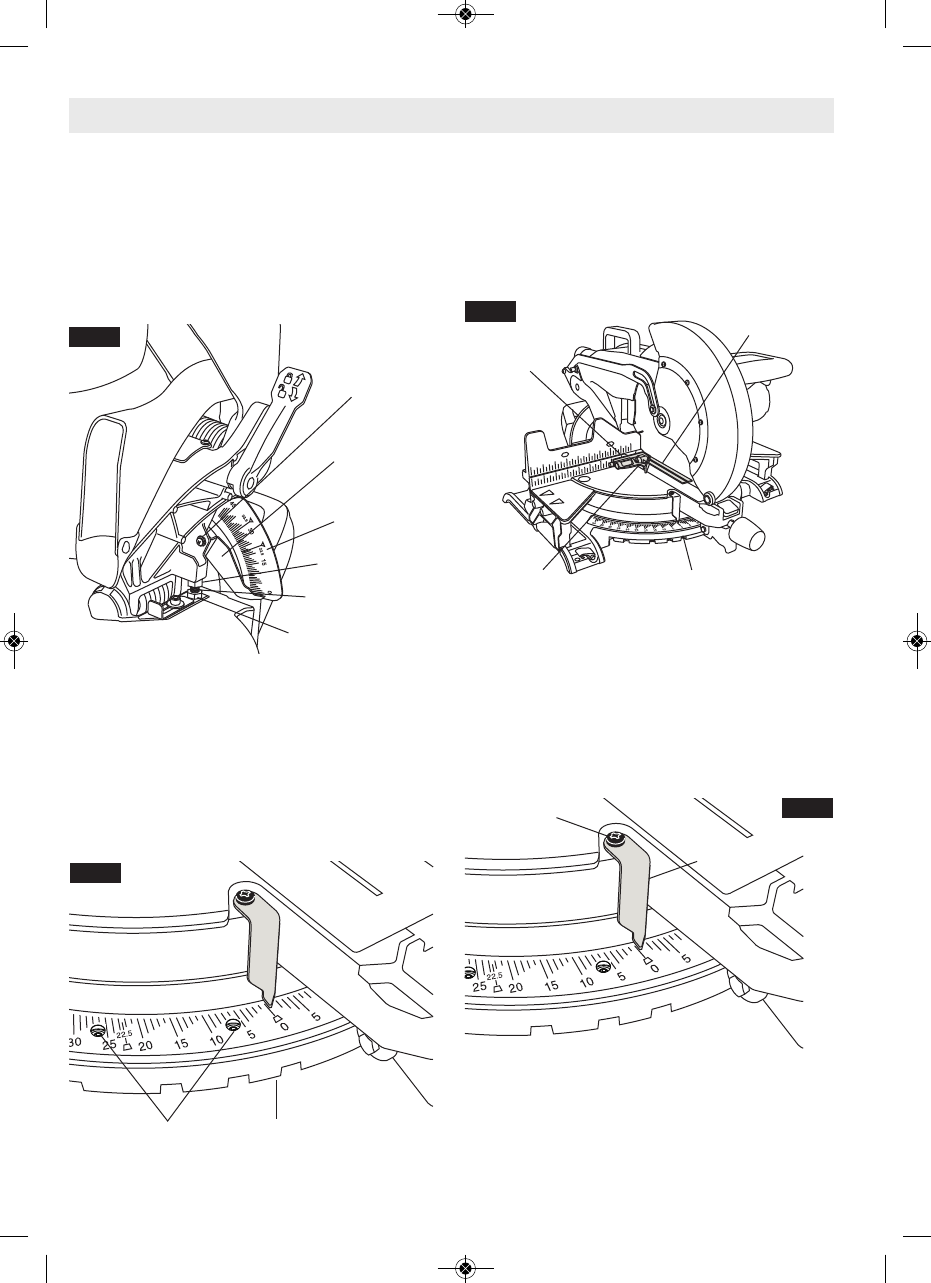
!6A2?&0.92$<6;A2?17B@A:2;A
1. Rotate table to 0° position and lock in place.
2. Raise the head assembly to the full UP position.
3. Loosen the pointer adjust screw that holds the
miter scale pointer in place (see Figure 16).
4. Position the pointer to align with the 0° line.
Tighten the screw.
17B@A:2;A@
2C29&0.92
$<6;A2?
2C29&0.92
<08"BA
2C29&A<=<9A
H2C29&A<=
FIG. 13
&0?2D
&0?2D@
2A2;A$9.A2
<:/6;.A6<;
&>B.?2
<;A.0A6;4
2;02
<;A.0A6;4
9.12
&2A!6A2?
2A2;AH
FIG. 14
FIG. 15
$<6;A2?17B@A
&0?2D@
!6A2?&0.92
$<6;A2?
FIG. 16
BM 2610021316 10-11 E:BM 2610021316 10-11 E.qxp 10/17/11 11:02 AM Page 15