-31-
&.D#=2?.A6<;@
?<D;!<916;4BE696.?F2;02
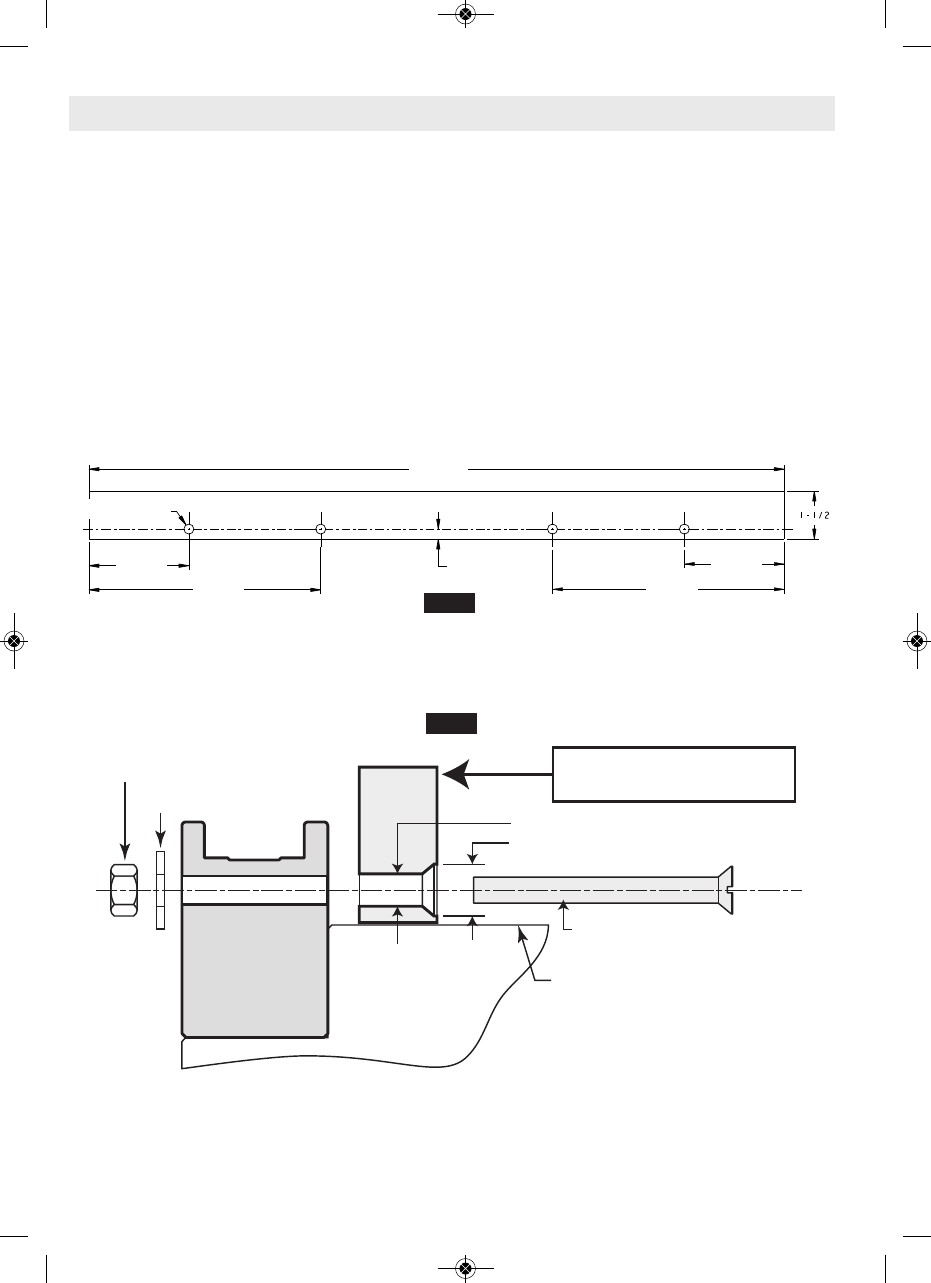
Note: The Stationary Fence is permanently
attached to the Saw Base (do not remove)
Stationary
Fence
5/16" Hole Through
1/2" Countersink
1/4" Flat Head Machine Screw x 2-1/2" Long
(need 4)
Flat Washer (need 4)
Nut (need 4)
Top of Base
and Table
Saw Base
New Auxiliary Fence
Board: 3/4" Wide x 1-1/2" High
BE696.?F2;02 - Using an Auxiliary Fence when cutting Crown molding flat on the table will reduce
splintering of your workpiece and movement of small cut-off pieces. Remove the saw’s sliding fences
(see page 21) before attaching the auxiliary fence.
B691.BE696.?F32;02/F3<99<D6;4=.AA2?;/29<D!.A2?6.9ED<<1
115<92@.@16:2;@6<;21<;=.AA2?;<?115<92@3<99<D6;4A52;2EA@A2=@
Cut wood to the outside dimensions shown and temporarily attach to saw’s stationary fence using
two C-clamps.
Use 1/4" drill bit to drill first through existing holes in the rear of the stationary fence and then
through the wood.
Remove wood, countersink the front of the wood and permanently attach to saw’s fence with hard-
ware shown below.
FIG. 43
FIG. 44
6.
BM 2610021316 10-11 E:BM 2610021316 10-11 E.qxp 10/17/11 11:02 AM Page 31


