


-28-
&.D#=2?.A6<;@
?<D;!<916;4 .F6;49.A<;'./92
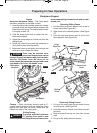
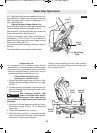
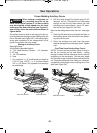
• "<A2@ Position workpiece with its back flat on the
saw table.
• Always place top edge of molding against fence
(Decorative edge is at the bottom of crown molding.)
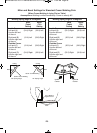
Crown molding’s “spring angle” is the angle between
the back of the molding and the bottom flat surface
that fits against the wall.
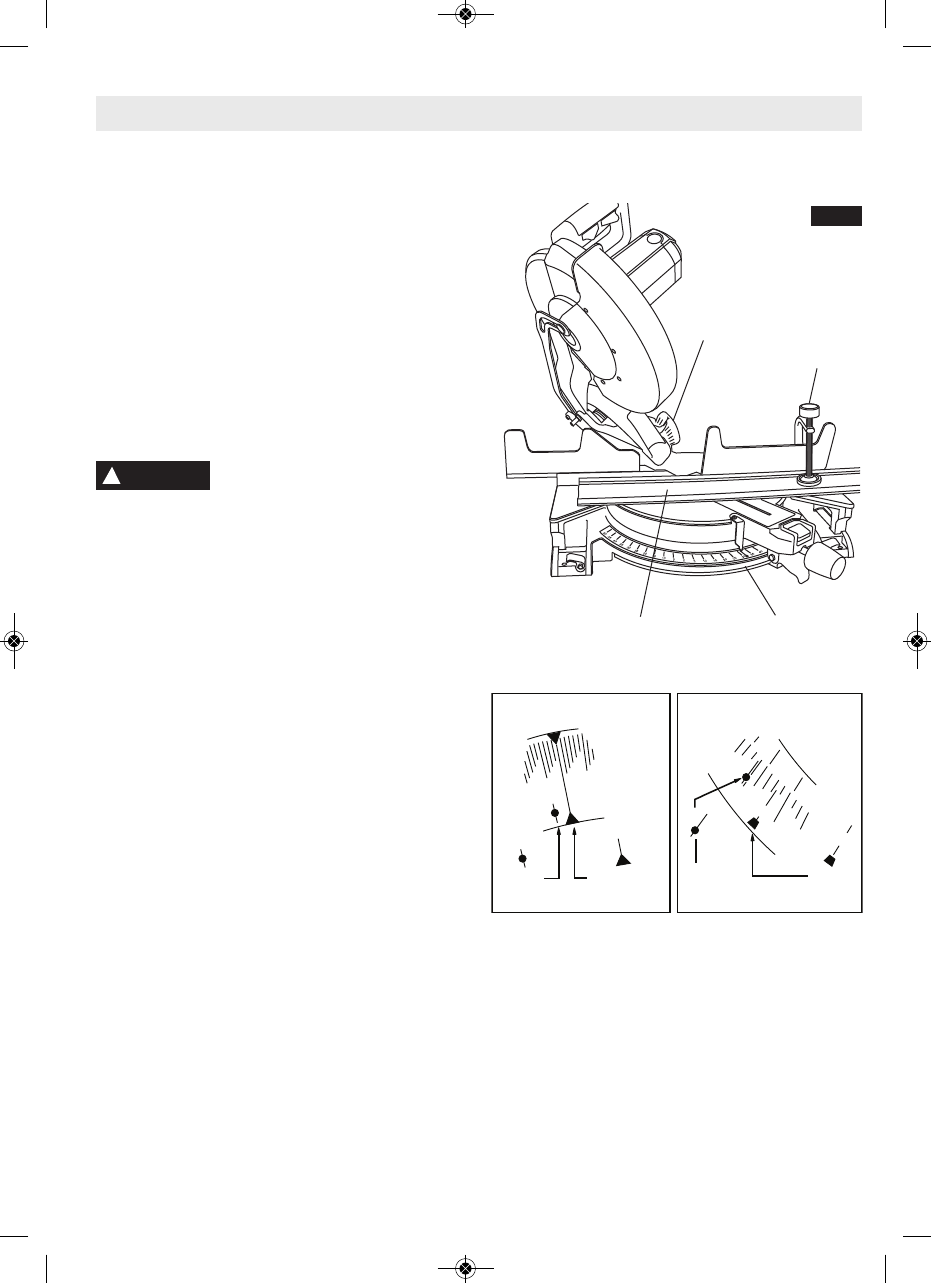
1. For 90º corner, set the bevel and miter angles using
Charts below. Tighten the miter lock knob and the
bevel lock lever (See Figure 40).
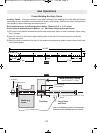
2. Position molding on saw table. Clamp workpiece
in place using the quick clamp.
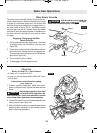
(@209.:=6;4=<@6A6<;A5.A1<2@
;<A6;A2?32?2D6A5<=2?.A6<;2
3<?2@D6A056;4<;9<D2?52.1.@@2:/9FA<:.82
@B?209.:=092.?@4B.?1.;152.1.@@2:/9F
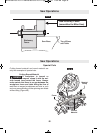
3. Follow procedures for chop cut (see page 23).
4. Wait until blade comes to a complete stop before
returning head assembly to the raised position
and/or removing workpiece.
"#' *,&''&'('(&"&%$
'##"%!#%%'" &
!
WARNING
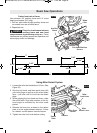
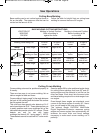
Bevel Scale Settings Miter Scale Settings
For 45°
Spring Angle
For 45°
Spring Angle
For 38°
Spring Angle
For 38°
Spring Angle
30
30
35
30
40
33.9
33.9
35.3
35.3
31.6
31.6
?<D;!<916;4 F6;49.A
2C29
&0.92
!.A2?6.9
9.:=
!6A2?&0.92?<D;!<916;4
FIG. 40
BM 2610021316 10-11 E:BM 2610021316 10-11 E.qxp 10/17/11 11:02 AM Page 28