


34
GM 3000AC
%
2
0
/
1
3
,OCTITE
"?
OPERATING MANUAL
EDITION 05/2007
PART NO. DOC364831
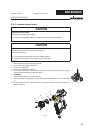
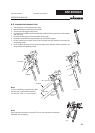
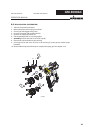
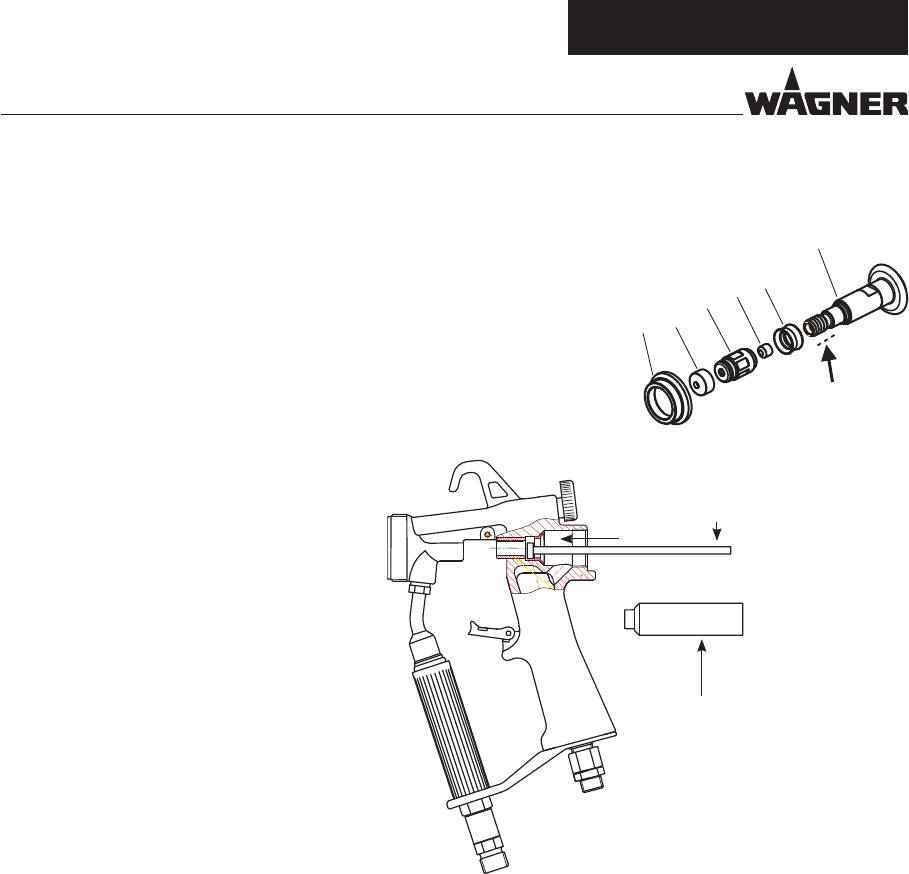
6.4.2 REPLACING SEALS IN THE VALVE TAPPET
1. Heat valve tappet assy. to about 150°C; 302°F.
2. Place a 7 mm; o.28 inch wrench on the valve tappet (E) and hold. Unscrew
the tappet cap (Q) with an 8 mm; 0.31 inch wrench.
3. Remove and replace tappet seal (O) and seal (P).
Note:
The seal (O) can be unscrewed from the valve tappet (E) using a small screw-
driver pushed into it
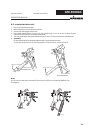
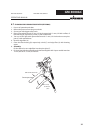
When the air-valve leaks:
4. Remove the air-valve seal (R) from
the gun-housing and replace. Clean
sealing surfaces in the gun housing.
When the slide cap (S) is damaged:
5. Cut the slide cap (S) with a shrap knife
and press a new one onto the tappet
cap.
Disassembly tool for air-
valve seal (R)
Part-No. 036 943
Assembly tool for air-
valve seal (R)
Part-No. 0364942
R
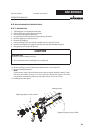
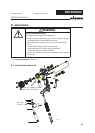
6.4.3 REASSEMBLING
1. Screw in the valve seat (K) and tighten using a 12 mm; 0.472 inch torque wrench to a
torque of 10 Nm; 7.4 lbft.
2 See section 5.4.3 for reassembly of air-cap.
3. Lightly grease the tappet seal (O) and the seal (P) and assemble on valve tappet (E).
4. Push in valve stem (D).
Note:
Only silicon-free or resin-free grease is permitted to be used.
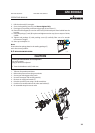
5. Screw the air valve tappet (E) and tappet cap (Q) together using loctite 243 by hand.
Carefully tighten using 7 mm; 0.275 inch / 8 mm; 0.314 inch wrenches until slight
resistance is felt when sliding the valve stem in and out.
6. Place the seal package (F) on the valve rod (D) and insert into the hole in the housing
from the rear.