Revision 1.4.16a Page 113
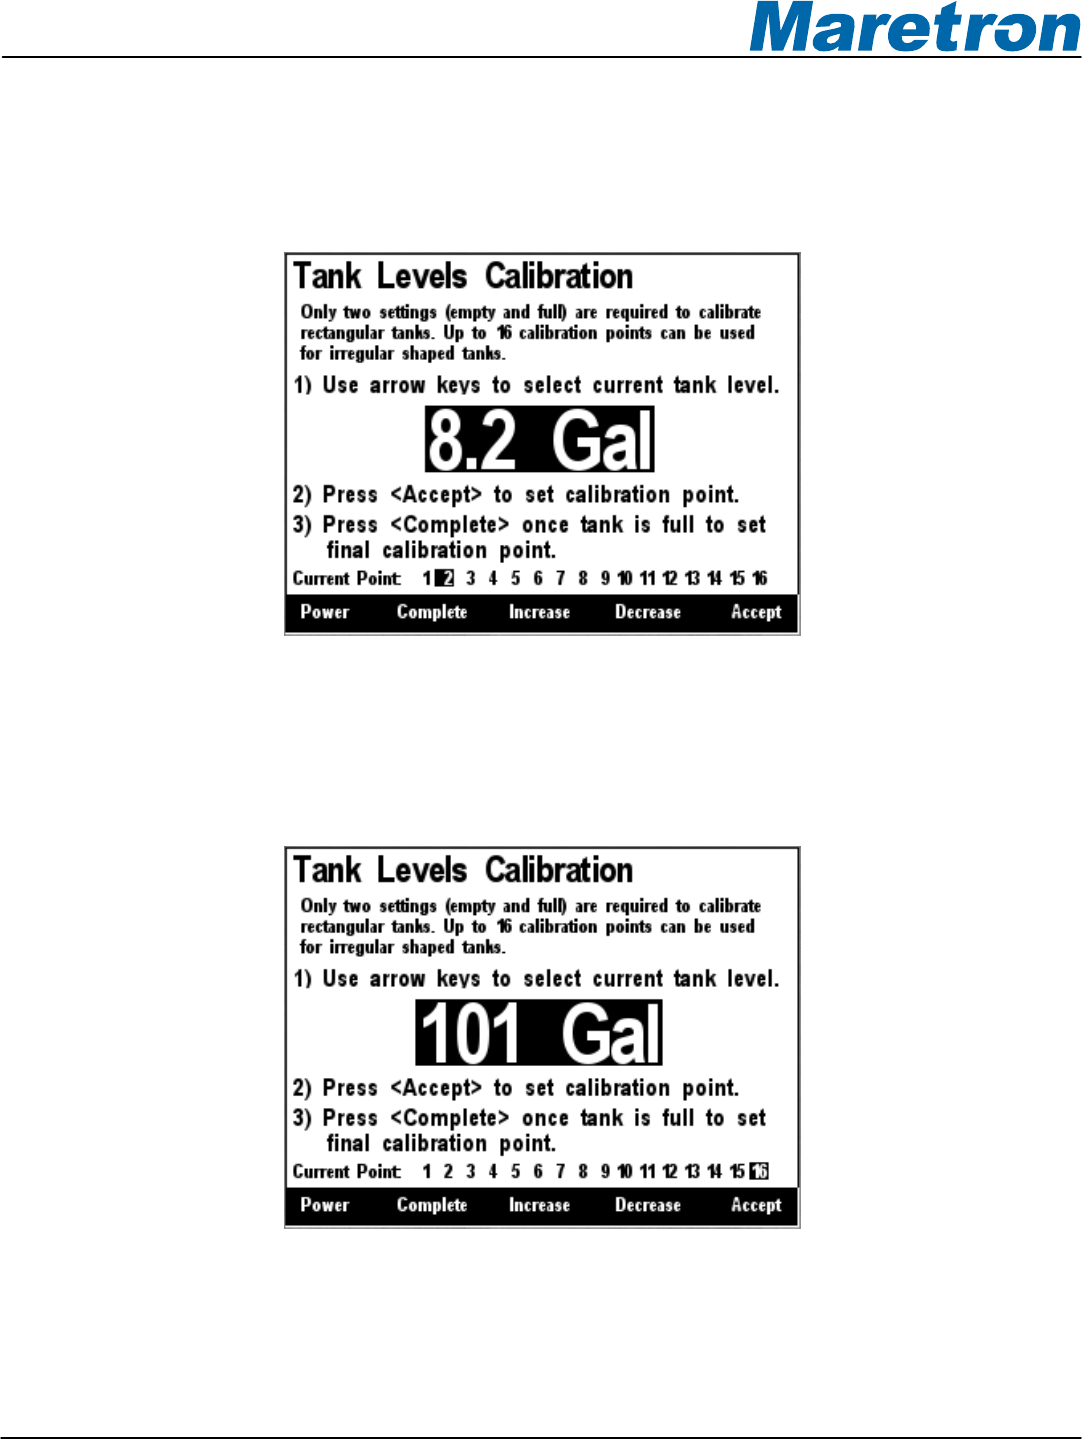
Each time you press Accept during this process and after the Current Point highlight advances, put
more fluid into the tank, and note the total volume of fluid pumped into the tank at this point. Use the
Increase and Decrease keys to set the current tank level to the appropriate value, and then press the
Accept key to store the current calibration point and advance to the next calibration point. Figure 107
shows a screenshot of these intermediate calibration points.
Figure 107 – Intermediate Level Calibration
Once the tank is completely full, instead of pressing the Accept key to store the current calibration
point, press the Complete key. This will complete the calibration process and will also adjust the tank
capacity to the currently indicated level. Figure 108 below shows the calibration screen at the last
point with the full tank level (and thus the tank capacity) set to 101 gallons.
Figure 108 – Full Level Calibration
After you press accept, a confirmation screen will appear showing completion of the calibration
process and the new tank capacity value. A screenshot of this calibration screen is shown below in
Figure 109.
