


3M™ Rapid Detection Reader Running Quality Control
12
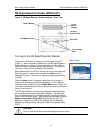
Running Quality Control
Two types of quality control test records are stored by the 3M Rapid Detection Reader:
• LQC (Liquid Quality Control) - external surrogate sample test results.
• IQC (Internal Quality Control) - self-diagnostic test results including a check of the power
supply voltage, system memory, cartridge transport system, cartridge barcode sensor, LED
function, and incubator function for heated assays.
Running LQC
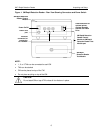
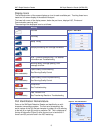
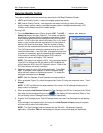
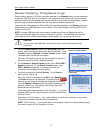
1. From the Main Menu screen (Figure 4) touch LQC. The LQC –
Assay List screen will open (Figure 9). This screen will display
the entire list of assays sorted in ascending order by the Time to
Expiry before assay lockout as displayed in the LQC Expiration
column. If LQC is due, this column will display “Run x of y levels”
where x is the number of levels required and y is the number of
defined LQC levels for that assay. Both the number of levels
required and the available defined levels are set using the RCU.
The LQC status column shows the requirements for any LQC
levels that have failed. If any LQC fails, that specific control level
must be run successfully prior to proceeding with a patient’s test.
If the maximum number of Failures before LQC Lockout is
reached, this column will display “LQC Lockout”.
NOTE: The assay list is defined in RCU. Any new assays added
in the RCU or through the CM will default to LQC disabled and
will be listed with N/A in the LQC Expiration column. Refer to the
RCU Help Manual for further instruction.
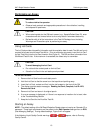
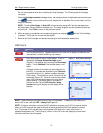
2. Select the assay for which LQC will be performed. Touch Run
LQC. If prompted, enter Operator ID and/or Password using
either the touch screen or the barcode scanner. To accept the
displayed information touch Accept.
NOTE: Both the Operator ID and Password are case-sensitive.
Figure 9. LQC - Assay List
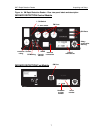
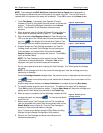
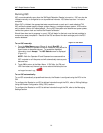
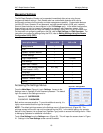
Figure 10. Control ID Entry
3. When prompted (Figure 10), select the appropriate Control ID using the drop down menu. Touch
Accept.
NOTE: If LQC has failed for the assay selected, the number of LQC attempts allowed prior to
assay lockout is displayed.
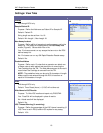
4. When prompted to Add Control & Insert the Test Cartridge, the LED on a free port of the TM will
flash blue and the corresponding port icon on the display will illuminate blue (Refer to Test
Kit and Quality Control Package Inserts for detailed instructions).
5. Prepare Test Cartridge as per Test Kit Package Insert and insert Test Cartridge into the flashing
port.
If the cartridge is not inserted within 5 minutes of the Add Control & Insert prompt, the system
will time-out and return to the Main Menu.
NOTE: The Test Cartridge must be inserted into the TM within ~30 seconds of sample
application. Otherwise, FAIL will be displayed in the port icon and the assay will be aborted.