3M™ Rapid Detection Reader Managing Settings
18
Managing Settings
The 3M Rapid Detection Reader can be operated immediately after set-up using the pre-
programmed default settings. Each Reader also has customizable features which can be
configured to enhance its functionality and data management capability. Customizable features
include LQC timer, Operator ID and password, and data transfer options (USB, print, network).
Some of these features can be configured in the CM Settings menu. In the default configuration,
these settings can only be viewed or changed by an operator with Supervisor access. Most
feature configurations are set using the Reader Configuration Utility (RCU) by a Full Access User.
For instruction on configuring settings on the CM, refer to Edit Settings and Edit Operators. For
instructions on configuring settings using the RCU, refer to Editing Settings Using the Reader
Configuration Utility (RCU).
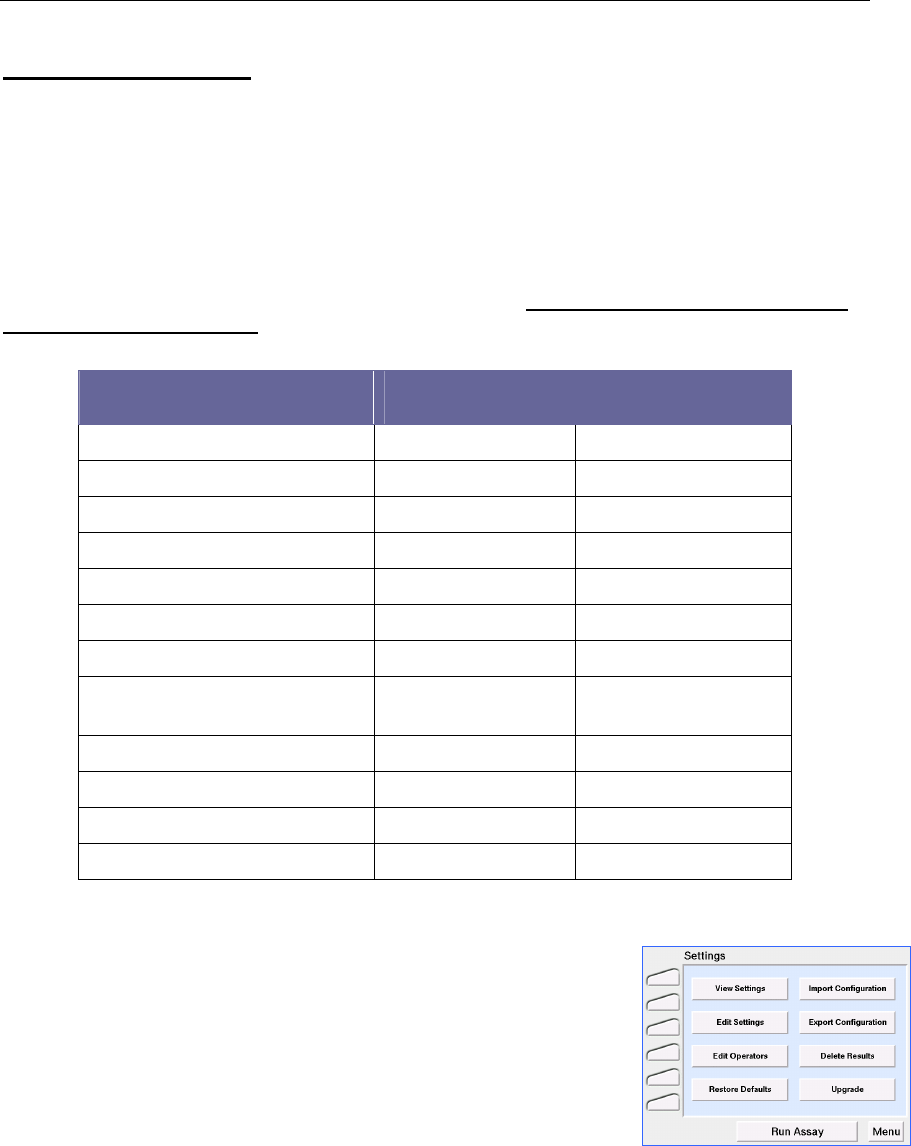
Feature (See Detailed
Descriptions Below)
Full Access User
Edit on RCU
Supervisor
Edit on CM
Assay defaults √
LQC √
Update / Upload Features √
Printer Settings √
Login Requirements √ √ (limited)
File Settings √ √
Menu Idle / Timeout √
Date / Time (without Network
Time Protocol – NTP)
NTP only √
Language √
Auto IQC Interval √ √
Network Transfer Timers √
Sound √
Accessing the Settings Menus
From the Main Menu (Figure 4), touch Settings. Access to the
Settings menu is Operator ID and Password protected. The default
login for access to the Settings menus is:
Operator ID: SUPERVISOR
PASSWORD: PASSWORD
Both entries are case-sensitive. To provide additional security, it is
highly recommended that this login be changed.
Figure 20. Settings Menu
NOTE: The default privilege access to the Settings menu is Supervisors only (Figure 25). The
privilege access to this menu can only be changed via the RCU. In the default setting, any operator
defined in the Operator List as Supervisor [Operator Type] is able to access the Settings menu. Refer
to Managing Operators for additional information.
Touch View Settings from the Settings menu (Figure 20). This will open the screen shown in Figure
21. Settings in the View Settings screen cannot be edited.


