


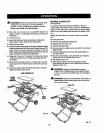
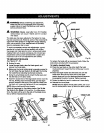
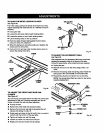
TOAUGNTHEMITERLOCKINGCLAMPS
See Figure66.
The miter locking clamps are preset at thefactory but may
requireadjustingafter extendeduse or if damage occursin
shipping.
• Unplug the saw.
• Loosen theset screwbehindeach lockingclamp.
• Loosen thescrew on top of each Iockingclamp.
• Uft the locldng clamp tothe up position,
• Pushthe clamp forward tightagainst the front railto
bringthe c_p intoaiigr_'_ent.
• When the clamps are correctlypositioned,retightenthe
scows and the setscrews.
• Push both front and rearmiter lockingclampsdown to
securethe s|idingmiter table.
SCREW
Fig. 66
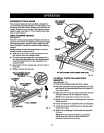
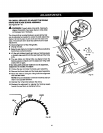
TO ADJUST THE FRONT AND REAR RAIL
CLAMPS
See Rgure 67.
The railcrampsate locatedbelow theraUsand ensuretight
attachment of the rail.Followrngextended use, the rail
holdernutinsidethe railsmay need adjusting.
• Unplug the saw.
• Remove the miter table and accessorytabla.
• Remove the _ont emdrear railsbylooseningthe rail
crampsand dlding the rai_soff.
• Rotate eachrailclamp to the {sft unti{ithits orcomes in
correct with the bo'_omotthe saw table.
• Tightenraitholdernut untilit issnug.
• Loosen railholdernutone-fourth (1/4)turn.
• Replacethe rails and checkthe rail clamps.
44
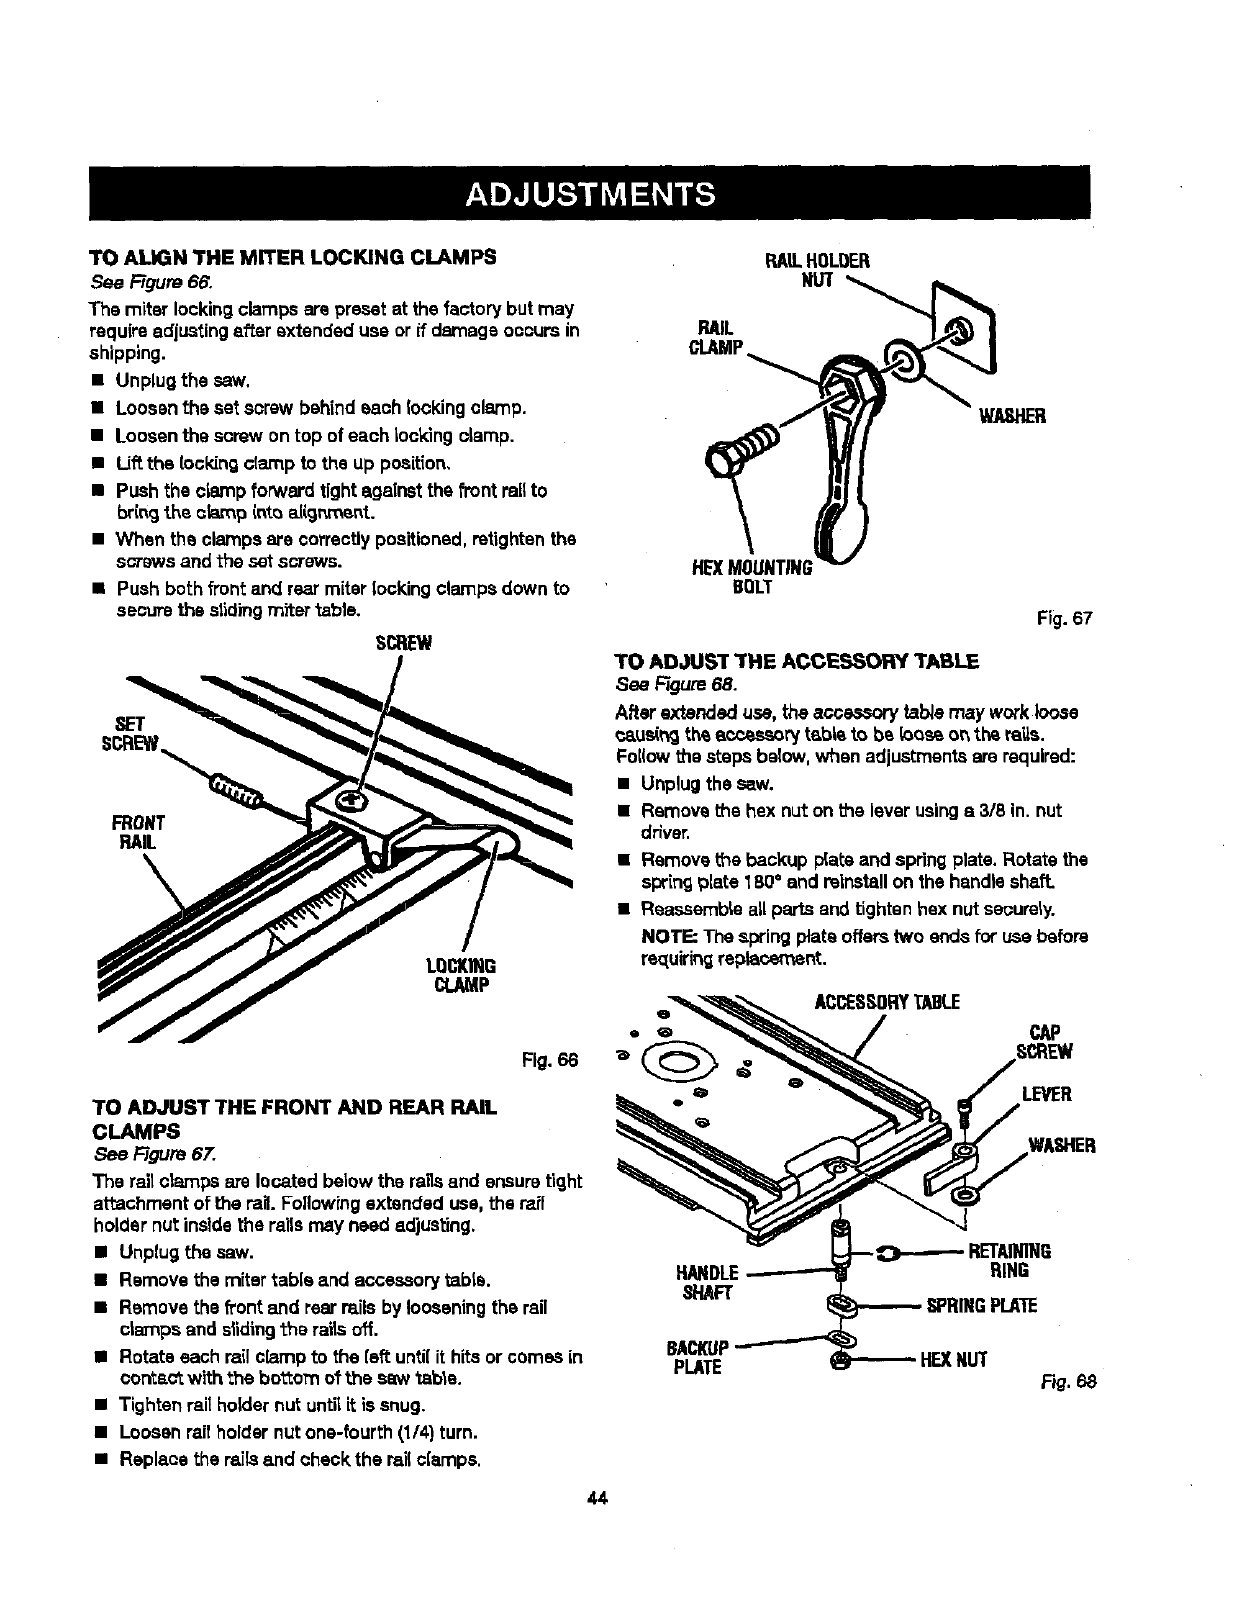
RAILHOLOER
NUT
RAIL
CLAMP
WASHER
HE)(MOUNTING
BOLT
Fig. 67
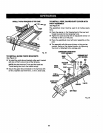
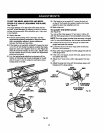
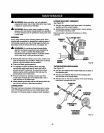
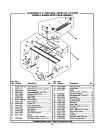
TO ADJUST THE ACCESSORY TABLE
See Rgure 68.
After extended use, the acce..-_, tab/emay workloose
caus(_ th_accessorytable to be {oos_o_ the ra'_s.
Foi(owthestepsbelow,when adjustmentsarerequired:
• Unplugthesaw.
• Removethe hexnut on the leverusings 3/8 in. nut
driver.
• Removet_e backup p{ateand springplate.Rotate the
springplate 180° and reinstallon the handleshaft.
• Reassemble allparts end tightenhexnut securely.
NOTE; The springplate offerstwo endsfor use before
re_[uiringreplacement.
ACCESSORYTABLE
LEVER
HAl RING
_"IAFT
SPRINGPLATE
BACKUP
PLATE HEXNUT
F_.68