


-84-
For Machines Mfg. Since 7/09
Model SB1016/SB1036
SERVICE
11. Have your assistant press on the brake pedal
a few times while you watch all of the brake
linkage for any loose fasteners or worn pivot
points and pins. Tighten or replace parts as
required.
12. Have your assistant step on and hold the
brake pedal to lock the drum in place.
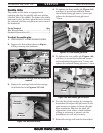
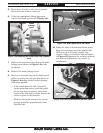
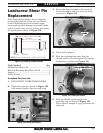
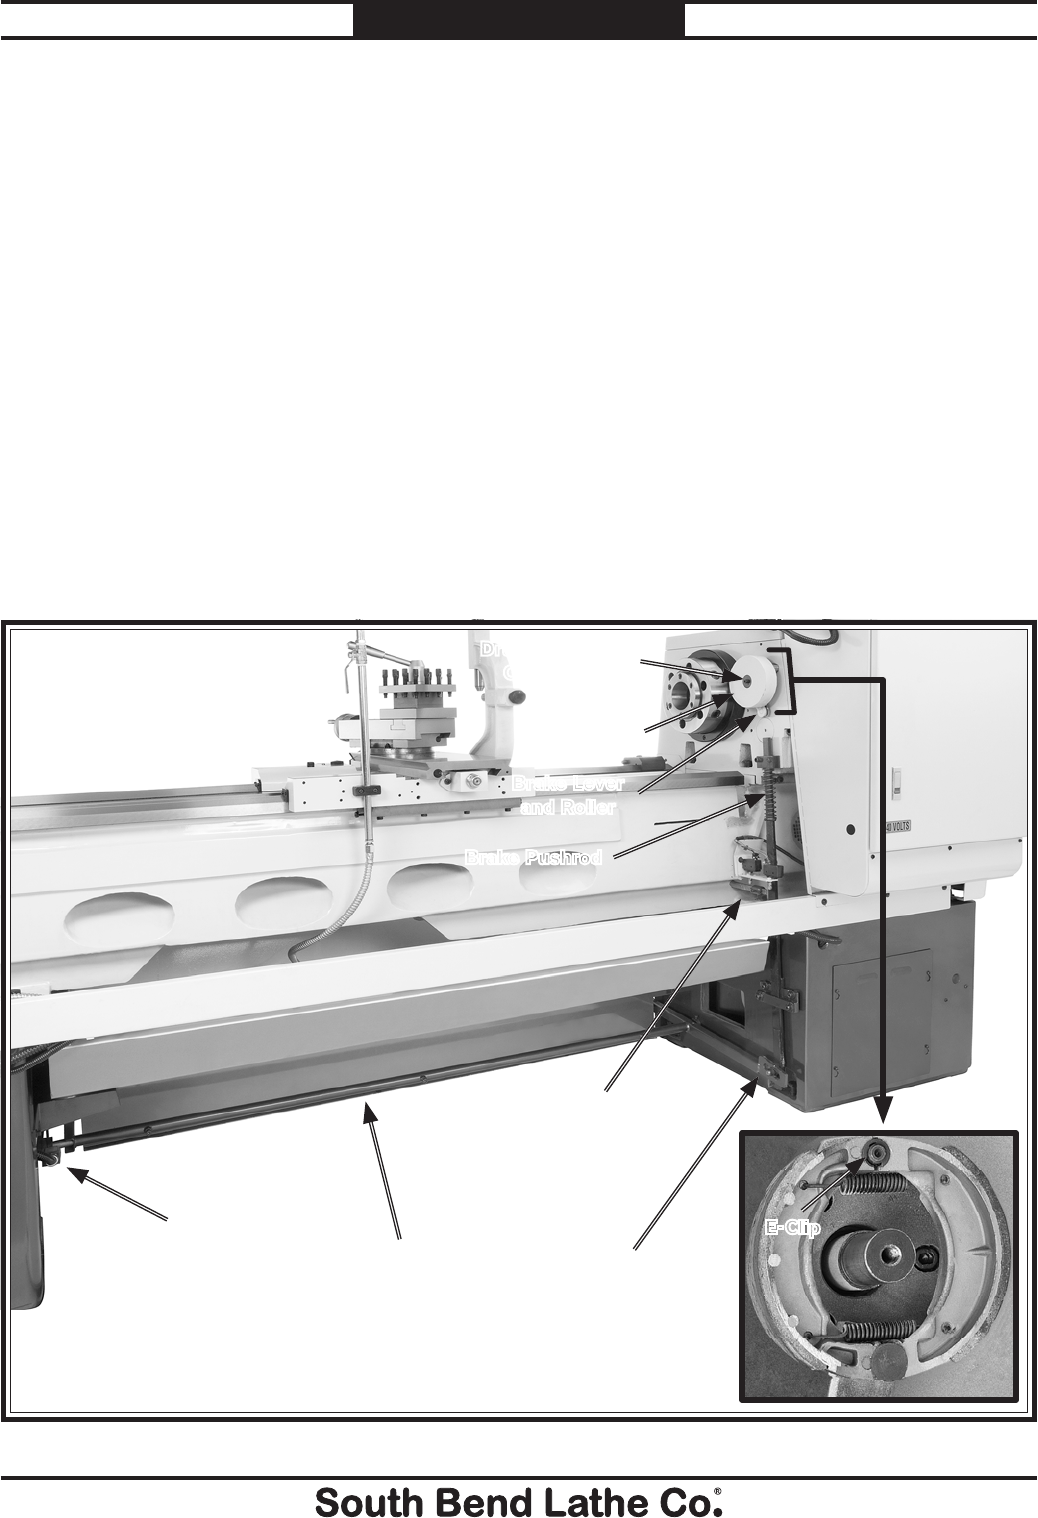
13. Remove the drum retaining cap screw shown
in Figure 151.
14. Remove the brake drum, E-Clip, and shoes
shown in Figure 151, and the brake shoes.
15. Use mineral spirits to clean the drum.
Then inspect it. If the drum is bell-mouthd,
cracked, or shows deep grooves, replace it.
For minor scoring, the drum can be dressed
with sandpaper or turned on a lathe.
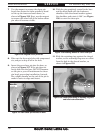
Figure 151. Complete brake system.
Brake
Lever and
Roller
Motor Kill
Switch
Brake Pushrod
E-Clip
Brake Drum
and Shoes
Brake Lever
and Roller
16. Clean the brake shoes with hot soapy water
and inspect. When evaluating the brake
shoes, replace the shoes as a set if the lining
thickness discussed below is
3
⁄16" or less, or
if the linings are loose on the rivets, or if the
bonded linings are separating from the shoe.
— If riveted linings are present, measure
the lining thickness by determining how
much lining is left before the tops of the
rivet heads will begin to score the drum.
— If bonded linings are present, view the
brake shoe from the side, and measure
the thickness of the remaining lining
before the metal brake shoe begins to
score the drum.
17. Re-install the guards and covers, and test for
brake operation.
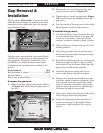
Drum Retaining
Cap Screw
Foot Pedal
Support Rod
Lobe Rod
and
Spindle ON/OFF
Switches