


For Machines Mfg. Since 7/09 Model SB1016/SB1036
-85-
SERVICE
Leadscrew Shear Pin
Replacement
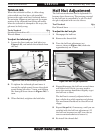
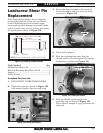
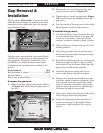
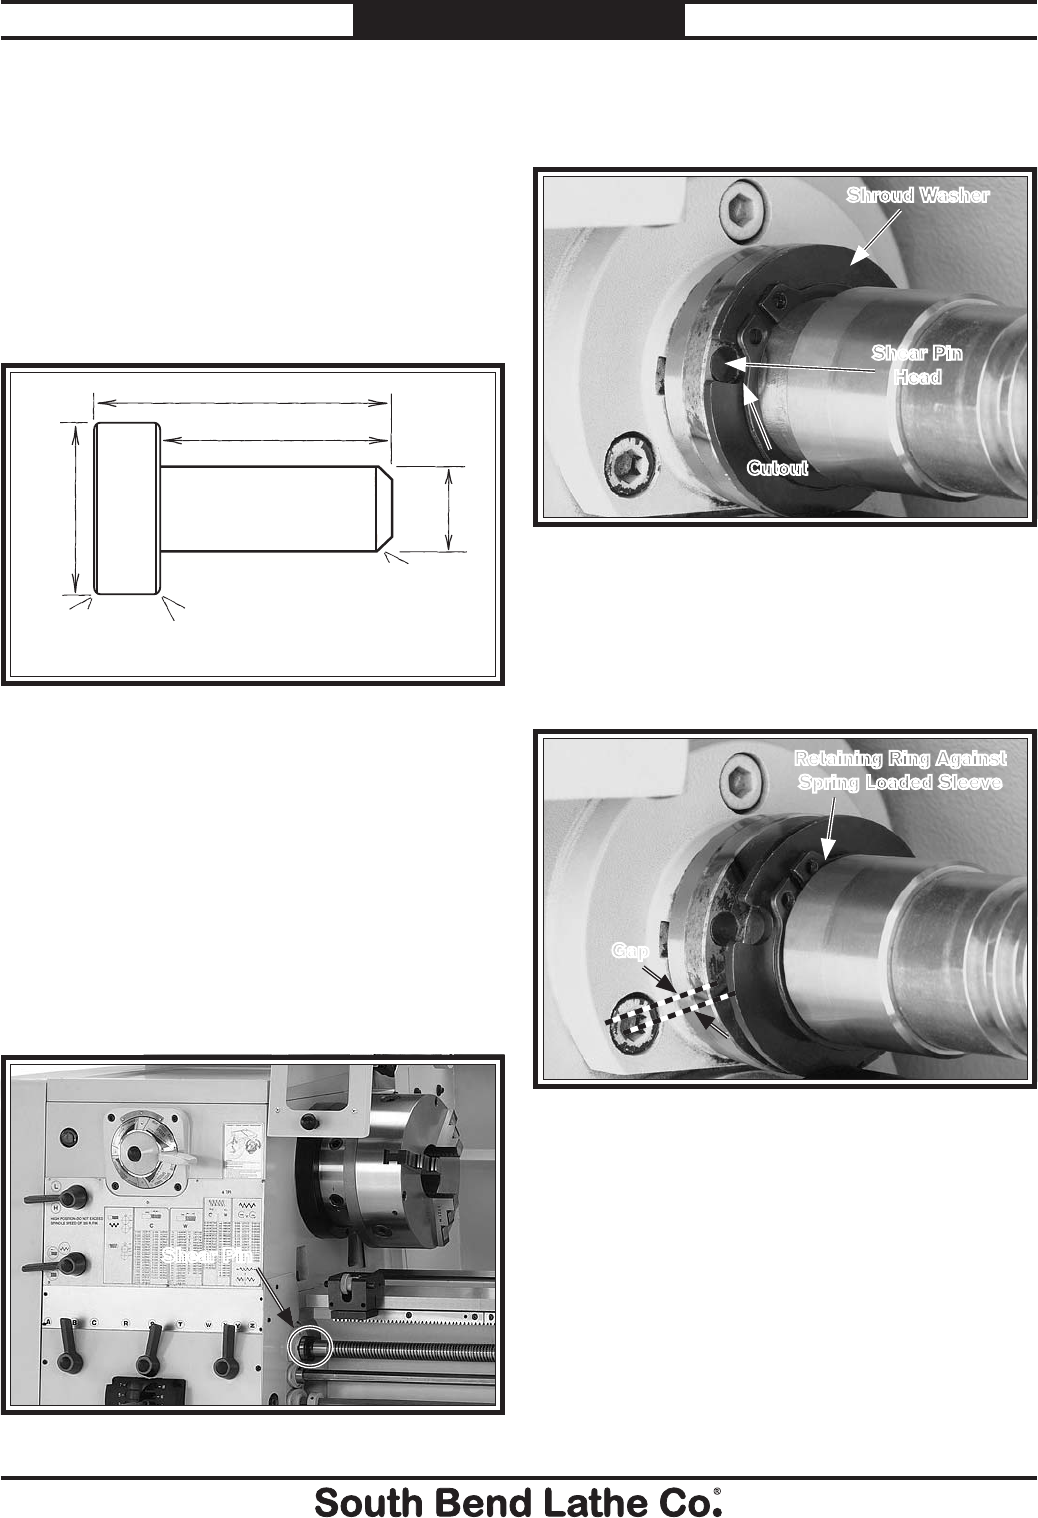
3. Rotate the shroud washer so the cutout in
the washer aligns with the shear pin head,
as shown in Figure 154.
4. Put on safety glasses.
5. Slide the retaining ring away from the
shroud washer so it rests against the spring-
loaded sleeve as shown in Figure 155.
Figure 154. Shroud washer/pin alignment.
Shear Pin
Head
Shroud Washer
Cutout
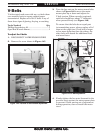
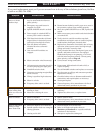
10.54mm
8.75mm
5.8mm
0.5mm
0.2mm0.2mm
3.74mm
NOTE: Shear Pin Material = S45C (SAE 1045)
Figure 152. Shear pin specifications.
Tools Needed: Qty
Phillips Screwdriver #2 ........................................1
External Retaining Ring Pliers 90° #2 ................1
Magnet ...................................................................1
Safety Glasses .......................................................1
To replace the shear pin:
1. DISCONNECT LATHE FROM POWER!
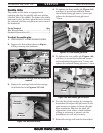
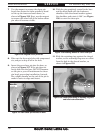
2. Clean shear pin area shown in Figure 153
with mineral spirits, then dry with a rag.
Figure 153. Shear pin location.
Shear Pin
If the shear pin has broken, do not improvise
by inserting a roll pin, cotter pin, steel dowel,
or nail. Should the pin need to shear again,
catastrophic gearbox damage may result. Order
extras or make your own set of shear pins using
the specifications shown in Figure 152.
Figure 155. Shear pin access.
Retaining Ring Against
Spring Loaded Sleeve
Gap
6. Slide the shroud washer against the
retaining ring, as shown in Figure 155.
There must be enough of a gap to remove the
shear pin.