Removal and Replacement
TDS 310, TDS 320 & TDS 350 Service Manual
6Ć15
1. Have handy a wooden spudger (Item 9).
2. Set the oscilloscope so its rear is down on the work surface and its
bottom is facing you.
DO NOT touch the carbon contact points on the menu elastomer
installed in the trim ring. Also, do not touch the contacts on the
menu button flex circuit exposed when you remove the trim ring. You
should wear clean cloth gloves that are free of lint when handling
the menu elastomer or when touching the menu button flex circuit
mounted on the front chassis.
3. Grasp the trim ring by its top edge, pry it up, and lift it forward to snap it
off the top front of the main chassis (see Figure 6Ć6).
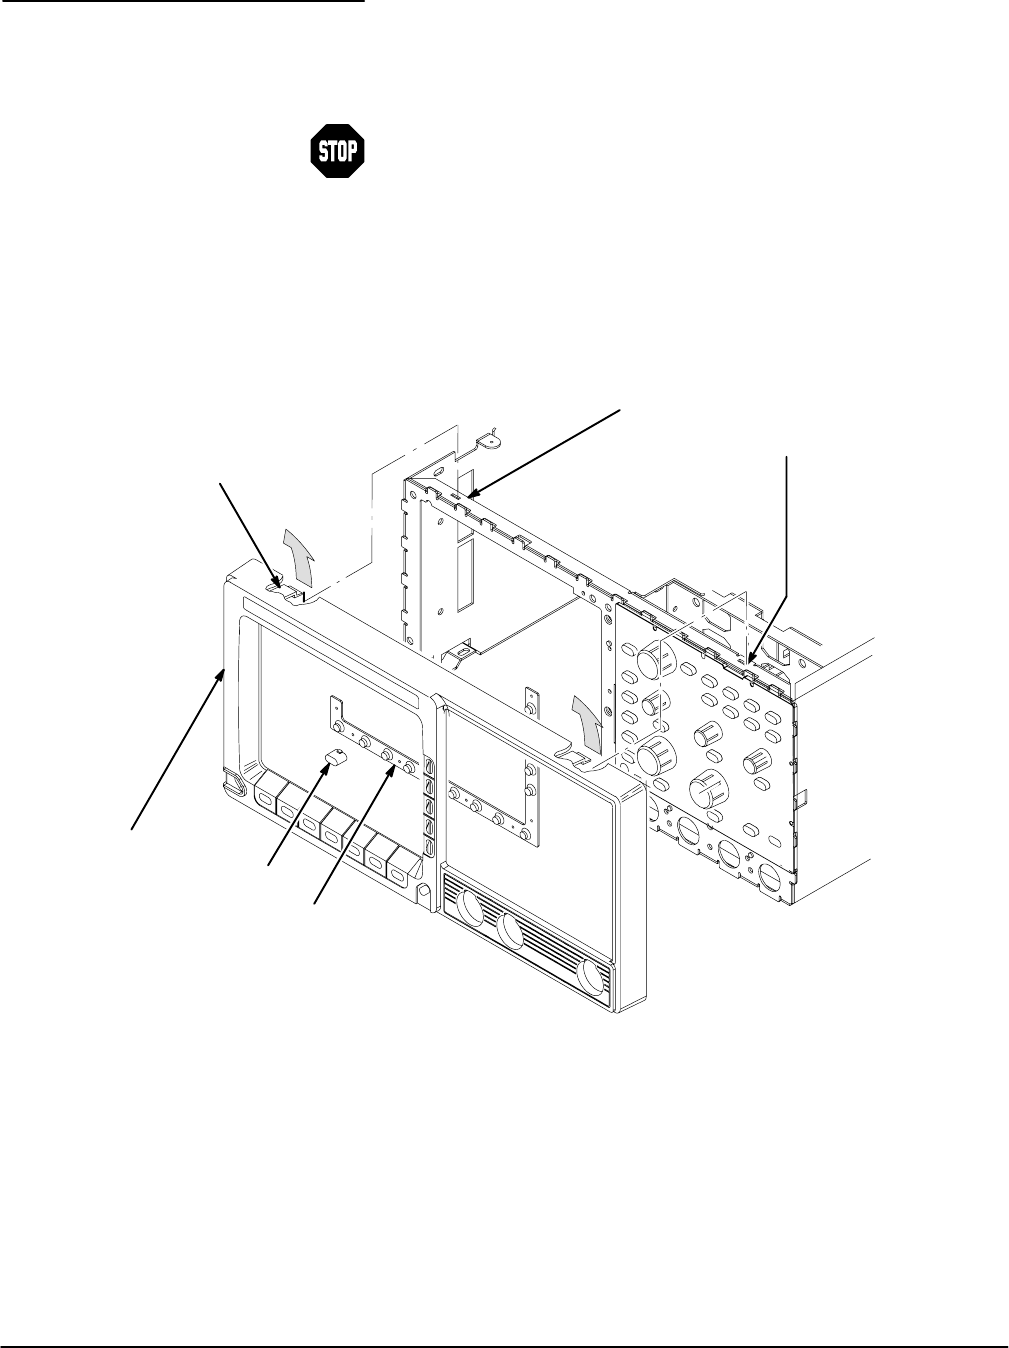
Trim Ring: To remove, grasp its back edge
and press up on its two tab locks. Flex the
trim ring upward; then pull it forward. Repeat
for the bottom edge of the trim ring.
Menu Elastomer
Menu Button (17)
Trim Ring
Tab Lock
Figure 6Ć6:ăTrim Ring, Menu Elastomer, and Menu Buttons Removal
4. Repeat the process, prying on the bottom edge of the trim ring to comĆ
plete its removal. Lay the trim ring on its face on the work surface.
5. If you are servicing the front EMI gaskets, discard the old ones.
6. If you are servicing the menu elastomer, lift it out of the trim ring.
7. If you are servicing the menu buttons, lift them out of the trim ring.
Trim Ring, Menu
Elastomer, Menu
Buttons, and Front
EMI Gaskets


